

Prerequisites
- An active CoreWeave account
- A CKS cluster
kubectlinstalled locally- An active API Access Token, with an associated Kubeconfig
Create a Node Pool using the Cloud Console
To create a Node Pool from the Cloud Console, complete the following steps:-
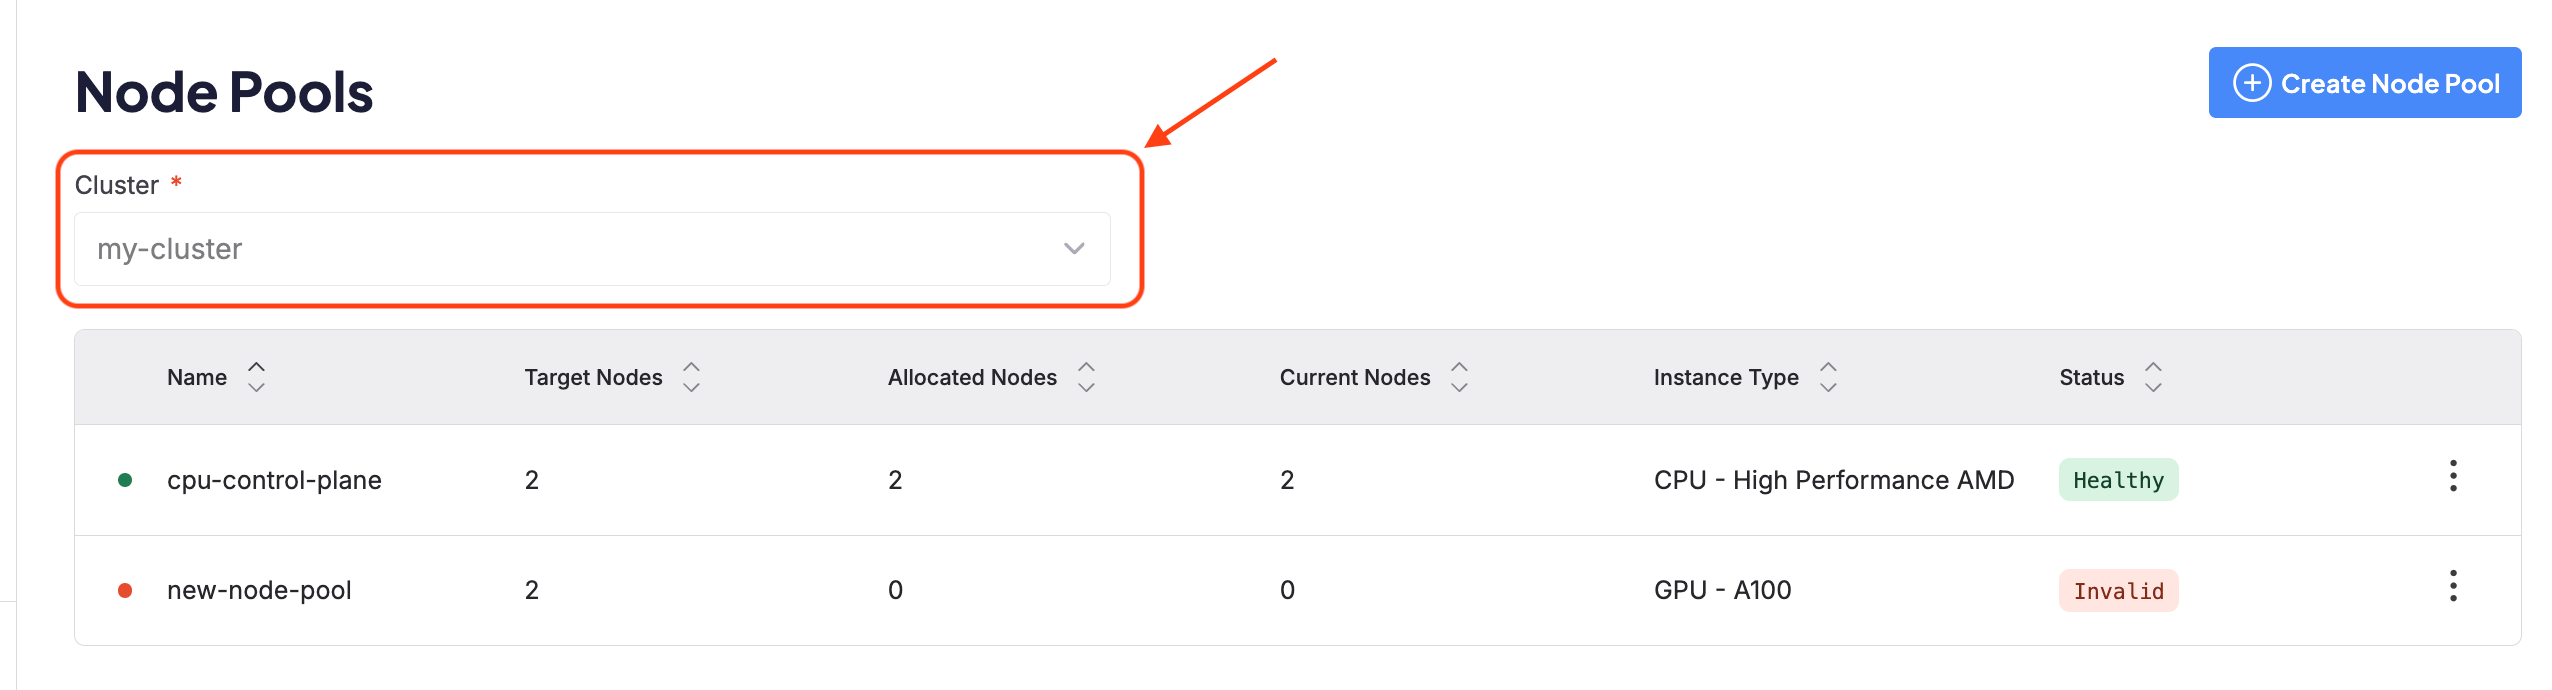
In Cloud Console, navigate to the Node Pools page (
https://console.coreweave.com/zones/[ZONE-NAME]/clusters/[CLUSTER-NAME]/node-pools). If you don’t yet have any CKS clusters, you need to create a cluster first. -
Select the CKS cluster to which the Node Pool should be added from the drop-down menu at the top of the page.
-
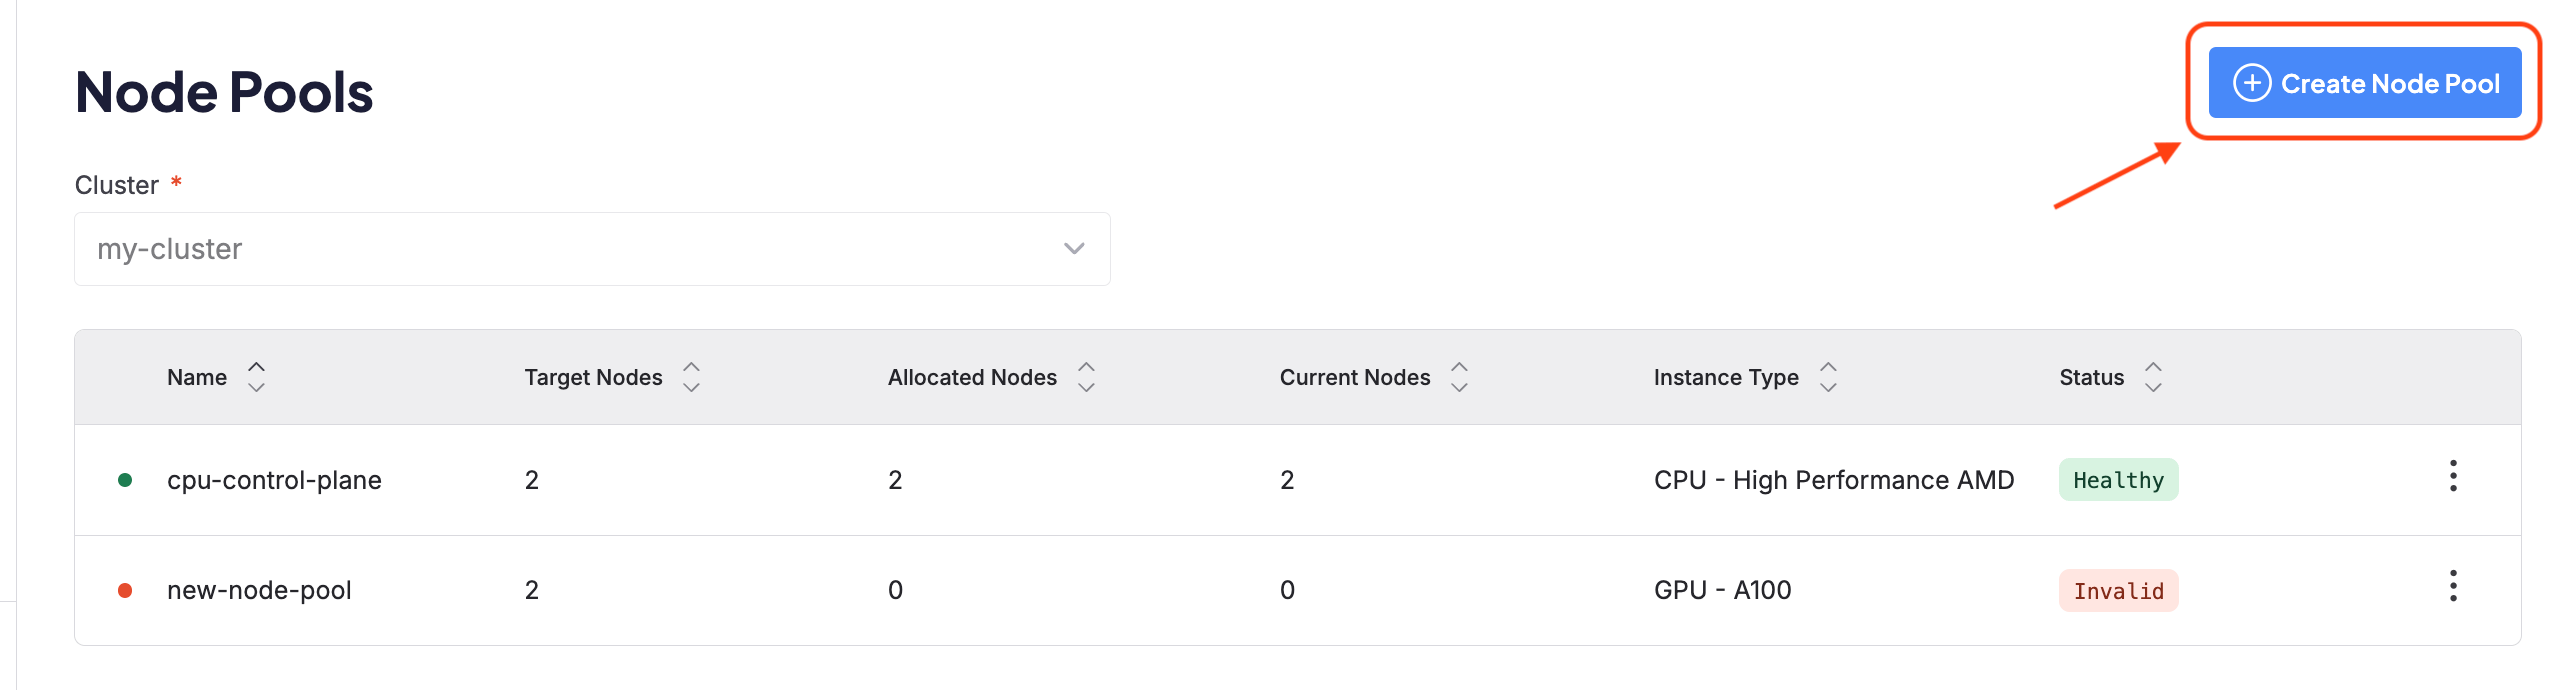
Click the Create Node Pool button at the top right corner of the dashboard.
-
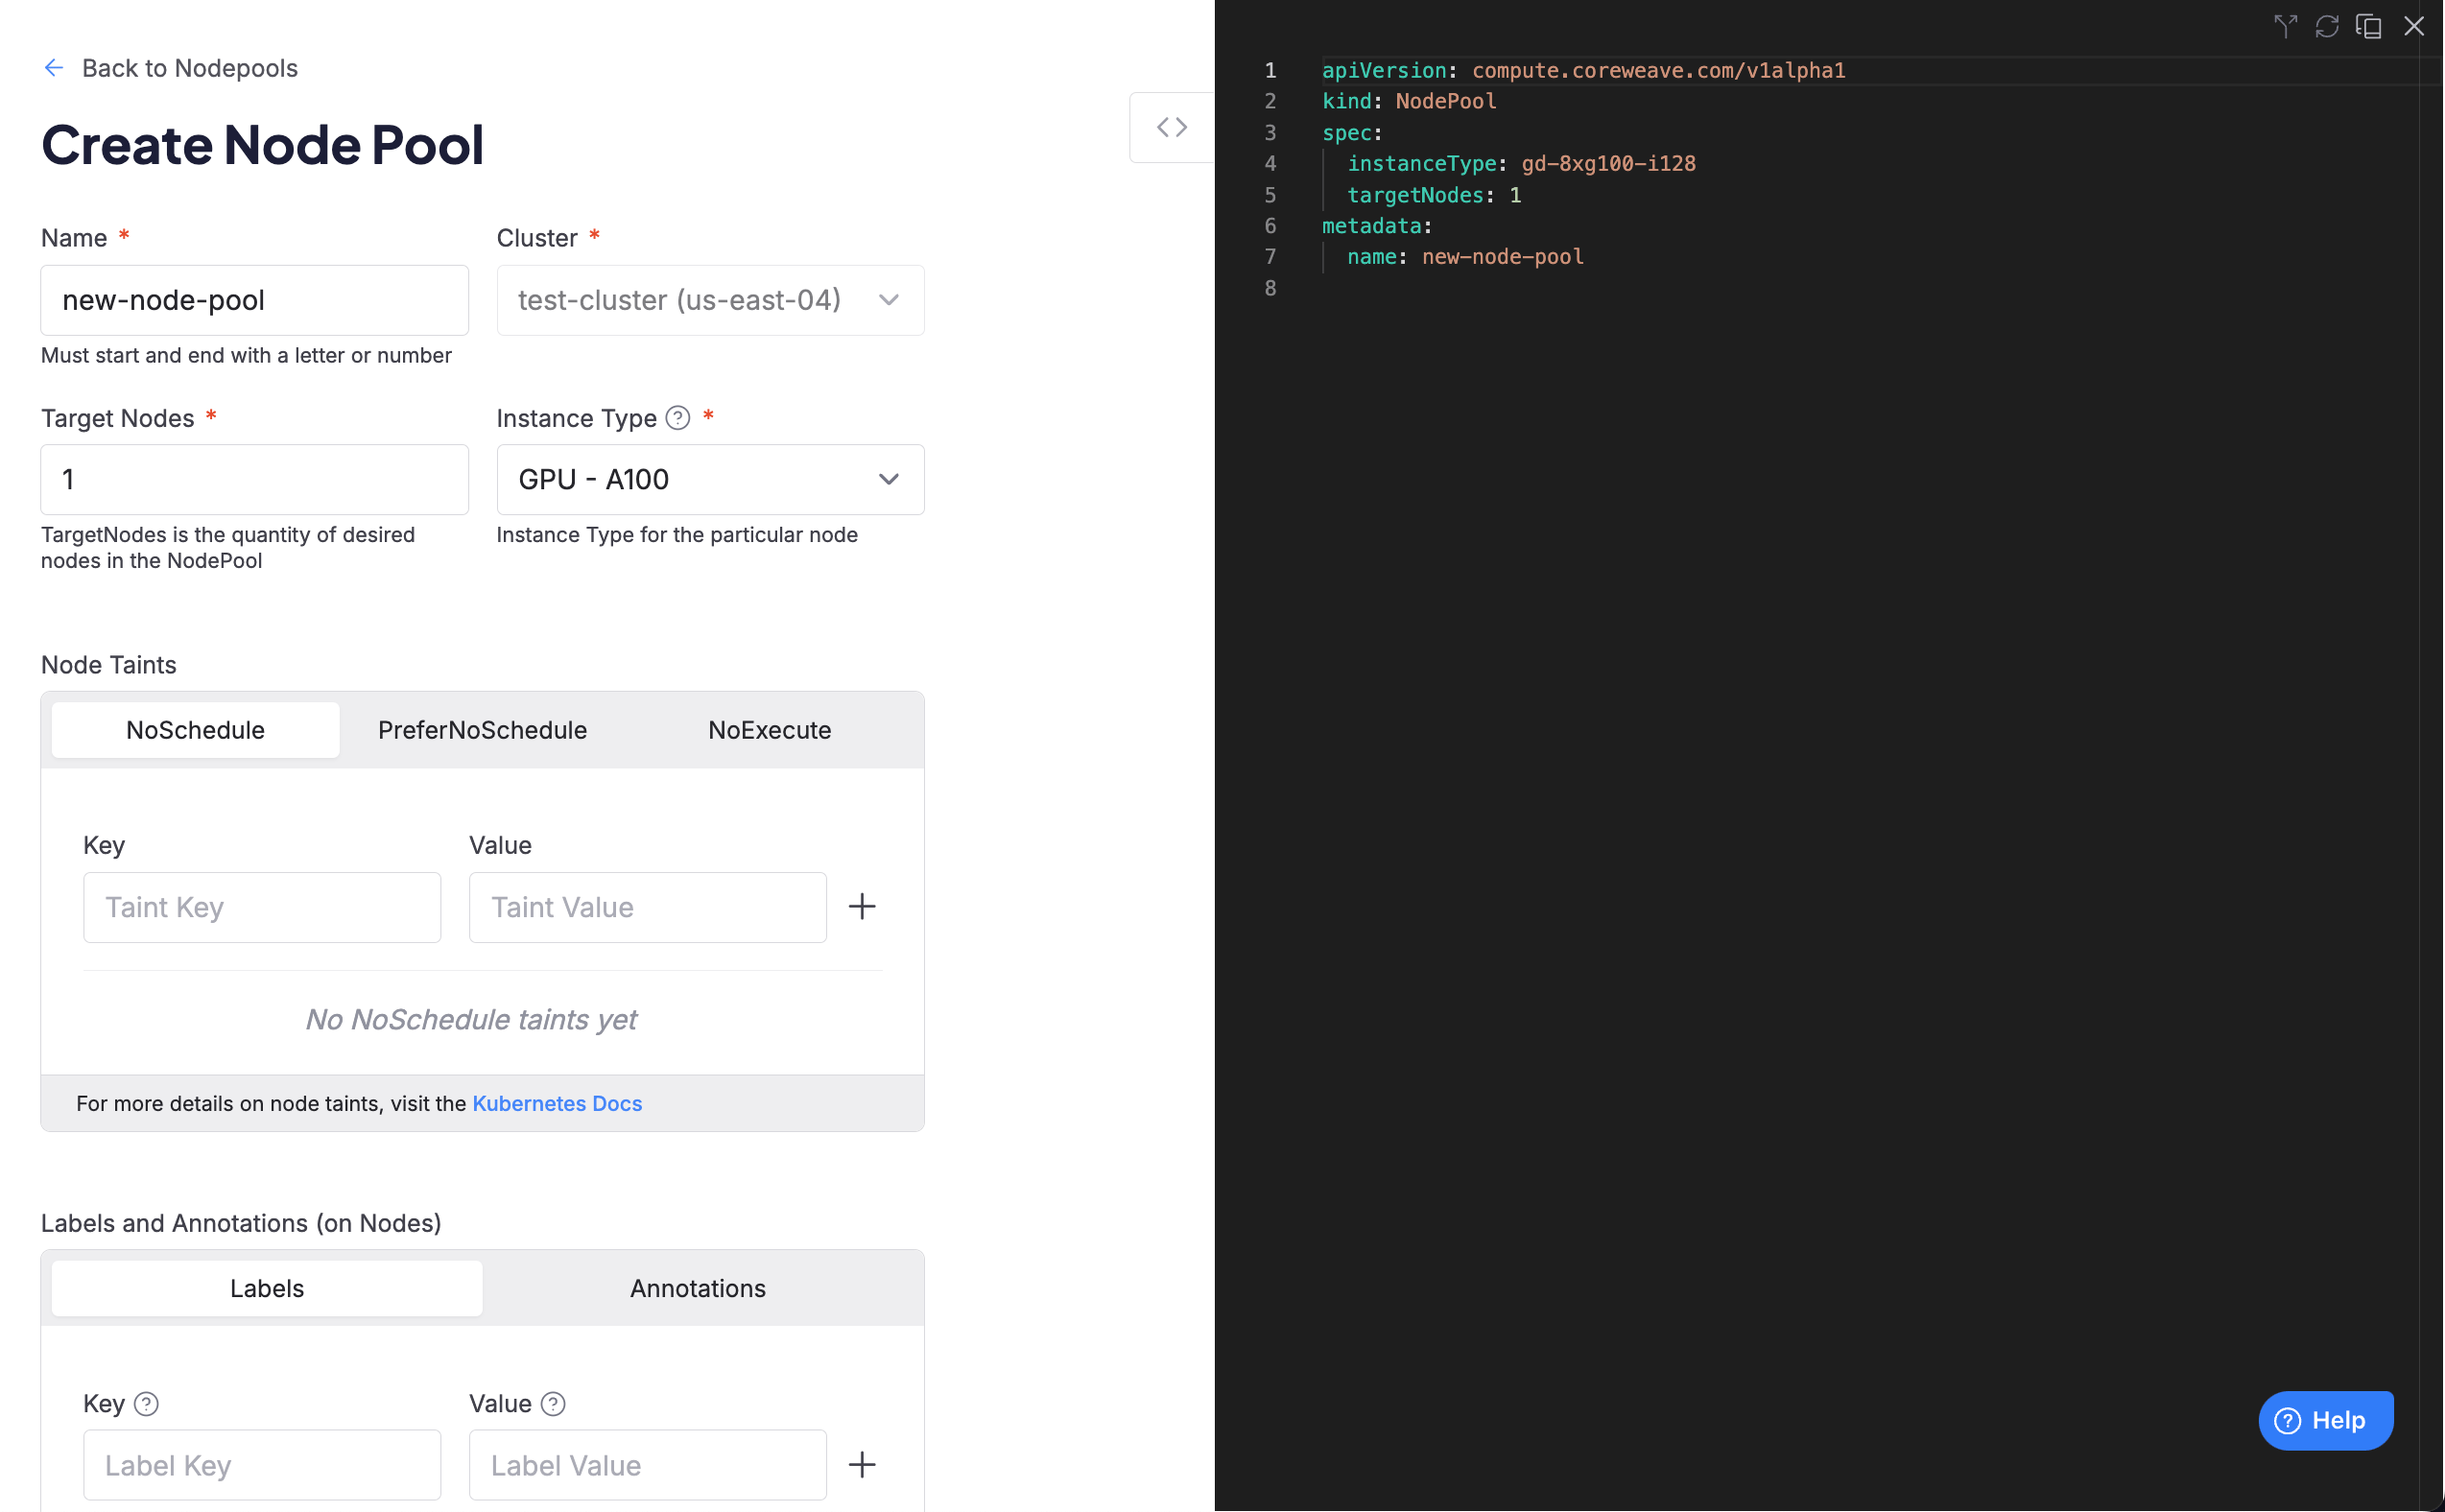
The creation page features a YAML editor alongside a corresponding GUI.
-
Configure the Node Pool:
Node Pool quotas
Every timetargetNodes is set, whether you’re creating a new Node Pool or scaling an existing one, CKS checks the organization’s quota. If the total request exceeds the organization’s quota for that instance type and zone, the Node Pool is filled up to the allowed quota. The output of kubectl describe on the nodepool resource displays error messages:
Configure taints, labels, and annotations
At the bottom of the creation page, configure any taints, annotations, or labels for the Node Pool.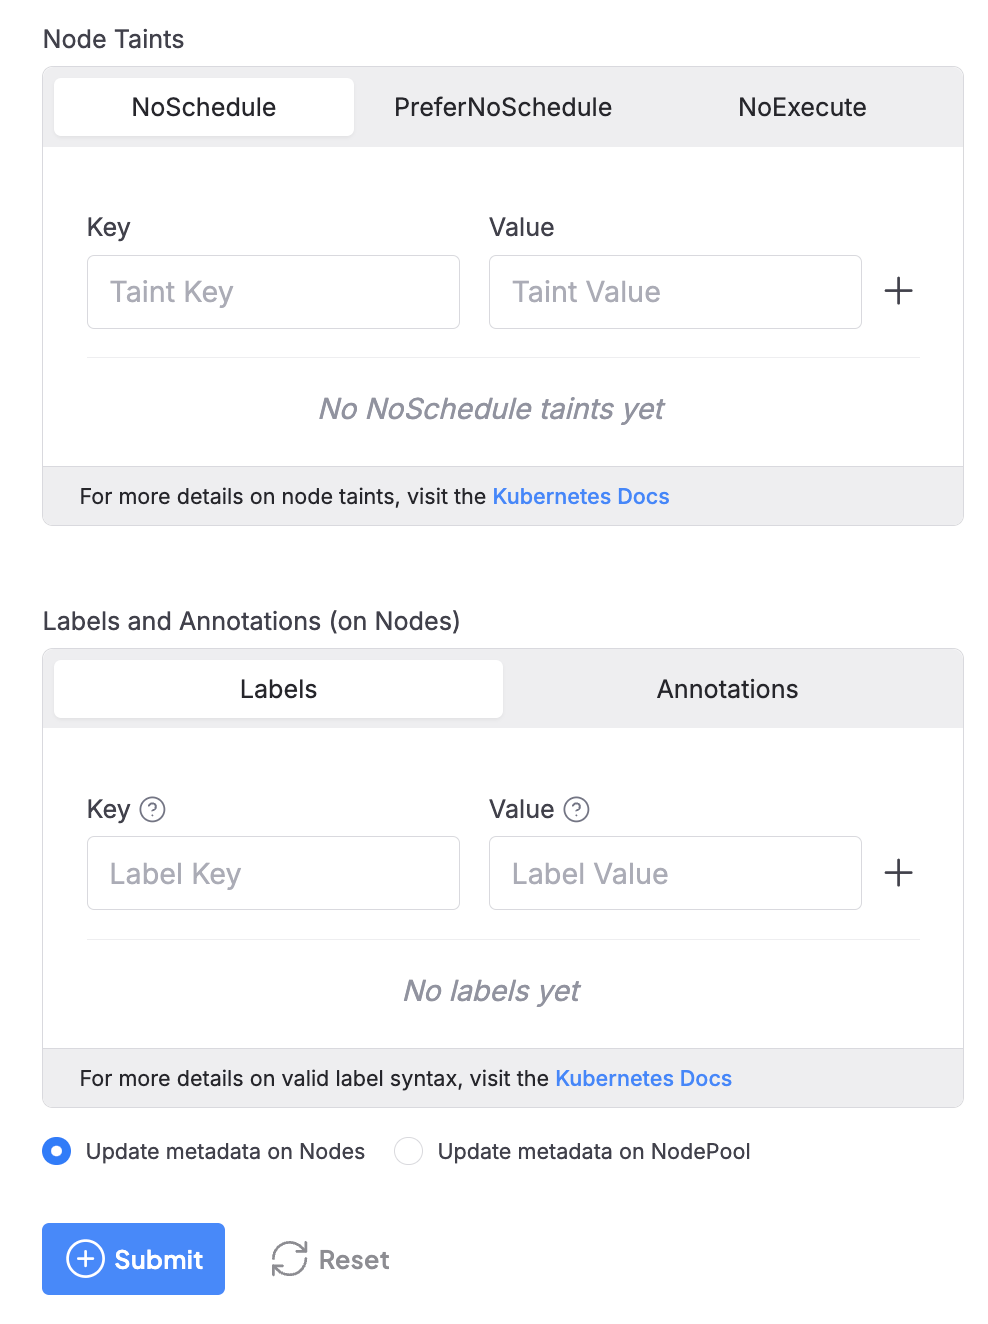
For more information about Node taint scheduling, see Taints and Tolerations in the official Kubernetes documentation. For information about the valid syntax for labels and annotations in CKS and vanilla Kubernetes, see Labels and Selectors in the official Kubernetes documentation.
Deploy the Node Pool
- When the Node Pool is ready, click the Submit button to deploy it. If you need to make changes, click the Reset button to clear all fields and start over.
-
After you click the Submit button, Cloud Console directs you back to the Node Pools dashboard. The new Node Pool is listed in a
Pendingstate until deployment completes, when its status changes toHealthy.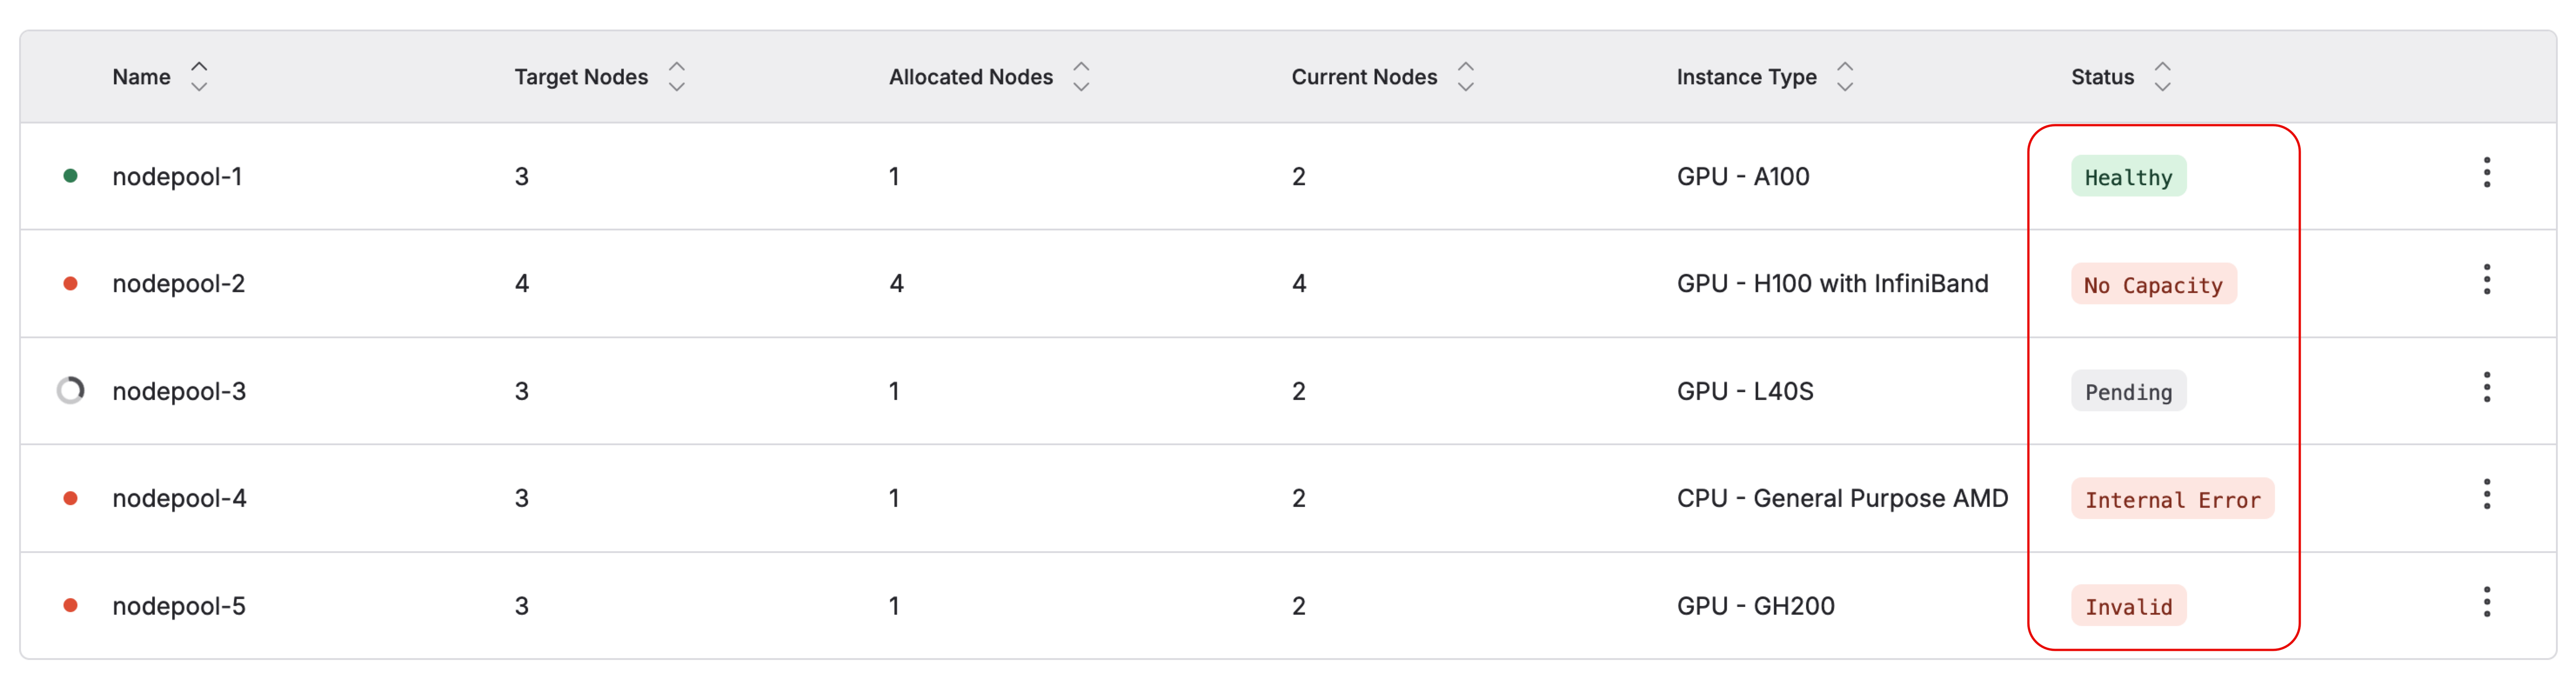
To learn more about other Node Pool conditions, see the Node Pool reference on conditions.
Create a Node Pool using Kubernetes
The following sections describe how to define a Node Pool manifest, apply it to your cluster, and verify the result. First, configure a Node Pool manifest. Here’s an example of adefault Node Pool:
example-nodepool.yaml
In this example, the Node Pool manifest creates a Node Pool with the following characteristics:
Autoscaling
To enable autoscaling for a Node Pool, setautoscaling: true. The autoscaler then adjusts targetNodes based on workload demand, keeping it between minNodes and maxNodes.
Rack-based Node Pools
For rack-based instance types, such as GB200 and GB300,targetRacks can be used instead of targetNodes. Each rack contains 18 Nodes, so setting targetRacks requests Nodes in multiples of 18 without having to calculate the Node count yourself. For example, targetRacks: 5 requests 5 racks, or 90 Nodes.
targetRacks and targetNodes are mutually exclusive: a Node Pool spec must set exactly one of the two.
example-rack-nodepool.yaml
Apply the manifest
After you configure the manifest, apply it withkubectl:
Verify the Node Pool
Verify that CKS created the Node Pool resource by usingkubectl get on the nodepool resource. For example:
Example command
Example output
List all available Node Pools
To view all available Node Pools in a cluster, usekubectl get nodepool. This returns a list of all current Node Pools in the cluster, as well as their current condition. For example:
Example command
Example output
View the Node Pool
To see additional details on any Node Pool, target the Node Pool withkubectl describe.
For example, where the Node Pool’s metadata.name is example-nodepool:
Example command
Example output
For more information about Node Pool
conditions, see Node Pool reference: conditions.For more information about Node Pool creation, see the Node Pool reference page.