

- Create a cluster in CKS.
- Create a Node Pool.
- Interact with clusters and Pods using
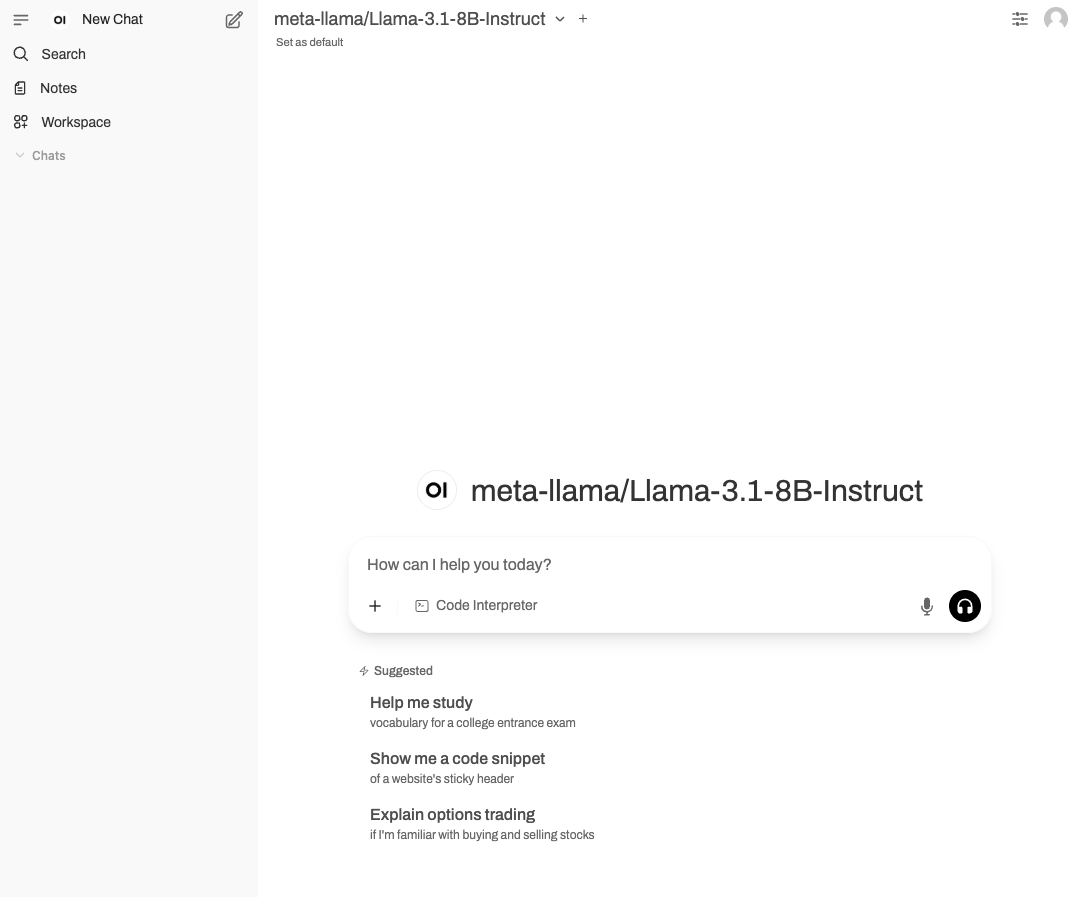
kubectl. - Deploy and interact with an LLM using Open WebUI.
Before you begin
Before completing the steps in this guide, you must have the following:kubectlinstalled on your machine.kubectlis the command-line tool for interacting with Kubernetes clusters. If needed, see the kubectl installation instructions.- Access to the CoreWeave Cloud Console. For more information, see Activate and sign in to your CoreWeave organization.
- A Hugging Face access token. See the Hugging Face instructions at User access tokens. Be sure to copy and store the token in a secure location. You will need it later in this guide.
- Access to the
Llama-3.1-8B-Instructmodel at Hugging Face. Go to meta-llama/Llama-3.1-8B-Instruct and request access. Note that approval for restricted models can take a few hours or longer.
Create a CKS cluster and Node Pool
CKS clusters and Node Pools are the core infrastructure for running and managing workloads. To create a cluster and Node Pool, complete the following steps:Open the Clusters page
Log in to the Cloud Console and navigate to the Clusters page.
Name the cluster and enable API access
In the Create a Cluster dialog, give the cluster a name, select the latest Kubernetes version, and verify the box is checked for Enable access to the Kubernetes API via the Internet. Click Next.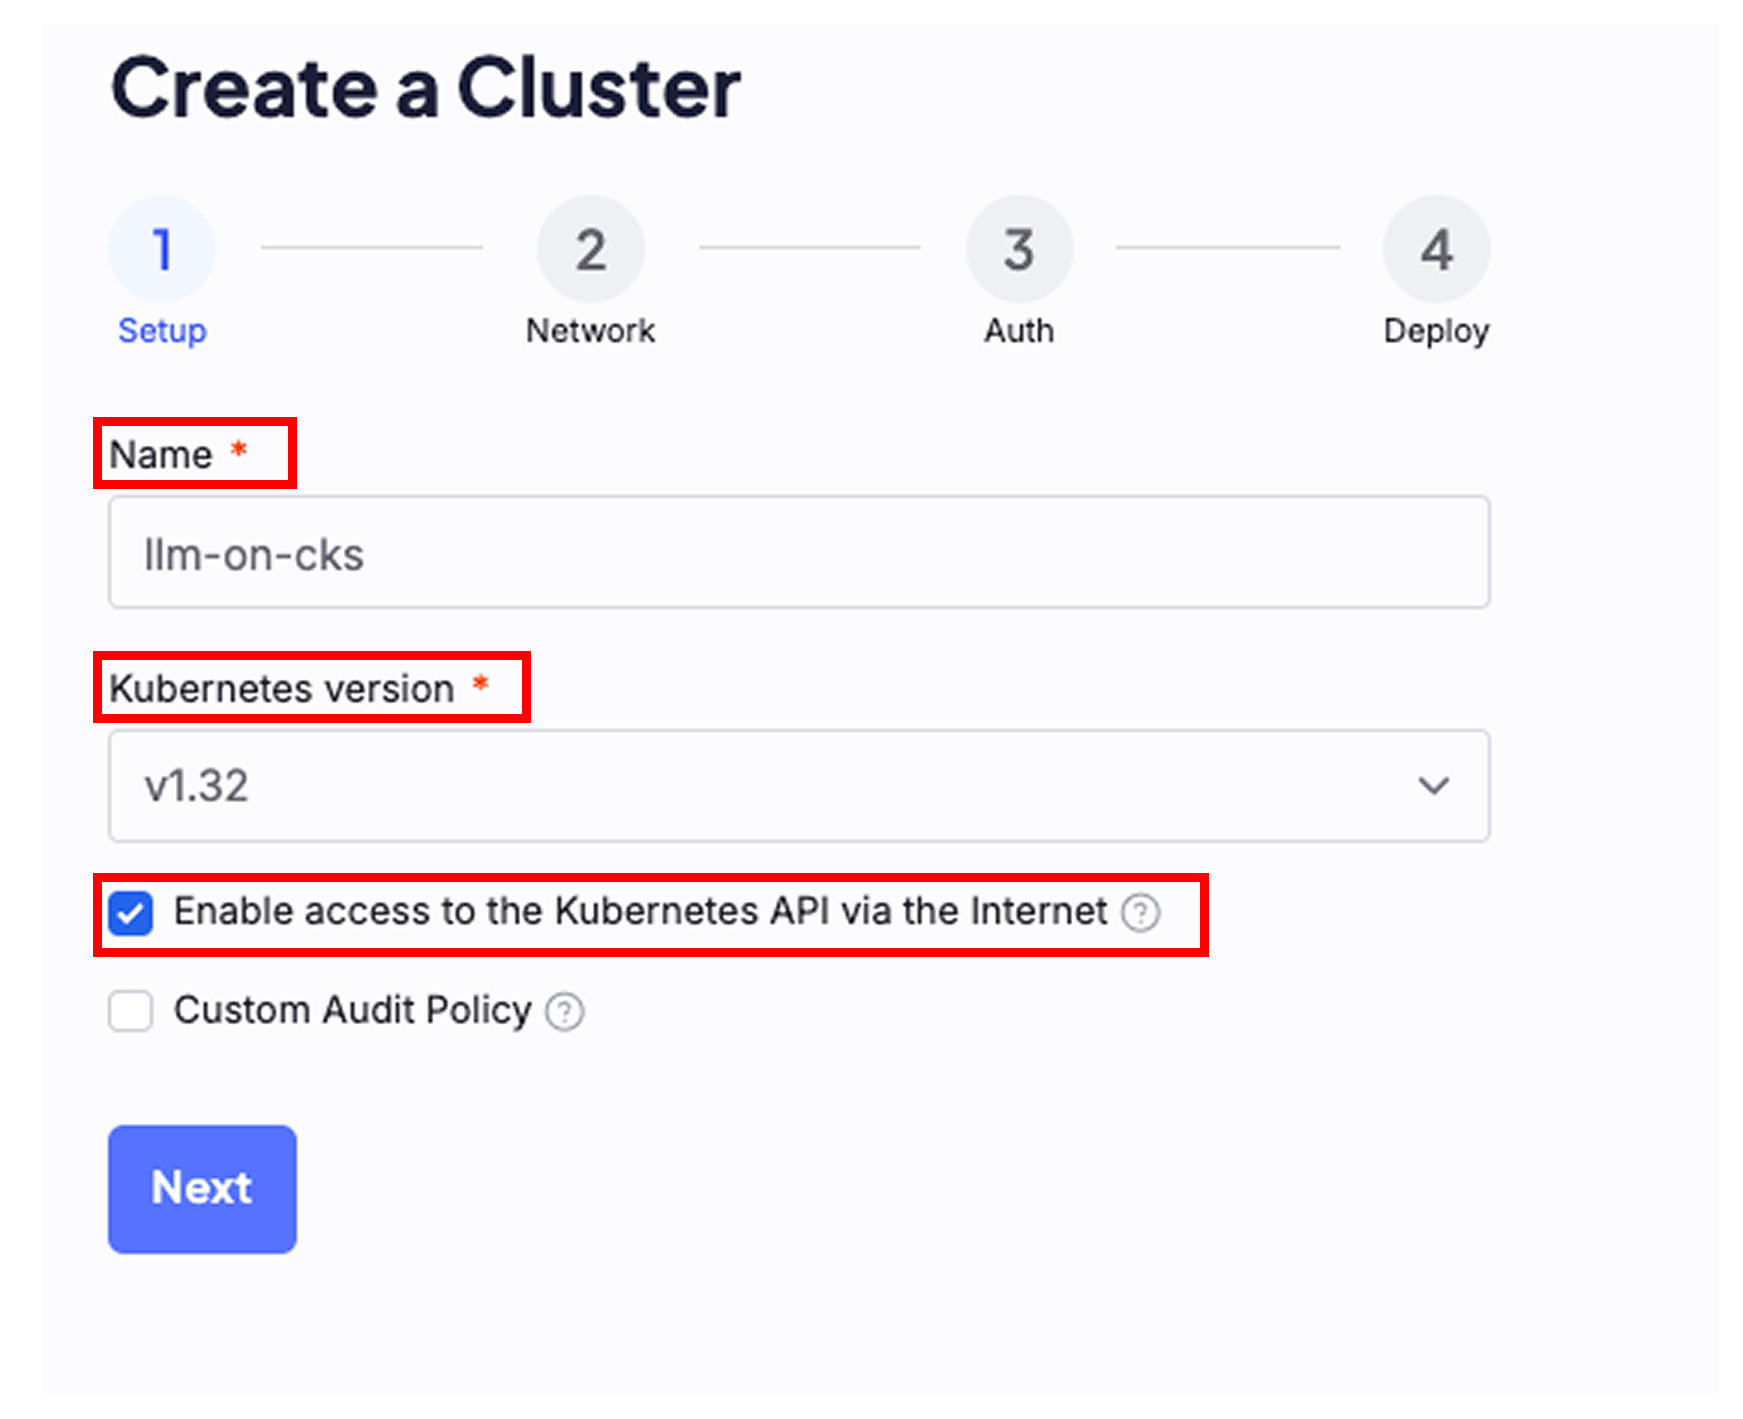
Select a region with GPU quota
Create the cluster where you have GPU quota available. Verify the box is checked for Create a default VPC, and then click Next.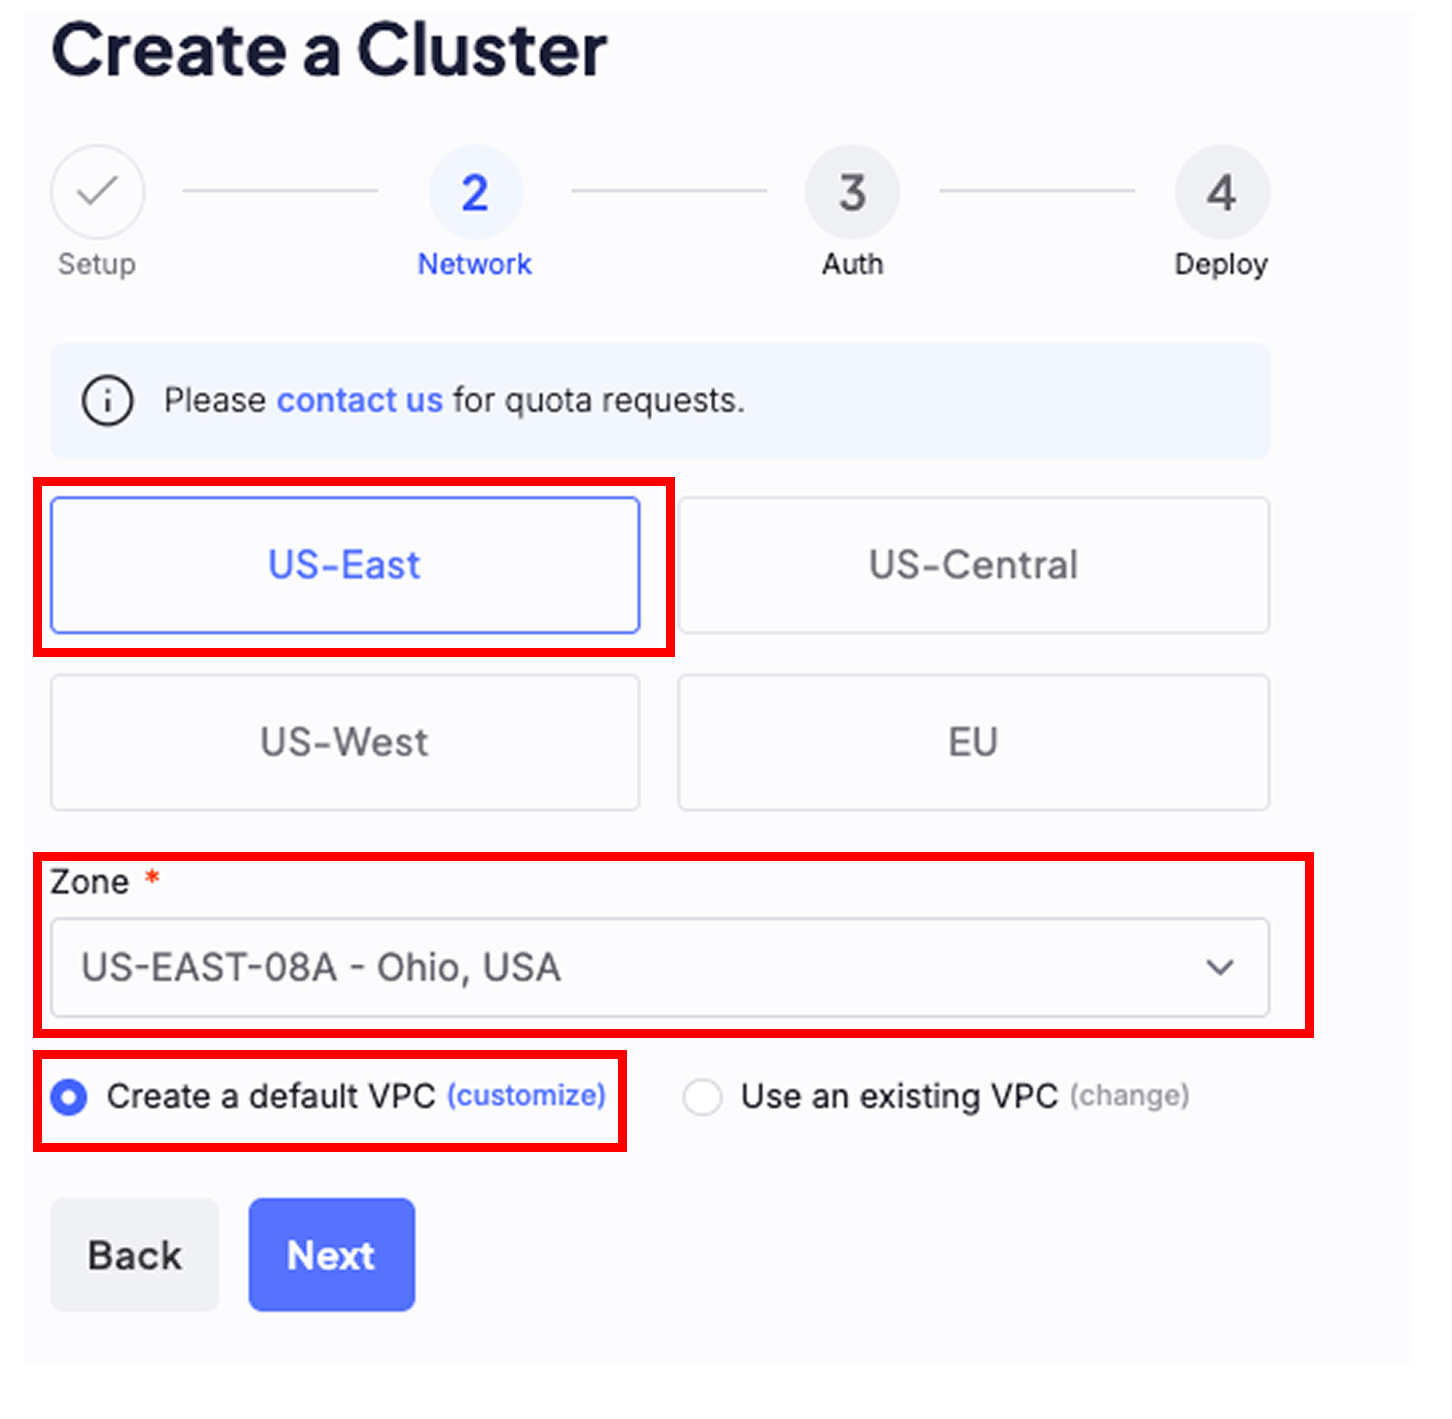
Healthy, your cluster has GPU capacity ready to serve the model, and you can continue to the following steps.
Do not install the NVIDIA GPU Operator on CKS clusters
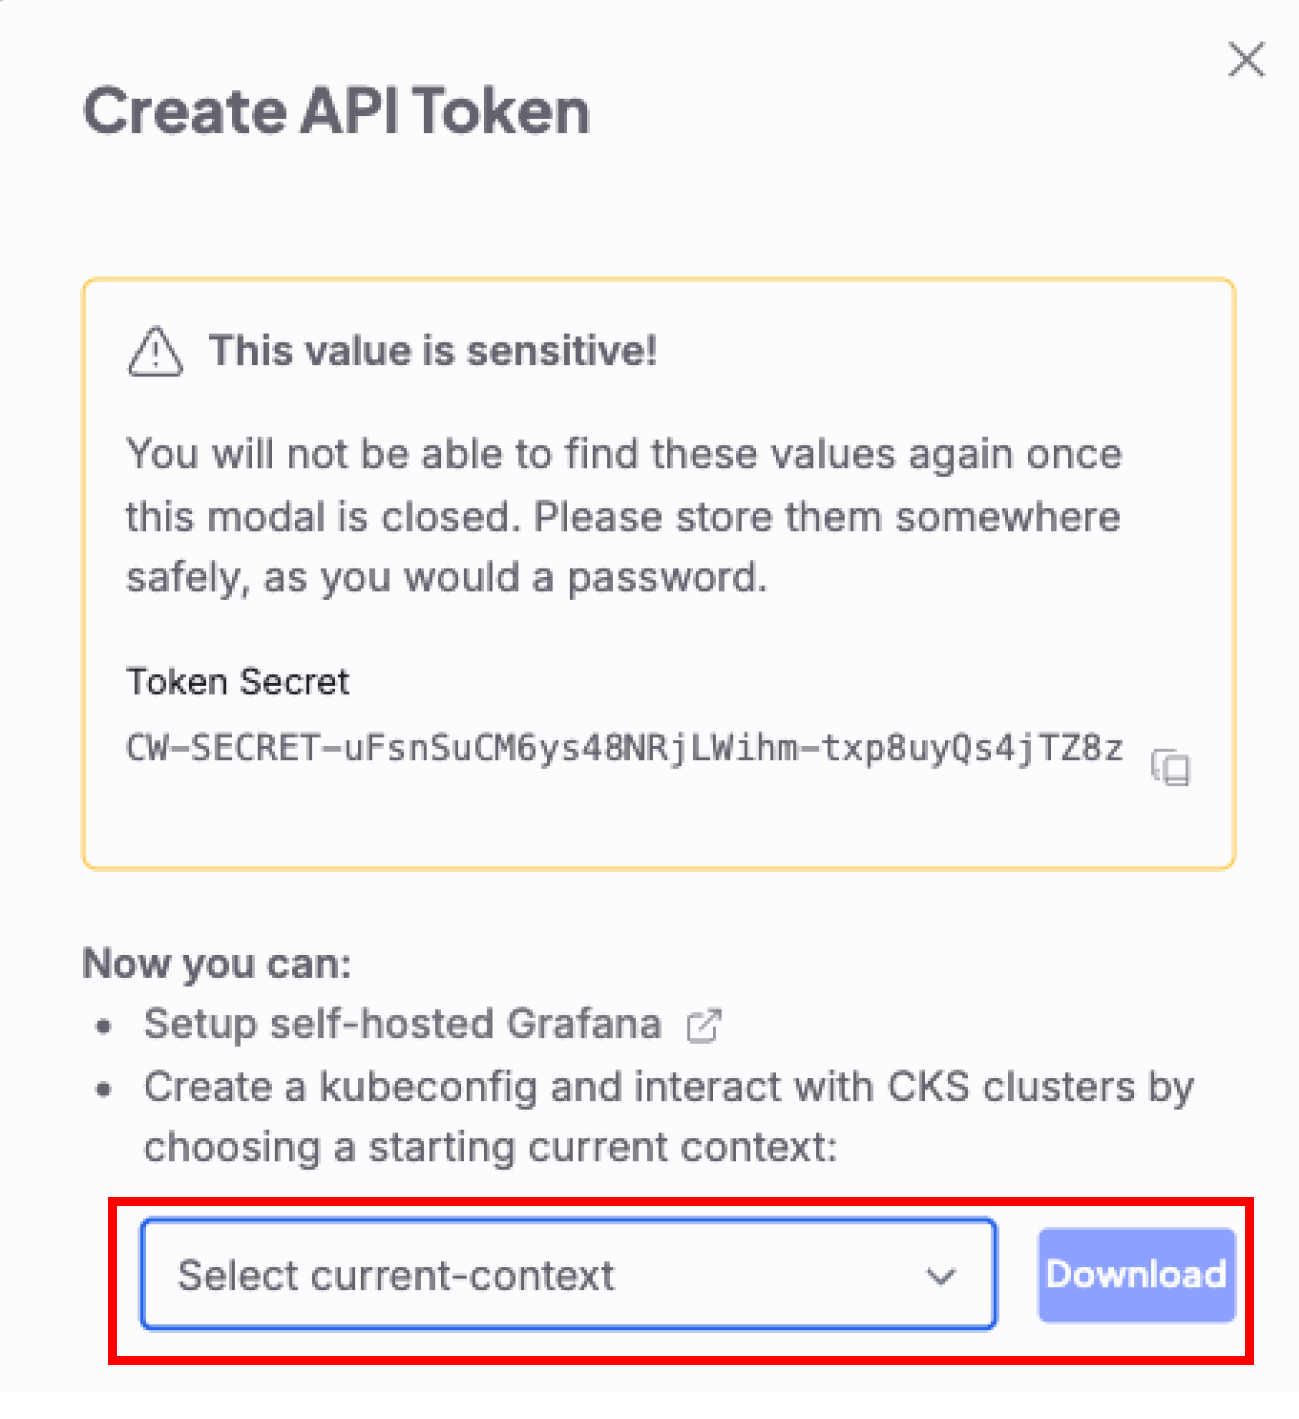
Generate a CoreWeave access token
Access tokens let you authenticate to your Kubernetes resources throughkubectl. You must create one for the cluster you just provisioned before you can run commands against it.
To create an access token, complete the following steps:
Open the Tokens page
In the Cloud Console, navigate to the Tokens page and click the Create Token button.
Use kubectl with your cluster
To communicate with your cluster using kubectl, complete the following steps:
Set the KUBECONFIG environment variable
Make a
KUBECONFIG environment variable that points to the kubeconfig file you just downloaded, for example:Create a Hugging Face secret
For CKS to download thellama-3.1-8B-Instruct model from Hugging Face, you must create a Kubernetes secret that holds your Hugging Face access token. The model deployment in the next section reads this secret at runtime to authenticate with Hugging Face.
Complete the following steps to create the secret:
Create the secret
Run the following command to create a Hugging Face secret:
[HUGGING-FACE-TOKEN]: This is the token Hugging Face provides you. For more information about creating a Hugging Face token, see User access tokens.
Download and apply a YAML configuration file
Kubernetes uses YAML files to configure resources. The example manifest defines four resources that together deploy the model and a chat interface, so you can create them all with a single command:llama-3-1-8b-deploymentruns the model. Itsvllm-servercontainer starts the vLLM inference server withvllm serve, loads the model named in theMODELenvironment variable (meta-llama/Llama-3.1-8B-Instruct), and reads your Hugging Face token from thehf-token-secretyou created. The container requests one GPU and mounts a 2Gi/dev/shmvolume that vLLM uses for shared memory.llama-3-1-8b-svcis aClusterIPService that exposes the model inside the cluster on port11434and forwards to the container’s port8000. Open WebUI reaches the model through this Service athttp://llama-3-1-8b-svc:11434/v1.open-webuiruns the Open WebUI chat interface. Its environment variables point it at the model Service, so the UI sends inference requests to the deployed model.open-webui-svcis aClusterIPService that exposes Open WebUI inside the cluster on port80and forwards to the container’s port8080.
ClusterIP type, so they’re reachable only from inside the cluster. Later steps use kubectl port-forward to reach Open WebUI from your machine. To expose it on the internet instead, see Expose Open WebUI publicly.
The
vllm-server container uses the ghcr.io/coreweave/ml-containers/vllm-tensorizer image, which CoreWeave builds in the ml-containers repository. It packages the open source vLLM inference server on CoreWeave’s CUDA and PyTorch base image and integrates CoreWeave’s tensorizer library for fast model loading from storage.nvidia.com/gpu: 1 under both requests and limits. This requests one GPU for the Pod, which schedules it onto a GPU Node in your Node Pool. Without a GPU request, the scheduler can place the Pod on a Node that has no GPU.
To deploy the Llama-3.1-8B-Instruct model, complete the following steps:
Apply the manifest
Use
kubectl to apply the file by running the following command:Before running the command, confirm you have access to the
Llama-3.1-8B model. Visit the meta-llama/Llama-3.1-8B-Instruct page to verify your access.Confirm the resources deployed
Confirm Kubernetes deployed the resources by running the following commands:Verify all Pods are ready and running. The output should look like the following:
Pod creation timeCreating Pods can take up to five minutes.
Verify the model endpoint
The model runs an OpenAI-compatible inference server. Before you open Open WebUI, confirm the model responds to a chat completion request. The model Service (llama-3-1-8b-svc) is a ClusterIP Service, so you can only reach it from inside the cluster. The following command runs a temporary Pod that sends a request to the in-cluster Service:
choices array confirms the model is serving inference. If the request fails, recheck the Pod status and logs from the previous step before continuing.
Get the Open WebUI endpoint
The Open WebUI service is not exposed to the internet. To access Open WebUI from your machine, use port-forwarding:Start port-forwarding
Run the following command to forward local port 8080 to the Open WebUI service:
Expose Open WebUI publicly (optional)
Port-forwarding keeps Open WebUI reachable only from your machine. To reach it over the internet instead, changeopen-webui-svc to a public LoadBalancer Service:
Change the Service to a public LoadBalancer
In the manifest, set the Service
type to LoadBalancer and add the CoreWeave public load balancer annotation:coreweave-load-balancer-type: public annotation provisions a public IP for the Service. For more detail, including how to assign a public DNS name, see Expose a Service.
Use a different model
This guide deploysLlama-3.1-8B-Instruct, but the same manifest works for other models that vLLM serves. To deploy a different model, edit the manifest before you apply it:
Change the model ID
In the
llama-3-1-8b-deployment, change the MODEL environment variable to the Hugging Face model ID you want to serve. If the model is gated, make sure the Hugging Face token in your hf-token-secret has access to it.Scale GPUs for larger models
For a larger model that needs more than one GPU, raise
TENSOR_PARALLEL_SIZE to the number of GPUs to shard the model across, and set the nvidia.com/gpu requests and limits to the same number. Choose a Node Pool GPU instance that provides those GPUs.The Deployment and Service names in the manifest, such as
llama-3-1-8b-svc, are labels only. You can keep them as-is for any model, or rename them for clarity. If you rename the model Service, update the endpoint references in the open-webui deployment to match.Next steps
You’ve deployed an LLM on CKS and confirmed it serves inference. Consider these next steps:- Monitor your workload. Use CoreWeave’s managed Grafana to track GPU usage and model performance. See Managed Grafana.
- Scale your cluster. Add Node autoscaling so capacity grows and shrinks with demand. See Node autoscaling.
- Run batch and burst workloads. Use CoreWeave SUNK to run Slurm on Kubernetes for training and HPC jobs. See SUNK.
- Manage infrastructure as code. Provision clusters and Node Pools with Terraform. See Terraform.
- Learn more about CKS clusters. See Introduction to clusters.
- Learn more about Node Pools. See Introduction to Node Pools.