Fortinet
The configuration guide for the Fortinet end of the Site-to-Site VPN tunnel.
In order to complete the Fortinet side of the Site-to-Site VPN connection, you must first complete the following steps from the Fortigate dashboard:
- Create a VPN Tunnel.
- Create a Security Policy.
- Create a Static Route.
- Assign a IP address to the tunnel interface.
For more in-depth information on Fortigate VPN configuration, refer to the Fortinet documentation.
The following describes how to accomplish the above such that the Fortinet side of the VPN connection will behave as expected.
Create a VPN tunnel
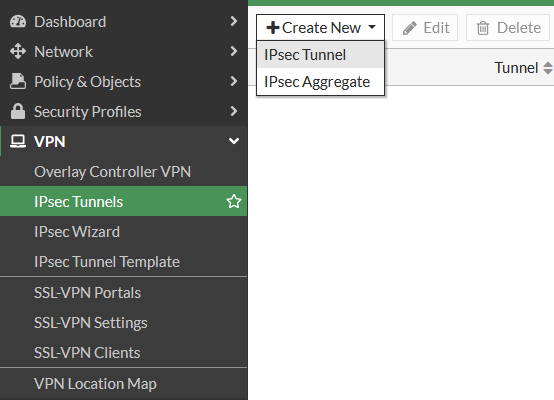
From the Fortinet dashboard, navigate to the IPsec Tunnels menu from the VPN submenu.
Select Create New, then IPsec Tunnel from the drop-down.
This will open the VPN Creation Wizard. Select Custom, then input a name for the tunnel (e.g., coreweave), then click Next.
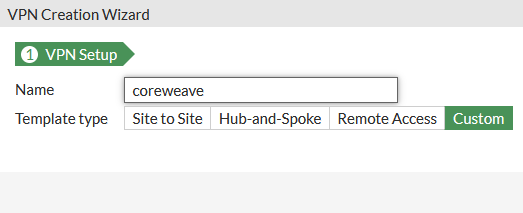
This will open the main configuration screen for the IPSec tunnel.
Phase 1 selectors
Refer to the table below, as well as the following screenshots, to configure the settings for the Phase 1 selectors of the tunnel.
Please note that some settings will be left as their default settings, and are therefore not mentioned.
| Option name | Instructions |
|---|---|
| IP Address | The IP address of your VPN service in CoreWeave |
| Interface | Your WAN interface |
| Pre-shared Key | A 32 to 64-character alphanumeric random string. ⚠️ CoreWeave will not allow a pre-shared key under 32 characters. |
| IKE | Version 2 |
| Phase 1 Proposal - Encryption | AES128GCM |
| Phase 1 Proposal - PRF | PRFSHA256 |
| Diffie-Hellman Group | 14 (modp2048) |
| Key Lifetime | 28800 |
.85186fb.647.png)
Phase 2 selectors
Refer to the table below, as well as the following screenshots, to configure the settings for the Phase 2 selectors of the tunnel.
Please note that some settings will be left as their default settings, and are therefore not mentioned.
| Option name | Instructions |
|---|---|
| Phase 2 Proposal - Encryption | AES128GCM |
| Phase 2 Proposal - Diffie-Hellman Group | 14 (modp2048) |
| Key Lifetime Seconds | 3600 |
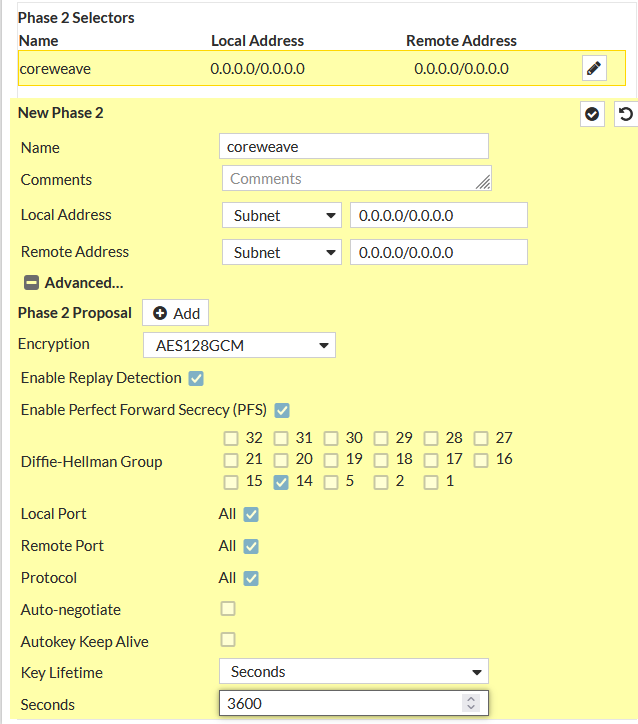
Once the Phase 1 and Phase 2 selectors have been configured as described above, click OK to create the tunnel. This will return you to the IPSec Tunnels dashboard.
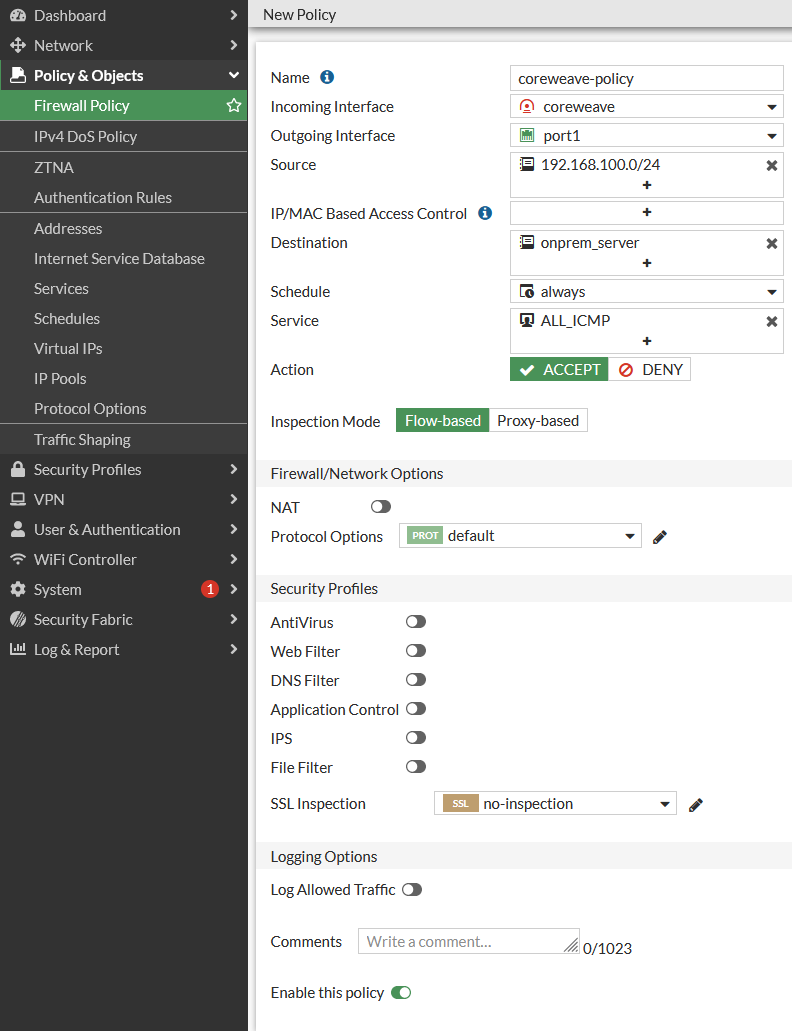
Create a Security Policy
Without a Security Policy attached, the VPN tunnel will not appear.
To configure a Security Policy for the new tunnel, navigate to the Firewall Policy page from the Policy & Objects submenu. From here, configure the Security Policy as is appropriate for your environment. Be sure that the new policy is Enabled using the slider at the bottom of the page.
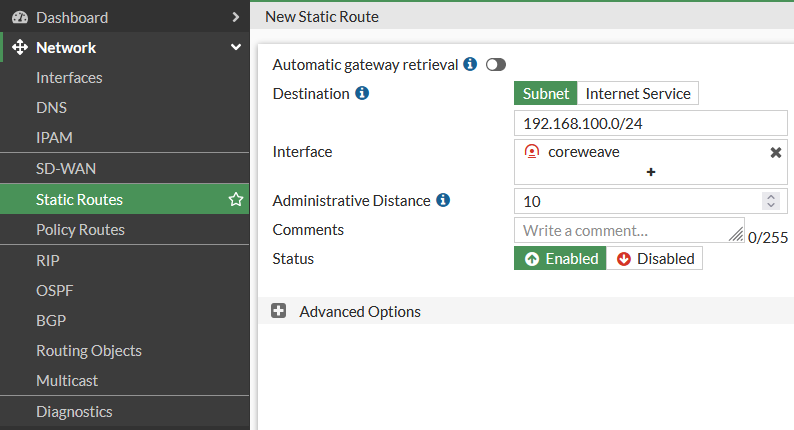
Create a static route
To configure a static route for your tunnel, navigate to the Static Routes page under the Network submenu.
| Option name | Instructions |
|---|---|
| Destination | The CoreWeave VPC subnet |
| Interface | The newly created tunnel interface |
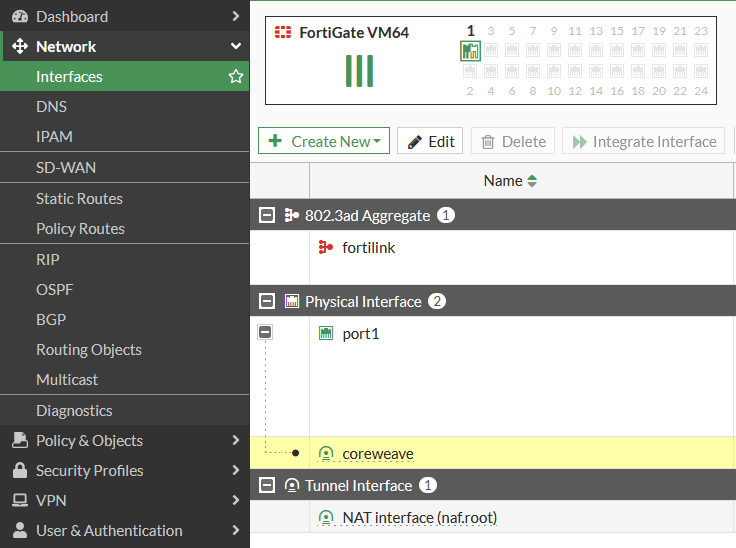
Assign an IP address to the tunnel interface
To assign an IP address to the new tunnel interface, navigate to the Interfaces menu below the Network submenu.
The new tunnel interface will be listed under the Physical Interface you selected during the tunnel setup (this will usually be your WAN port).
Select the Tunnel Interface, then click Edit.
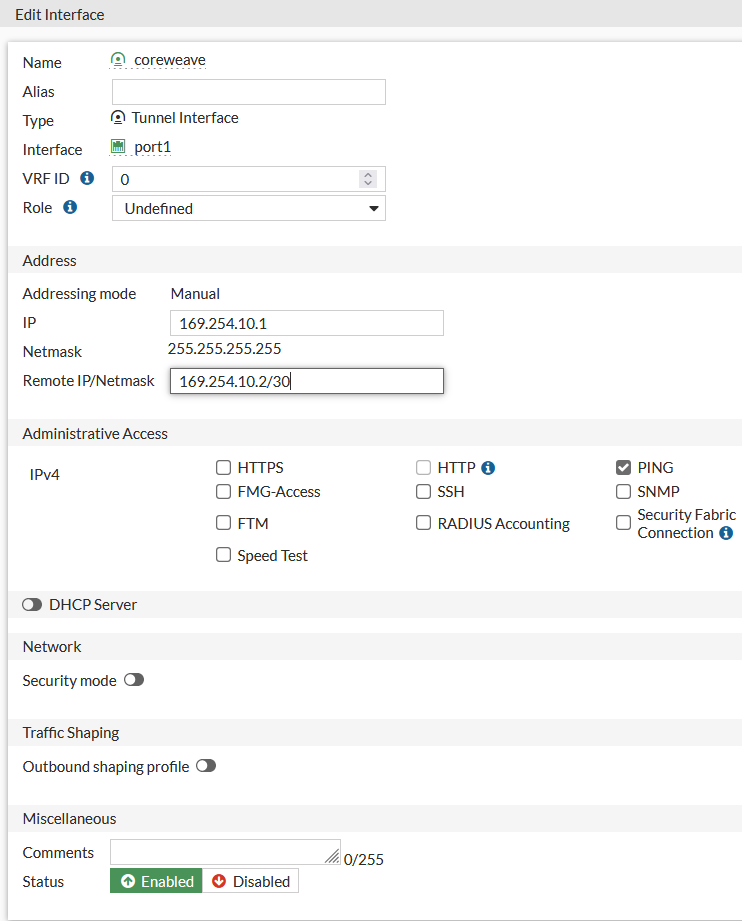
Clicking Edit will open the Edit Interface menu. To configure the interface, refer to the table as well as the screenshots below.
| Option | Instructions |
|---|---|
| IP | The IP for the Fortinet end of the tunnel |
| Remote IP/Netmask | The IP for the CoreWeave end of the tunnel, including the netmask (usually /30) |
| Administrative Access | Select PING. (This will allow you to ping the tunnel interface from the CoreWeave end of the tunnel) |
Once your Tunnel Interface has been correctly configured, the tunnel should be ready to use!