

How OIDC WIF works
Your workload obtains an OIDC token from your identity provider and sends it to the AI Object Storage WIF endpoint. CoreWeave validates the token against your WIF configuration, derives a role identity from the token’siss (issuer) and sub (subject) claims, and returns a temporary Access Key / Secret Key pair for AI Object Storage.
The role identity follows the format role/<ISSUER_URL>:<SUBJECT_USER_ID>. For example, if your IdP issues tokens with iss: https://idp.example.com and sub: svc-data-ingest, the derived role is role/https://idp.example.com:svc-data-ingest.
Your organization access policies and optional bucket access policies determine what the returned credentials can do. These policies must reference this role as a principal.
Prerequisites
Before you begin, ensure you have:- A CoreWeave organization with AI Object Storage enabled.
- Administrator privileges for your organization (the IAM Admin role and Object Storage Admin role, or equivalent legacy access).
- The CoreWeave organization ID (find this on the Settings page in Cloud Console).
- AWS CLI version
2.33.2or later. If you use Python SDKs, make sure your SDK is at leastboto3 >= 1.42.5. - An OIDC Identity Provider that supports OpenID Connect Discovery and can issue JWTs with the required claims. See Required OIDC claims.
Step 1: Configure your OIDC provider
Configure your IdP to issue JWTs for the workloads that need AI Object Storage access. CoreWeave uses these tokens to verify the identity of your workload before issuing temporary credentials, so the claims they carry must match the values in your WIF configuration. The tokens must include the standard claims listed in Required OIDC claims.Verify your provider supports OpenID Connect Discovery
CoreWeave validates each incoming token against your provider’s public signing keys (JWKS), and it locates those keys through OpenID Connect Discovery. Your IdP must meet two requirements:- It implements OpenID Connect Discovery. The provider serves a discovery document at
[ISSUER-URL]/.well-known/openid-configuration, and that document points to the provider’s JWKS endpoint. - It exposes the discovery document and JWKS endpoint publicly so CoreWeave can reach them. The IdP itself doesn’t need to be on the public internet, but these two endpoints must be reachable. Most managed and private Kubernetes clusters expose them publicly even when the cluster’s API server is private.
[ISSUER-URL] with your provider’s issuer URL, such as https://idp.example.com:
Check the discovery endpoint
jwks_uri field. Confirm that the key set is reachable too:
Check the JWKS endpoint
Required OIDC claims
The following standard OIDC claims are required. Theaud claim varies most across OIDC providers (see Configure the aud claim for your provider).
CoreWeave supports the optional
nbf (not before) claim. If present, the token is invalid before that time.
Example JWT payload
role/https://idp.example.com:svc-data-ingest.
Configure the aud claim for your provider
The iss, sub, exp, and iat claims are standard, and every OIDC provider issues them the same way. The aud (audience) claim is the exception: each provider sets it differently, and you choose its value. Whatever value your tokens carry in aud must match the Client ID (Audience) in your WIF configuration (see Step 2).
Choose a single audience value for your CoreWeave integration and use it consistently. The CoreWeave integrations default to https://coreweave.com/iam, and the following examples use that value.
Select your provider to see how to set the aud claim:
- GitHub Actions
- Kubernetes
GitHub Actions sets the If you request the token yourself instead of using the action, pass the audience when you call the GitHub OIDC token endpoint. For example, in a step that uses the GitHub Actions toolkit:For the end-to-end workflow, see the GitHub Actions tutorial.
aud claim when a workflow requests its OIDC token. The coreweave/actions-public/auth/caios-login action requests the token for you and defaults the audience to https://coreweave.com/iam. Set the audience input to use a different value. Replace [ORG-ID] with your CoreWeave organization ID:Step 2: Create a WIF configuration in Cloud Console
Next, register your IdP with CoreWeave. The WIF configuration specifies how CoreWeave validates tokens from your IdP, including which issuer URL to trust and which audience value to expect.- Log in to the Cloud Console and navigate to the Workload Federation page.
- Click Create OIDC configuration. The configuration form opens:
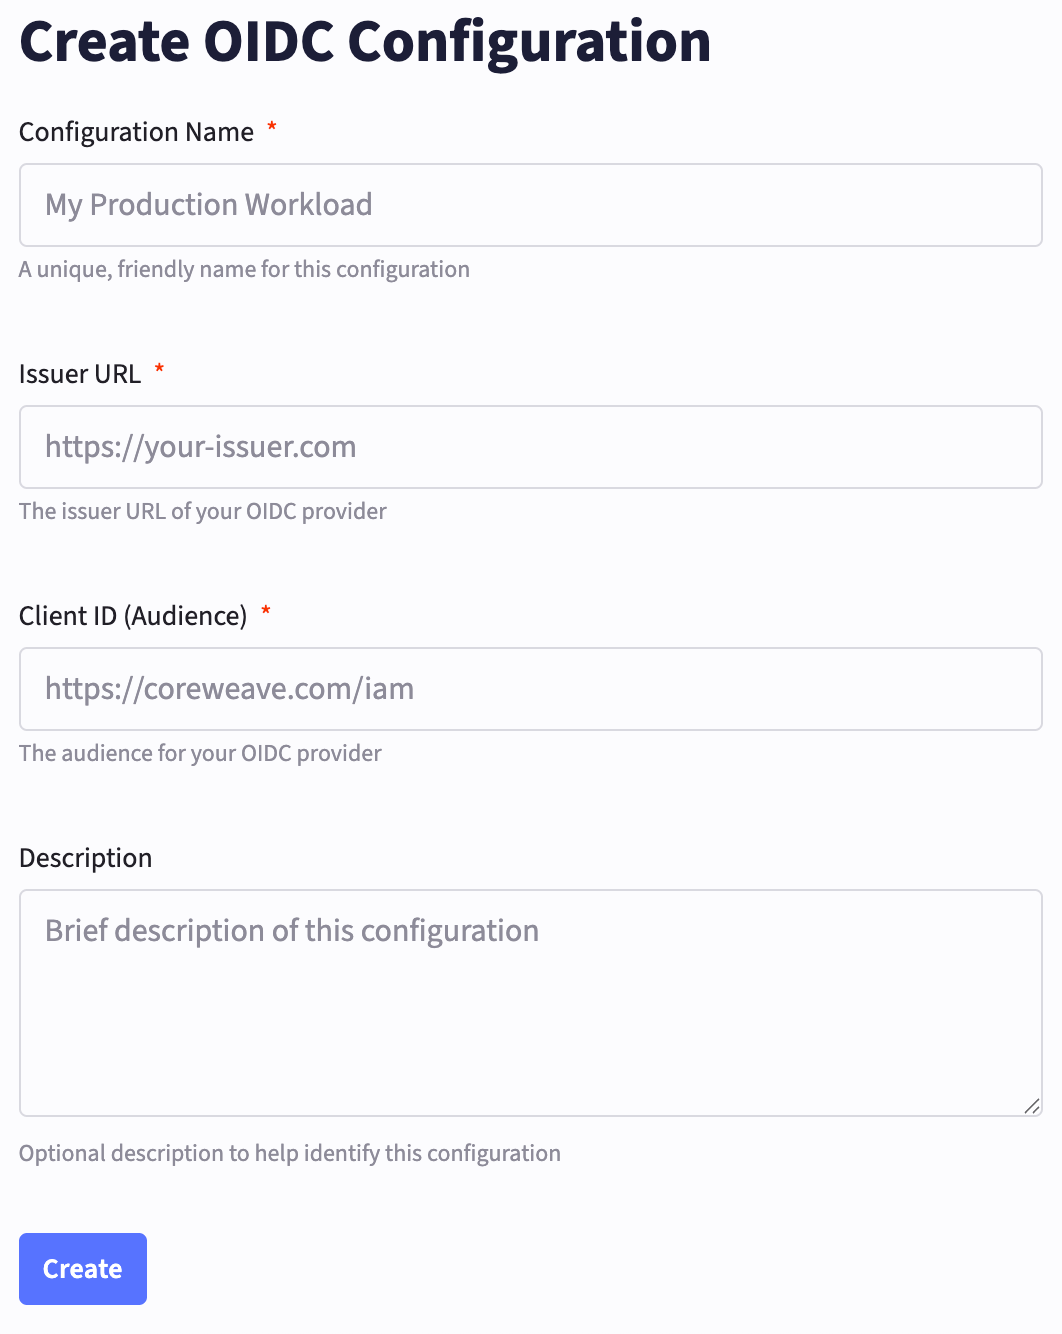
- Name: A unique name for the configuration.
- Issuer URL: Your OIDC provider’s identifier URL, such as
https://your-domain.okta.comorhttps://accounts.google.com. CoreWeave uses this to verify that your trusted identity provider issued the tokens and to fetch the provider’s JWKS for signature validation. - Client ID (Audience): The client identifier that tokens must target. CoreWeave validates that incoming tokens contain this value in their
audclaim. - Description: A brief description of the configuration.
Step 3: Create organization access policies
Organization access policies control what your WIF role can do. Before your workload can exchange OIDC tokens for credentials, you must grant thecwobject:CreateAccessKeyOIDC action to the WIF role.
The principal for your OIDC role follows the format role/<ISSUER_URL>:<SUBJECT_USER_ID>, matching the role identity derived from your token.
The following policy grants the WIF role permission to create temporary credentials through the OIDC endpoint. The cwobject: actions are global and must use "resources": ["*"]. Optionally, you can also grant other cwobject: actions to the WIF role.
Grant S3 permissions
After your workload can create credentials, you need policies that grant those credentials permission to access buckets. This policy grants read and write access to a specific bucket:Step 4: (Optional) Add bucket access policies
Usually, organization access policies are sufficient, and you can skip this step. However, you can layer on bucket access policies when you need cross-organization access to specific buckets or bucket-level lifecycle configuration. Organization access policies and bucket access policies have different syntax requirements:
See Bucket access policies for the full schema and examples.
Step 5: Configure your environment
After your IdP, WIF configuration, and organization access policies are in place, your workload can request temporary credentials from CoreWeave. In this final step, you configure your environment to use the temporary credentials, after which you can use any S3-compatible client to interact with your buckets.-
Ensure you’re using the correct version of the AWS CLI. The minimum required version is
awscli >= 2.33.2. If you use Python SDKs, the minimum required version isboto3 >= 1.42.5.Check the AWS CLI version -
Set the following environment variables, filling in the values for your CoreWeave organization ID, the path to your JWT token file, and the CoreWeave region you’re using. This uses the AWS container credentials feature, so although the environment variables reference AWS CLI environment variables, you must fill in your CoreWeave-specific values:
Set the environment variables
-
Test your configuration by listing your buckets:
List your buckets
Expiration field indicates when the credentials expire. The credentials inherit permissions from your organization access policies and any applicable bucket policies.
If you receive an error message like the following, check that you’re using the correct version of the AWS CLI (awscli >= 2.33.2) or Python SDK (boto3 >= 1.42.5):
Credentials request and response
This uses the AWS container credentials feature, which pulls from your configured credentials file and runs a GET request to the CoreWeave OIDC WIF endpoint as follows:Request
Response
Troubleshooting
If credential exchange or S3 operations fail, the following sections cover the most common causes and what to check.Token exchange returns “permission denied”
If the/temporary-credentials/oidc call returns an error like {"code": 7, "message": "permission denied", "details": []}, check:
- Missing cwobject permission: Ensure your organization access policy grants
cwobject:CreateAccessKeyOIDCto the WIF role. This permission is required for the token exchange to succeed. - Token validity: Ensure the
issandaudclaims match your WIF configuration. Verify the token isn’t expired (exp) and isn’t being used beforenbf(if set). - WIF configuration: Confirm the Issuer URL and Client ID in your WIF configuration exactly match the values in your tokens.
Token exchange succeeds but S3 operations return AccessDenied
If you receive credentials but S3 operations fail, the issue is in your access policies. Check that at least one organization access policy:- Allows the needed
s3:*actions (for example,s3:Get*,s3:List*,s3:Put*). - Uses the correct short-form resources (
"my-bucket","my-bucket/*"). - Lists the correct WIF role in
principalsusing the formatrole/<ISSUER_URL>:<SUBJECT_USER_ID>.
Deny statements can override other Allow statements.