

For instructions about accessing CoreWeave Grafana dashboards, see Access and use CoreWeave Grafana dashboards.
- Monitor the GPU and CPU utilization of a given Slurm job.
- Track the rate of filesystem operations related to the Slurm job.
- View Node conditions and alerts that may impact the performance of the Slurm job.
- Inspect NVIDIA Collective Communications Library (NCCL) bandwidth and latency per collective, and identify GPU ranks that fall behind the rest of the job.
Filters and parameters
Use these filters at the top of the page to choose the data you want to view:
The dashboard also includes buttons with links to the Slurm Cluster dashboard and
slurmctld logs.
Set the time range and refresh rate parameters at the top-right of the page. The default time range is 5 minutes, and the default refresh rate is 1 minute.
Panel descriptions
The following sections describe each group of panels on the dashboard, starting with Job Info and continuing through GPU Metrics, Filesystem, Node Resources, and NCCL Metrics.Job Info
The Job Info section displays identifying information about the selected Slurm job, including:Estimate model FLOPs utilization (MFU) from tensor core utilization
Use the Tensor Core Utilization Running Jobs panel in the GPU Metrics section to get a rough estimate of MFU.
Job Info: Job State Timeline and Last State
The Job Info section contains panels that display information about the state of the selected Slurm job. Last State displays the most recent reported state, while the Job State Timeline displays the job’s status over time.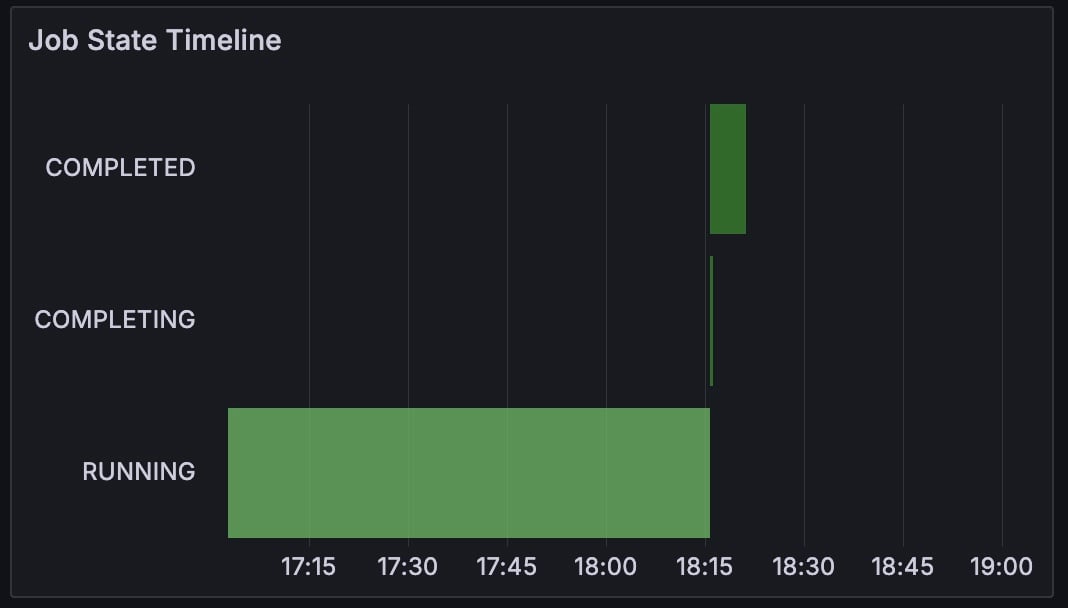
Job Info: Node alerts
Job alerts in the Slurm Job Metrics dashboard are generated by CoreWeave’s Mission Control, an automated system that continuously monitors and manages the underlying compute infrastructure to maintain high cluster reliability and availability. These alerts target hardware and system-level issues, such as GPU errors, networking failures, and endpoint timeouts. These conditions aren’t typically observable through application-layer metrics such as training metrics or standard logs.Understanding Node alerts and conditions
The following image shows an interruption caused by a Node alert, namelyGPUContainedECCError.
- Blue lines: Indicate Node conditions.
- Red lines: Indicate Node alerts.
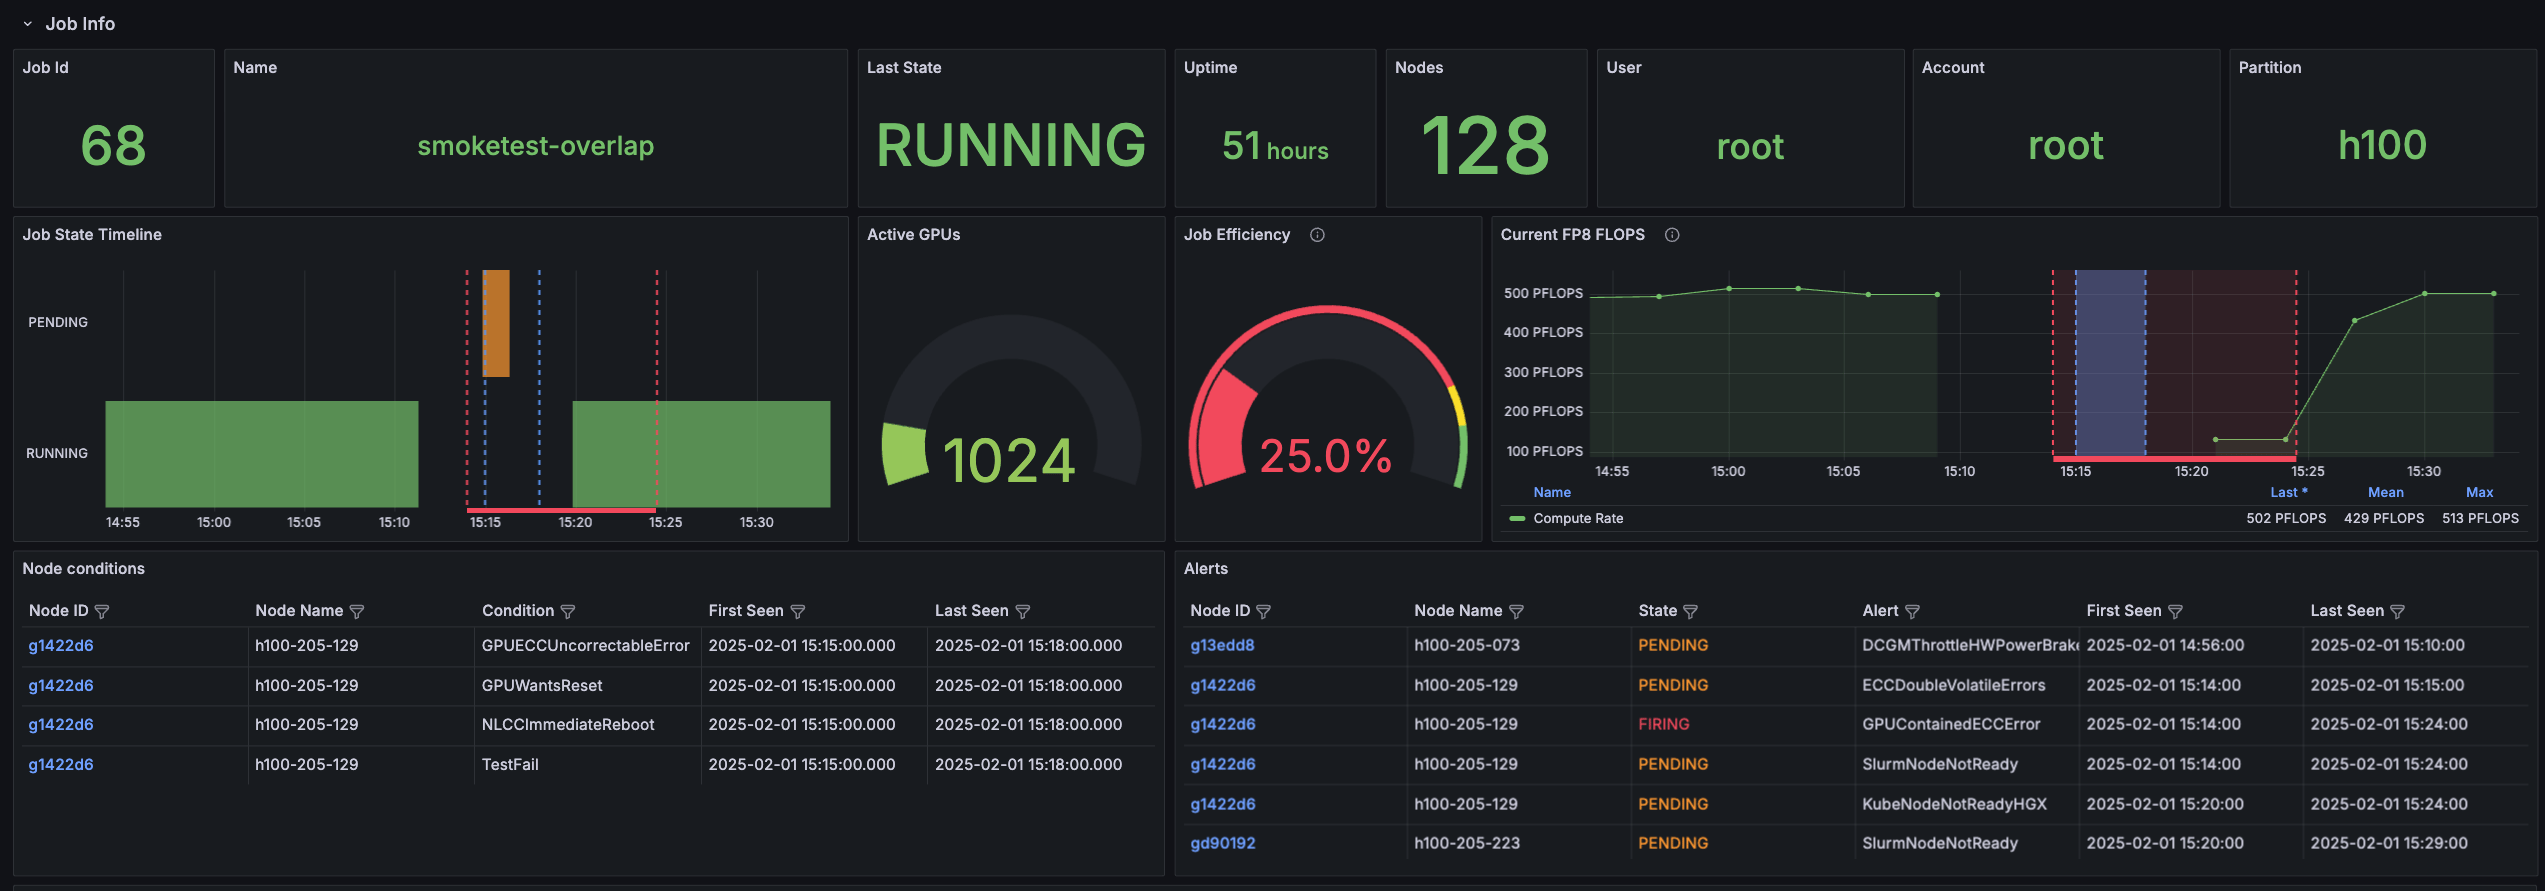
GPUContainedECCError, appears before the drop in compute, while the Node conditions indicated by the blue lines delineate the window the drop in compute occurred within.
The image shows that the H100 cluster experienced a hard fault around 15:15. Throughput dropped from 500 PFLOPS to 0 because the Slurm scheduler pulled a Node out of the pool due to a GPUContainedECCError. Understanding how Node alerts and conditions are overlaid on Node metrics can help you diagnose and troubleshoot problems with a running job.
GPU Metrics
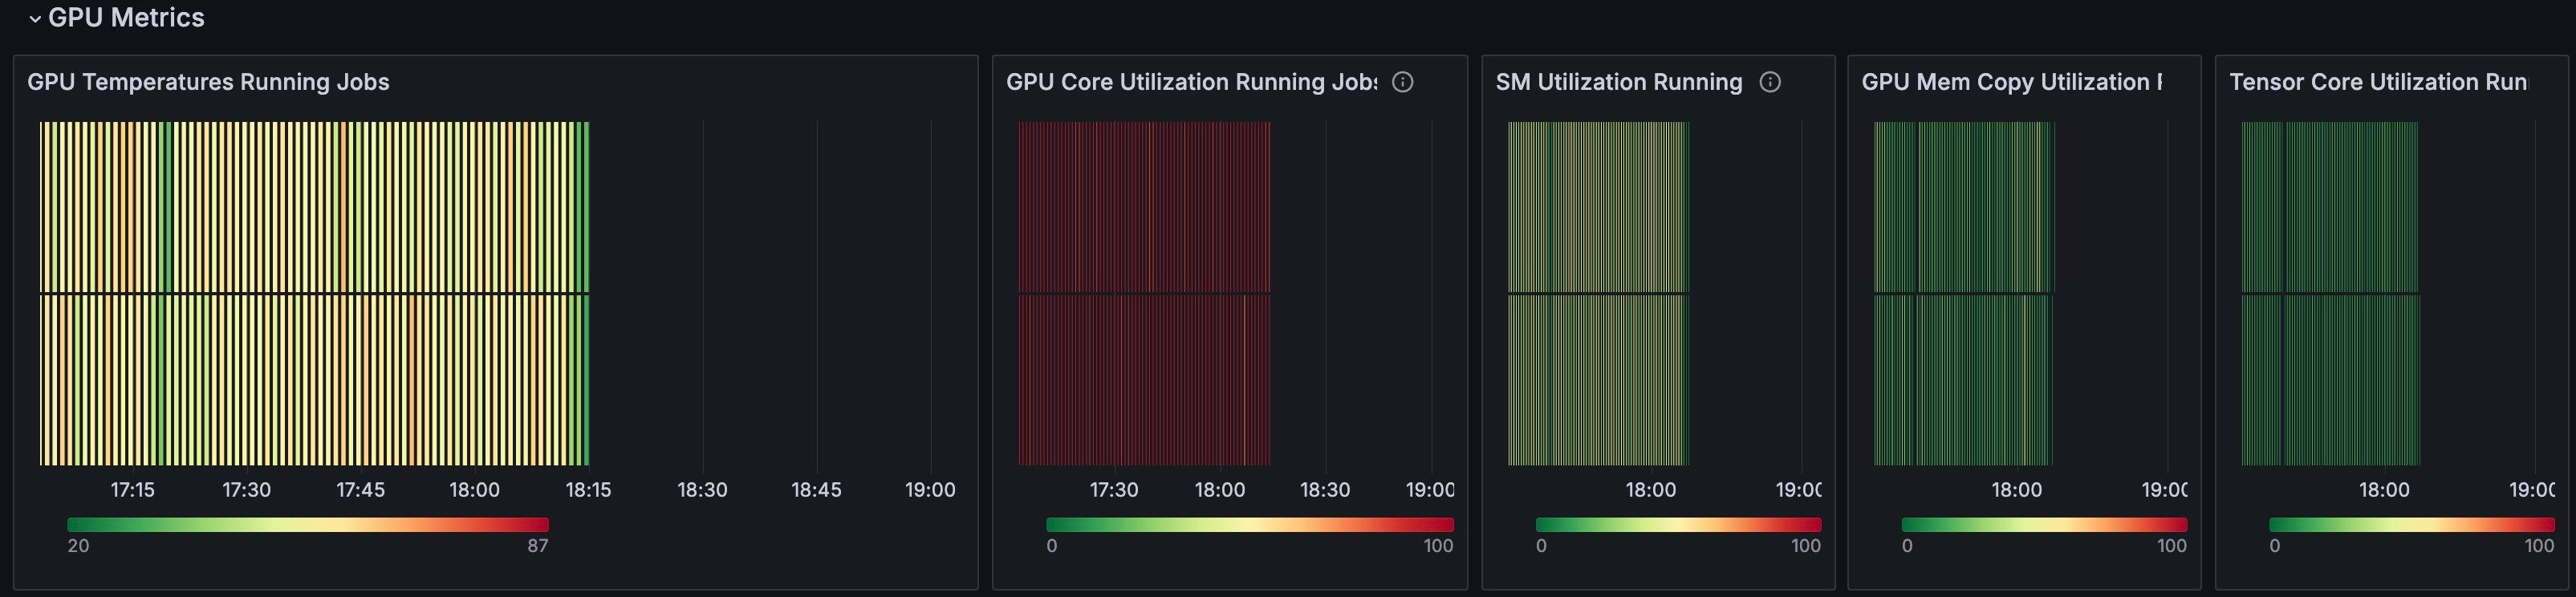
The GPU Metrics section displays detailed information related to hardware utilization. In this section, red lines correspond with higher temperature or utilization of the measured value, while green lines indicate a lower value or idle state. Whether these values suggest “good” or “bad” performance depends on the expected behavior and resource utilization of the job.GPU Metrics: Color coding
write operations.
Filesystem
The Filesystem section includes information aboutread and write operations on the Network File System (NFS) and local files.
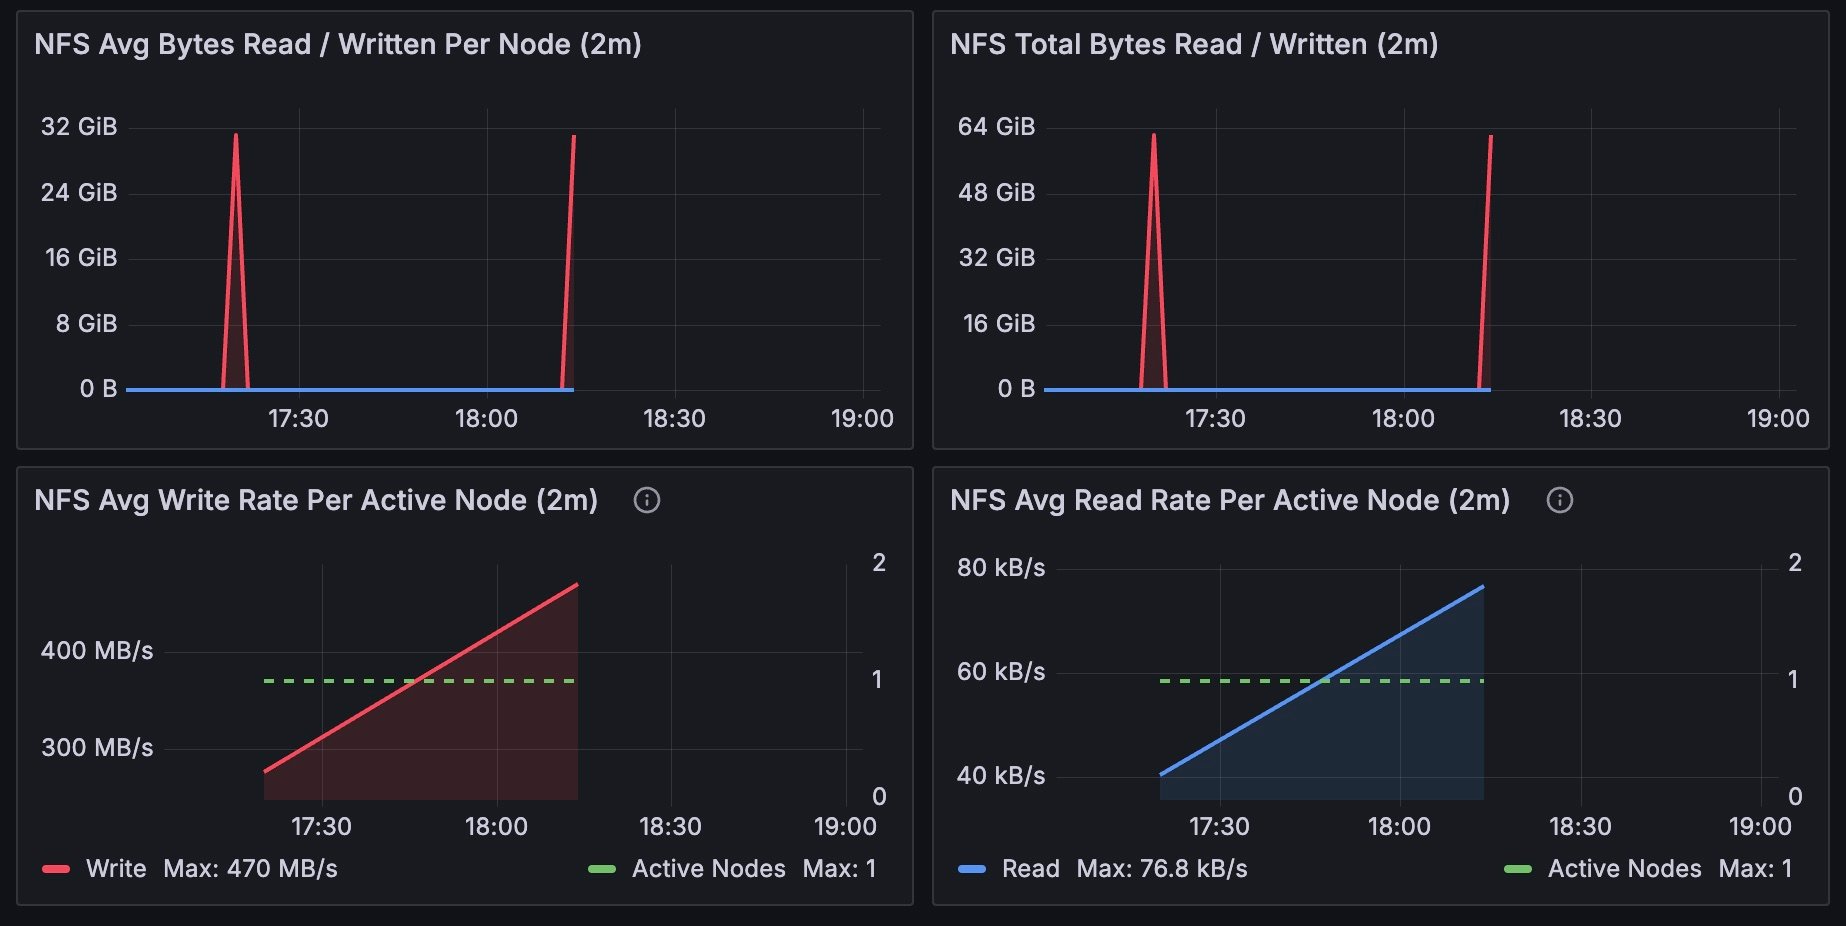
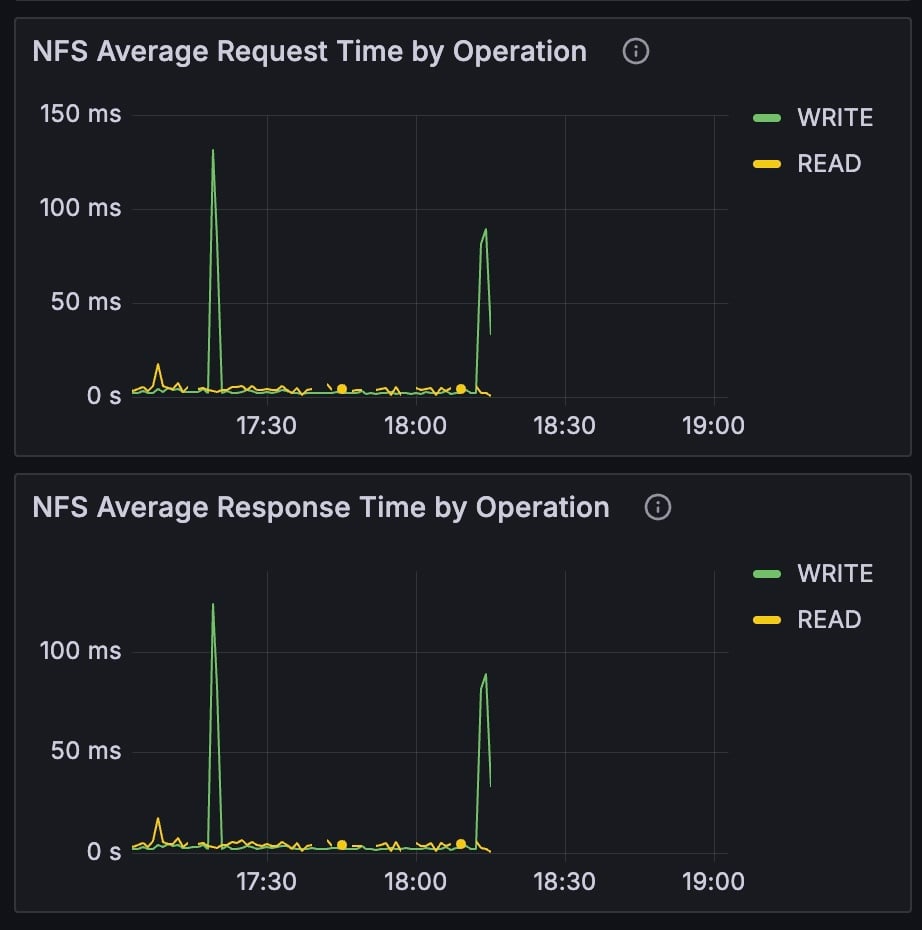
Filesystem: NFS Average Response and Request
The NFS Average Response and Request graphs describe the performance of the filesystem. A slowdown or spike could indicate that the storage is too slow, and that the job might perform better with faster or a different type of storage, such as object storage.Filesystem: NFS Total Read / Write
The NFS Total Read / Write graphs typically display a large red spike when a job starts, as the model and data are read in. While the job runs, the graph shows smaller write spikes at regular intervals, which occur as the checkpoints are written out. Compare these graphs with the panels in the GPU Metrics section to help confirm that running jobs are behaving as expected.Node Resources
The Node Resources section includes the CPU Allocation panel, which displays the total number of CPU cores utilized over the job runtime.NCCL Metrics
The NCCL Metrics section reports how the GPUs allocated to the job communicate with each other, using telemetry from the NCCL profiler plugin. These panels populate only when GPU Straggler Detection runs on the cluster. They sample at one-minute intervals. Jobs that run for less than about two minutes produce empty or sparse panels. The NCCL BusBW and NCCL Latency panels each appear once per process-group size, and the 32+ and 512+ panels include every group at or above that size. A job populates only the panels whose sizes its communicators match, and the remaining panels read “This job does not contain NCCL groups of this size”.
For an introduction to the feature that produces these metrics, along with worked examples, see Introduction to GPU Straggler Detection. To turn it on for a SUNK cluster, see Enable GPU Straggler Detection.