

Organizations
In CoreWeave, an organization is your entire CoreWeave Cloud Console account, including all users and resources within it. Billing, user management, and infrastructure management all take place at the organization level.Organization IDs
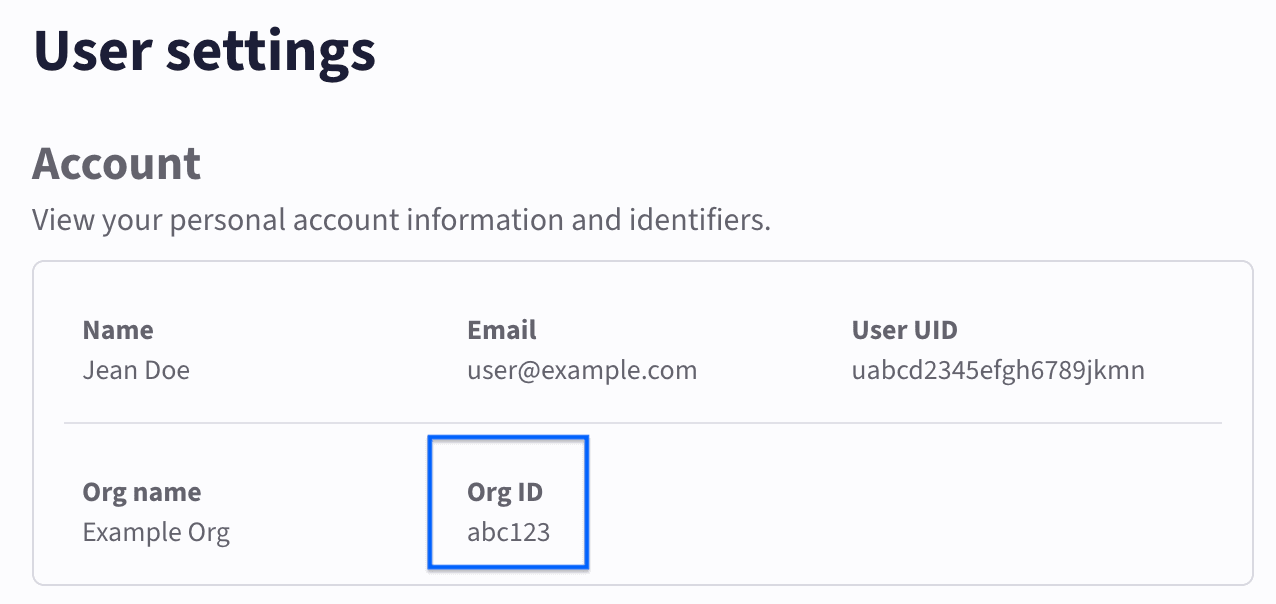
CoreWeave associates every customer with an Organization ID, or “Org ID.” Each organization has a unique Org ID, which takes the form of a short hexadecimal string (for example,ab1cd2). You can find your Org ID on the Settings page of your Cloud Console account.
User types
For more information about the permissions associated with each user type, see IAM Access Policies and Legacy User Permissions. To learn how to manage users, see Manage users.
Administrators
Administrators have access to a broad set of actions and controls and can see more information about the resources their organization creates.Users
Users have more limited permissions that administrators allocate. Users can perform only the actions assigned to them. To learn how user roles map to CKS permissions, see Configure cluster access.Set up your team
On your first day in a new organization, follow this sequence to go from a single administrator account to a team whose members each have the access they need. Define what people need to do first, grant those roles through an access policy, then invite the people.Whether to create a policy or a group first
Start with a policy. In CoreWeave, you grant access by writing an IAM Access Policy, which is a collection of rules. Each rule assigns one or more roles to a principal, where a principal is an individual user or a group. Access is default-deny: a principal can perform an action only when a policy grants the role for it. You don’t need to create a group to grant access. You can assign roles directly to individual users in a policy. Create a group only when several people should share the same roles and you want to manage them as a unit, then reference that group as the principal in a rule.Legacy user groups
There are also legacy user groups (admin, read, write, metrics, and billing_viewer) that predate IAM Access Policies, where a user’s permissions came from the legacy group they belonged to. New organizations should use IAM Access Policies rather than legacy groups. For how legacy groups map to current roles, see Legacy group role assignments.
Day one sequence
Follow these steps to grant access and onboard your team:- Decide what each part of your team needs to do. List the people or functions on your team and the actions each one performs, such as managing clusters, deploying models, viewing billing, or monitoring workloads. Map each one to the roles described in IAM roles.
- Create an access policy with the right roles. Create one or more policies whose rules assign those roles to the appropriate principals. To grant the same roles to several people, create a group and assign the roles to that group. For the console steps, see Manage IAM access policies. Creating a policy requires the IAM Admin role.
- Invite your users. Invite each person to your organization from the Cloud Console. For the steps, see Manage users. Inviting users requires the IAM Admin role.
- Assign users and verify access. Make sure each invited user is a principal in a policy rule that grants their roles, either directly or through a group. After a user accepts the invitation and signs in, confirm they can reach the resources their roles allow and nothing more. To change a user’s access later, edit the relevant policy. See Edit an access policy.