

Prerequisites
- Obtain a CoreWeave AI Object Storage Access Key and Secret. If you don’t already have these credentials, generate them in the Cloud Console.
- Set an organization access policy.
- Download and install Cyberduck.
Installation and configuration
- Open the Cyberduck application.
-
Install the CoreWeave AI Object Storage connection profile:
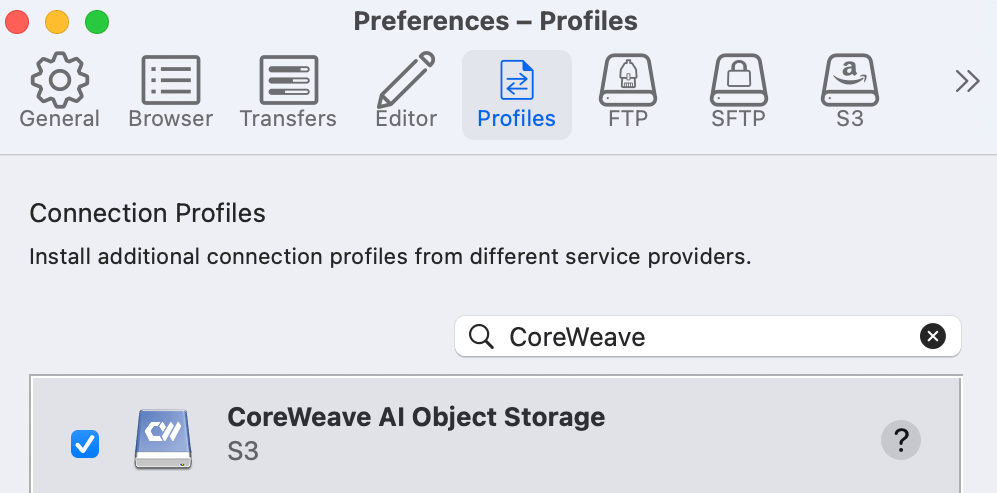
- In Cyberduck’s menu bar, locate Connection Profiles:
- For macOS: Cyberduck ▸ Settings ▸ Connection Profiles.
- For Windows: Edit ▸ Preferences ▸ Connection Profiles.
- In the profiles gallery’s search field, type “CoreWeave”. Search results may take a few minutes to appear. You only need to complete this step once at initial setup.
- Check the checkbox next to “CoreWeave AI Object Storage”.
- Close Preferences.
- Restart Cyberduck (close and re-open the application) for the profile to appear persistently in the ‘New Connection’ dropdown list.
- In Cyberduck’s menu bar, locate Connection Profiles:
Connect to CoreWeave AI Object Storage
When you open a connection from Cyberduck to AI Object Storage, you have the option to save a bookmark for more convenient access, but it’s not required.Open a connection
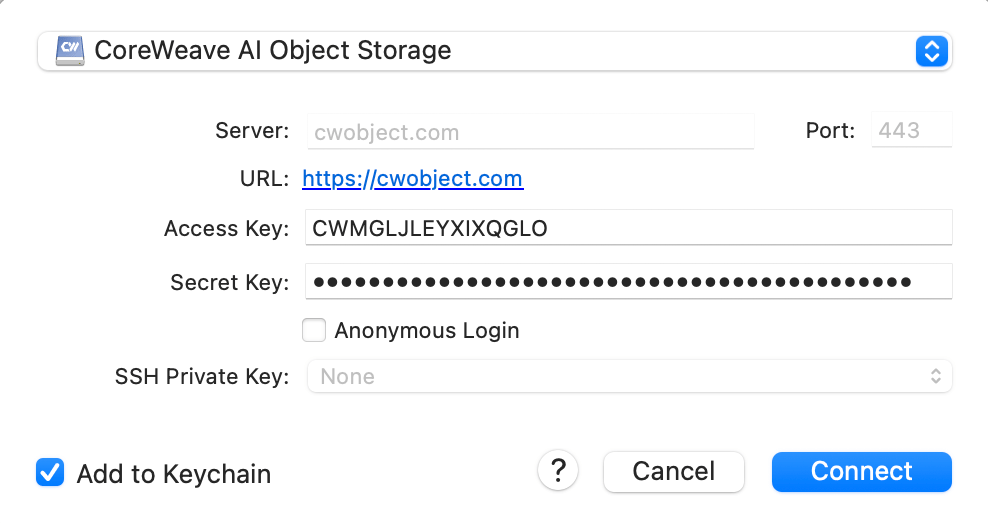
- Click the Open Connection toolbar button (or File ▸ Open Connection).
- Enter your CoreWeave AI Object Storage Access Key and Secret. For macOS, the “Add to Keychain” checkbox is selected by default at the bottom left. Uncheck this option if you prefer to enter your secret each time.
Save a bookmark
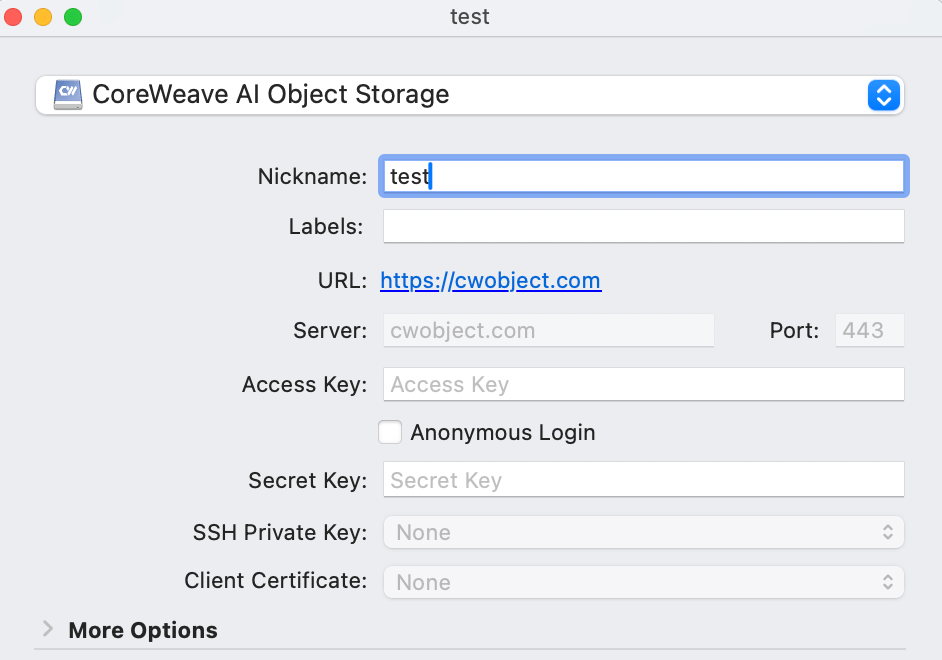
Bookmarks allow you to save connection settings, like a default path. When you save a bookmark in Cyberduck, it remains in your main Cyberduck browser window, labeled with its nickname and your access key.- In Cyberduck, open the Bookmark menu and select New Bookmark.
- Expand the dropdown menu at the top. Scroll to the bottom of the menu and select CoreWeave AI Object Storage.
- Give the connection a nickname.
- Optional: In macOS, you can create labels to organize and group your Cyberduck bookmarks.
- Enter your CoreWeave AI Object Storage Access Key and Secret.
- To bookmark your connection to a specific bucket, set your default path:
- Expand More Options.
- The Path field defaults to the root; append your bucket name. For example,
/test-bucket.
- Close the bookmark dialog window. Cyberduck saves the bookmark and displays it in the browser window.
- Double-click your new bookmark. The Cyberduck browser reflects the path if you set one; otherwise it displays the root-level view of all your buckets.
Manage AI Object Storage resources
This section shows how to manage buckets and files in Cyberduck.Create a new bucket in CoreWeave AI Object Storage
-
Open your bookmark and make sure you are connected to AI Object Storage. If you see the bookmark name at the top of the window with your access key ID displayed below it (like
CWESGLIQGQWMAUXM@cwobject.com), the connection is successful: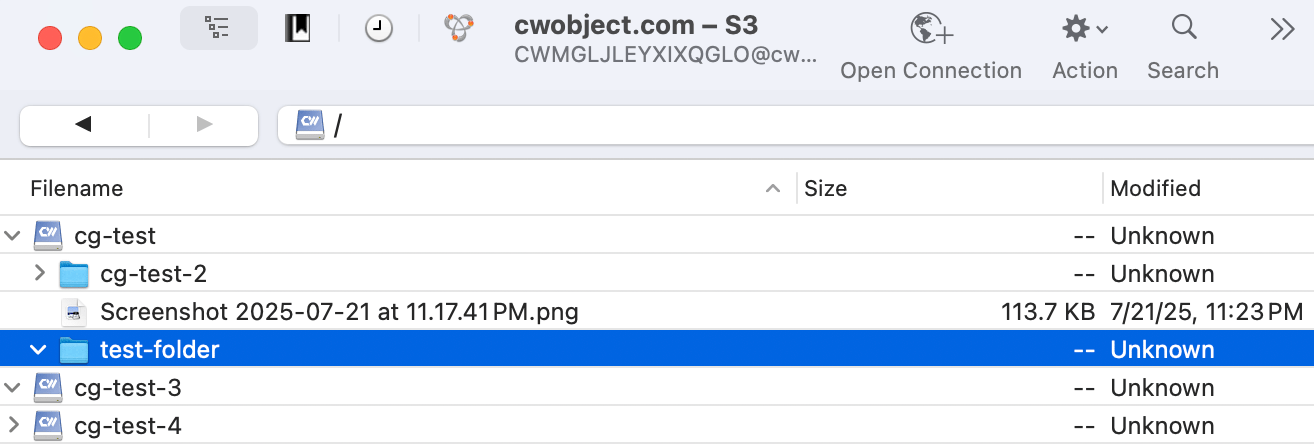
- Make sure no existing buckets are selected.
- Expand the Cyberduck browser window to view the Actions menu (gear icon). Expand this menu, and click New Folder. (Alternatively, use File > New Folder from the main menu, or right-click and select New Folder.)
-
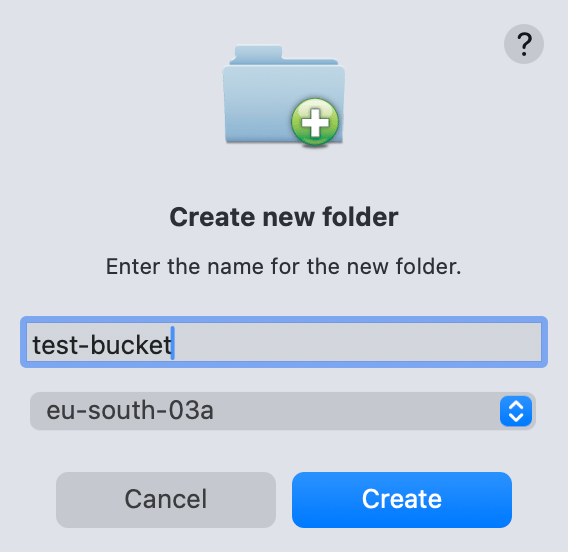
In the Create new folder dialog window, enter a name for your bucket and select the region.
Bucket naming rules
Bucket names must be globally unique and adhere to the following rules:- Length: 3 to 63 characters.
- Characters: Only lowercase letters (
a-z), numbers (0-9), and hyphens (-). No dots, uppercase letters, underscores, spaces, or other special characters. - Start and end: Must begin and end with a letter or number. Cannot start or end with a hyphen (
-). - Prohibited patterns: Cannot start with
xn--. - Reserved: Must not begin with
cw-,vip-, orlog-stitcher-ch-. Must not be the exact nameint. CoreWeave reserves these for internal use.
-
Click the Create button to create the bucket.
If you’re not prompted to select a region, you’re creating a folder inside an existing bucket. Deselect any selected buckets before creating a new bucket.
Create a new folder
To create a new folder within a bucket:- Select your bucket in the Cyberduck browser.
- Using the main Cyberduck menu, go to File > New Folder. (Alternatively, expand the Actions menu on the Cyberduck browser and click New Folder, or right-click and select New Folder.)
-
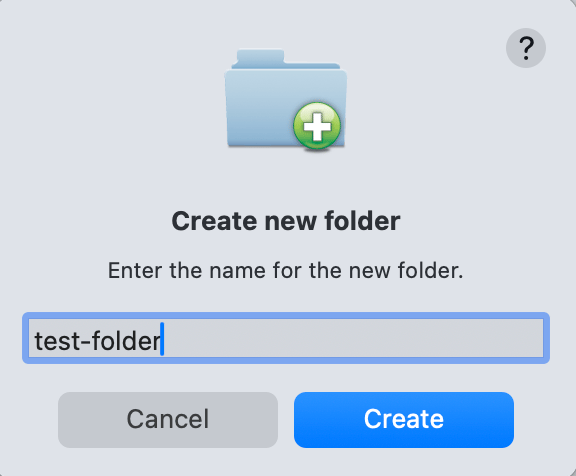
Enter a name for the folder, and click Create:
Upload files to the newly created bucket
- Open your file explorer and browse to the files you want to upload.
- Select the files and drag them into the Cyberduck window; hover over the newly created bucket until it is highlighted, and then drop in the files.
-
The Transfers window shows upload progress and status:

Browse and search files
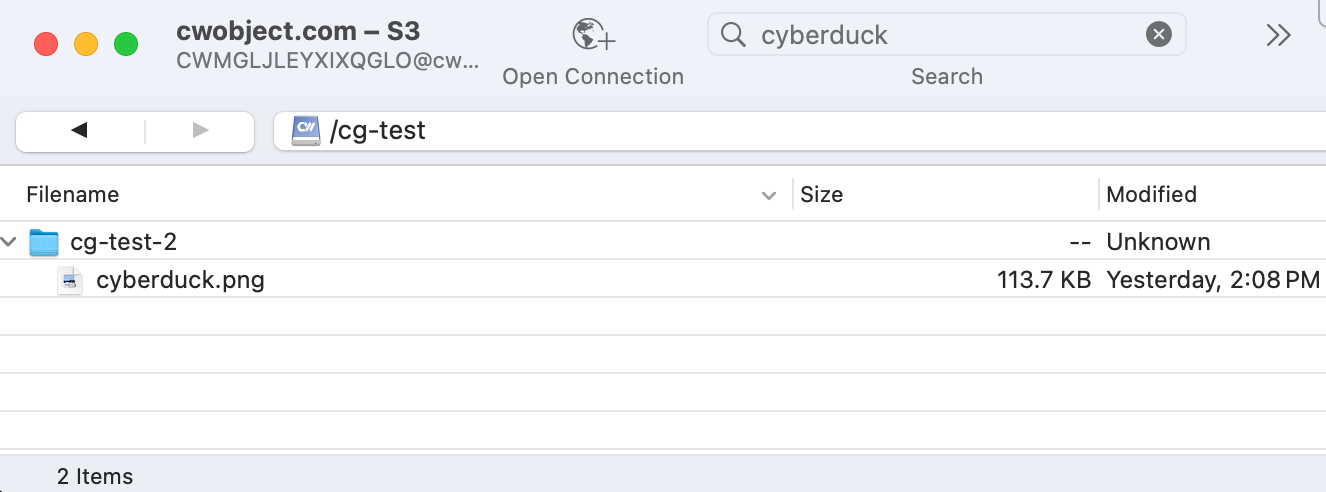
To browse files within a bucket:- In the root-level view, expand the carat next to the bucket name to view the subdirectories and objects.
- Alternatively, double-click the bucket and the Cyberduck browser shows only items in that bucket.
- Double-click the bucket you want to search. You should now see a list of files in the bucket.
- Click the Search icon at the top of the Cyberduck browser.
- Enter a search term to find files by name. Click Search to confirm in the dialog window. After a few moments, the Cyberduck browser displays your search results.
Delete resources
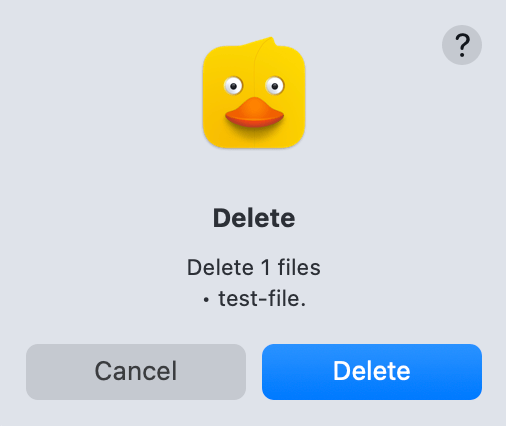
To delete files within a bucket:- Click into the bucket in the Cyberduck browser.
- Select the files you want to delete. Use command-click or right-click and select Delete.
-
The dialog window lists the items to delete. Click the Delete button to confirm:
- In the main Cyberduck browser, select the bucket(s) you want to delete.
- Command-click or right click and select Delete.
- The dialog window lists the items you wish to delete. Click the Delete button to confirm.