> ## Documentation Index
> Fetch the complete documentation index at: https://docs.coreweave.com/llms.txt
> Use this file to discover all available pages before exploring further.
# Use Workload Identity Federation with SAML
> Exchange SAML assertions for temporary AI Object Storage credentials using Workload Identity Federation
With SAML Workload Identity Federation, your workloads obtain a SAML assertion from your Identity Provider (IdP) and exchange it for temporary AI Object Storage credentials. This eliminates the need to store long-lived secrets in your applications.
This guide is for organization administrators and platform engineers who manage AI Object Storage access for automated workloads. It walks through the complete workflow: configure your SAML provider, create a WIF configuration in the Cloud Console, set up organization access policies, and exchange assertions for credentials. By the end, your workloads can authenticate with a SAML assertion and receive short-lived credentials scoped to the access policies you define.
## How SAML Workload Identity Federation works
Your workload obtains a SAML assertion from your identity provider and sends it to the AI Object Storage WIF endpoint. CoreWeave validates the assertion against your WIF configuration, parses the `Role` and `PrincipalName` attributes, and returns a temporary Access Key and Secret Key pair for AI Object Storage.
Your [organization access policies](/products/storage/object-storage/auth-access/organization-policies/about) and optional [bucket access policies](/products/storage/object-storage/auth-access/bucket-access/bucket-policies) determine what the returned credentials can do. The policies must reference the role as a principal.
Workload Identity Federation only generates temporary credentials. It doesn't manage AI Object Storage access policies, bucket policies, or Terraform state. You must configure policies separately and ensure they reference the correct WIF role principal.
Before using SAML for Workload Identity Federation, configure your organization's SAML SSO. See [Configure SAML SSO](/security/authn-authz/saml-sso/configure-saml-sso) for setup instructions.
## Prerequisites
Before you begin, ensure you have:
* A CoreWeave organization with AI Object Storage enabled.
* Administrator privileges for your organization (the **IAM Admin** role and **Object Storage Admin** role, or equivalent legacy access).
* A SAML Identity Provider configured to issue assertions with the required attributes (see [Required SAML attributes](#required-saml-attributes)).
## Step 1: Configure your SAML provider
Configure your IdP to issue SAML assertions for the workloads that need AI Object Storage access. The assertions must include the CoreWeave-specific attributes described in [Required SAML attributes](#required-saml-attributes).
### Required SAML attributes
Every SAML assertion must contain these CoreWeave-specific attributes:
| Attribute | Description |
| ----------------------------------------------------- | ----------------------------------------------------------------------------------------------------------------- |
| `https://coreweave.com/SAML/Attributes/Role` | The role for the credentials this call generates. CoreWeave uses this in access policy evaluation and audit logs. |
| `https://coreweave.com/SAML/Attributes/PrincipalName` | The principal (actor) that makes requests. You can use this in access policies, and it appears in audit logs. |
```xml title="Example: Role attribute" theme={"system"}
data-ingest
```
```xml title="Example: PrincipalName attribute" theme={"system"}
svc-data-pipeline@example.com
```
### SAML response configuration
Configure your IdP to set the following elements in the SAML response:
| Element | Value |
| ------------- | ----------------------------------------------------------------- |
| `Destination` | `https://console.coreweave.com/m2m-saml-acs` |
| `Recipient` | `https://console.coreweave.com/m2m-saml-acs` |
| `Audience` | `https://console.coreweave.com/accounts/saml/[ORG-UID]/metadata/` |
Replace `[ORG-UID]` with your organization's UID. You can find this on the [Settings page](https://console.coreweave.com/account/settings) in Cloud Console.
```xml title="Example SAML assertion" theme={"system"}
https://idp.example.com/d350ef80-d88e-4583-995c-704cee7672c6
https://idp.example.com/d350ef80-d88e-4583-995c-704cee7672c6
user@example.com
https://console.coreweave.com/accounts/saml/c972e1/metadata/
urn:oasis:names:tc:SAML:2.0:ac:classes:PasswordProtectedTransport
user@example.com
data-ingest
```
## Step 2: Create a Workload Identity Federation configuration in Cloud Console
Create a SAML Workload Identity Federation configuration to tell CoreWeave how to validate assertions from your IdP. The configuration links your IdP's signing certificate and entity ID to a Config ID that workloads reference when exchanging assertions.
1. Log in to the Cloud Console and navigate to the [Workload Federation](https://console.coreweave.com/organization/iam/workload-federation/saml) page.
2. Click **Create SAML configuration**. The configuration form opens:
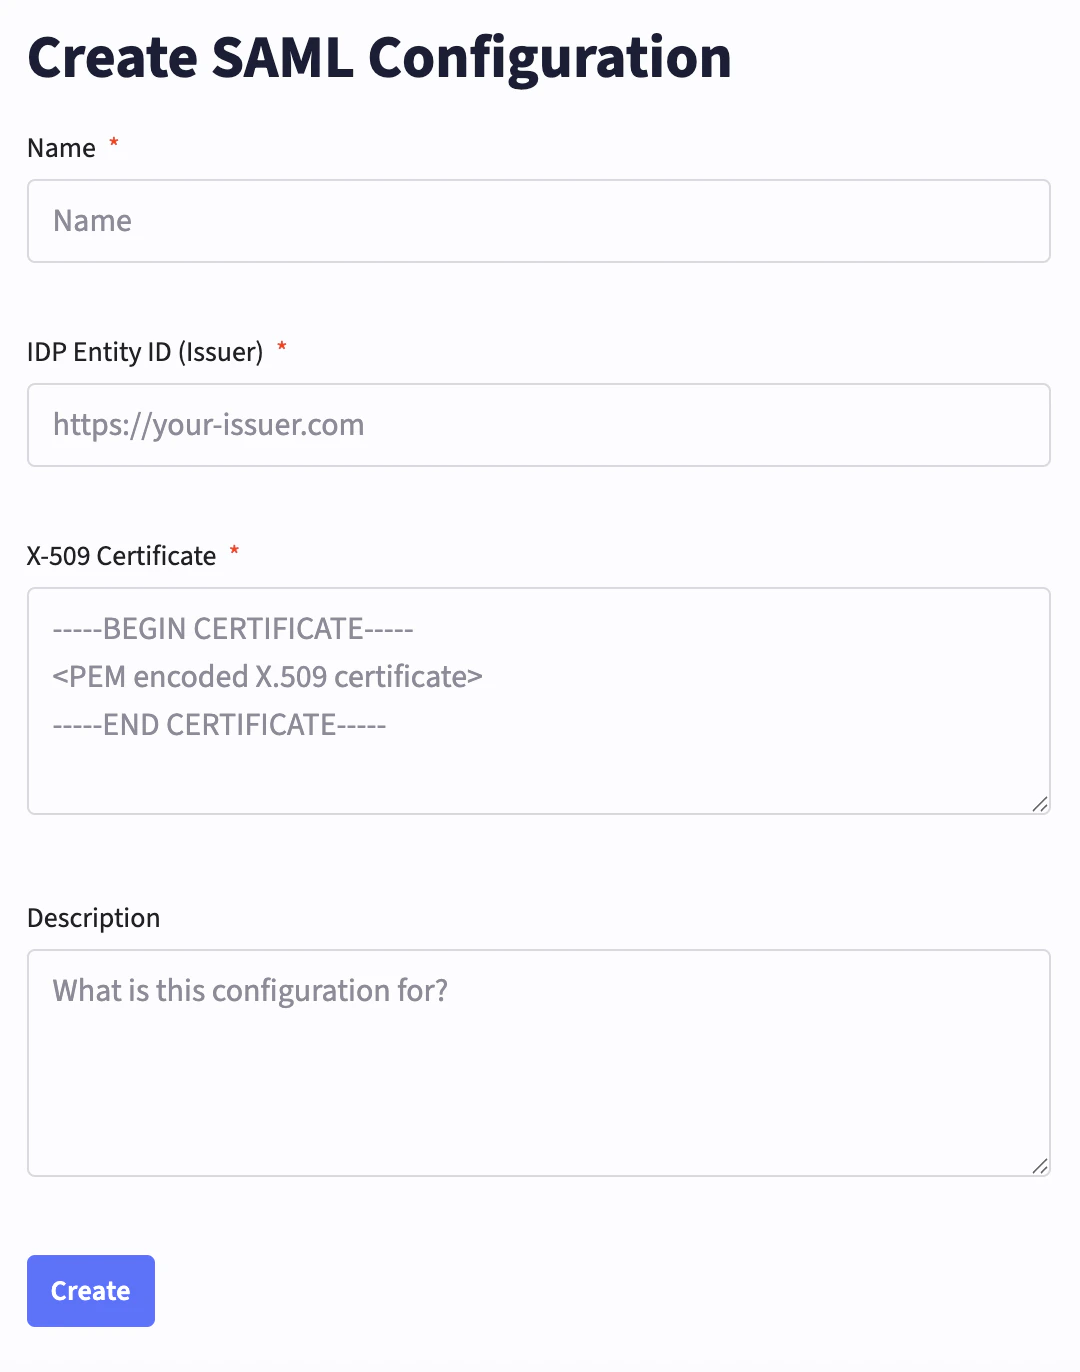 3. Provide the following values:
* **Name**: A unique name for the configuration.
* **IdP Entity ID**: Your identity provider's unique identifier, typically a URI or URL. You can find this value in your IdP's SAML metadata or SSO configuration settings. CoreWeave uses this to verify the source of SAML assertions.
* **X.509 Certificate**: The PEM-encoded public key certificate from your identity provider. CoreWeave uses this to verify that SAML assertions are digitally signed by your trusted IdP. You can typically find this in your IdP's SAML or SSO configuration settings.
* **Description**: A brief description of the configuration.
4. Click **Create** to save the configuration.
After creation, CoreWeave generates a **Config ID**. You use this ID when exchanging assertions for credentials. With the configuration saved, CoreWeave can now validate signed assertions from your IdP, but the role inside those assertions still needs permission to request credentials.
## Step 3: Create organization access policies
Organization access policies control what your SAML role can do. Before your workload can exchange SAML assertions for credentials, you must grant the `cwobject:CreateAccessKeySAML` action to the WIF role.
The principal for your SAML role uses the format `role/[ROLE-VALUE]`, where `[ROLE-VALUE]` matches the value in your SAML assertion's `Role` attribute.
The following policy grants the WIF role permission to create temporary credentials through the SAML endpoint. The `cwobject:` actions are global and must use `"resources": ["*"]`.
```json highlight={9-11} theme={"system"}
{
"policy": {
"version": "v1alpha1",
"name": "allow-saml-key-creation",
"statements": [
{
"name": "allow-create-access-key-from-saml",
"effect": "Allow",
"actions": [
"cwobject:CreateAccessKeySAML"
],
"resources": ["*"],
"principals": [
"role/data-ingest"
]
}
]
}
}
```
### Grant S3 permissions
Once your workload can create credentials, you need policies that grant those credentials permission to access buckets. This policy grants read and write access to a specific bucket:
```json highlight={19-21} theme={"system"}
{
"policy": {
"version": "v1alpha1",
"name": "data-ingest-read-write-my-bucket",
"statements": [
{
"name": "allow-data-ingest-rw-my-bucket",
"effect": "Allow",
"actions": [
"s3:Get*",
"s3:List*",
"s3:Put*",
"s3:DeleteObject"
],
"resources": [
"[BUCKET-NAME]",
"[BUCKET-NAME]/*"
],
"principals": [
"role/data-ingest"
]
}
]
}
}
```
### Example: Role-based access control with multiple roles
This policy demonstrates granting different access levels to different SAML roles:
```json theme={"system"}
{
"policy": {
"version": "v1alpha1",
"name": "role-based-access",
"statements": [
{
"name": "reader-access",
"effect": "Allow",
"actions": ["s3:Get*", "s3:List*"],
"resources": ["[BUCKET-NAME]/*"],
"principals": ["role/reader"]
},
{
"name": "writer-access",
"effect": "Allow",
"actions": ["s3:*"],
"resources": ["[BUCKET-NAME]/*"],
"principals": ["role/writer"]
},
{
"name": "admin-access",
"effect": "Allow",
"actions": ["*"],
"resources": ["*"],
"principals": ["role/admin"]
}
]
}
}
```
For more information, see [About organization access policies](/products/storage/object-storage/auth-access/organization-policies/about).
CoreWeave doesn't provide role management for AI Object Storage access. Role management is your responsibility. CoreWeave assumes that any access granted to a role through a SAML assertion from your organization's IdP is valid.
## Step 4: Add bucket access policies (optional)
Usually, organization access policies are sufficient. However, you can add bucket access policies when you need cross-organization access to specific buckets or bucket-level lifecycle configuration.
Organization access policies and bucket access policies have different syntax requirements:
| Aspect | Organization access policies | Bucket access policies |
| ---------- | ------------------------------------------------------- | --------------------------------------------------------------------------- |
| Principals | Short strings (for example, `role/data-ingest`) | Full ARNs (for example, `arn:aws:iam::[ORG-ID]:role/data-ingest`) |
| Resources | Short bucket names (`[BUCKET-NAME]`, `[BUCKET-NAME]/*`) | Full S3 ARNs (`arn:aws:s3:::[BUCKET-NAME]`, `arn:aws:s3:::[BUCKET-NAME]/*`) |
For more information, see [About bucket access policies](/products/storage/object-storage/auth-access/bucket-access/bucket-policies).
## Step 5: Exchange a SAML assertion for credentials
After your IdP, WIF configuration, and organization access policies are in place, your workload can request temporary credentials from CoreWeave. This step brings the previous configuration together at runtime.
Send an HTTP `POST` request to the SAML WIF endpoint:
```http theme={"system"}
POST https://api.coreweave.com/v1/cwobject/temporary-credentials/saml
Content-Type: application/json
{
"durationSeconds": 300,
"orgId": "[ORG-ID]",
"configId": "[WIF-CONFIG-ID]",
"samlResponse": "[BASE64-ENCODED-SAML-RESPONSE]"
}
```
| Field | Description |
| ----------------- | ---------------------------------------------------------------------------------------------------------------------------------- |
| `durationSeconds` | Lifetime of the credentials in seconds, up to a maximum of 12 hours. |
| `orgId` | Your CoreWeave organization ID. Find this on the [Settings page](https://console.coreweave.com/account/settings) in Cloud Console. |
| `configId` | The Config ID generated when you created your WIF configuration. |
| `samlResponse` | The base64-encoded SAML response from your IdP. |
On success, CoreWeave validates the assertion, parses the role and principal, and returns an Access Key and Secret Key pair that is valid for the requested duration. The credentials inherit permissions from your organization access policies and any applicable bucket policies.
## Step 6: Use the temporary credentials
Use the returned Access Key and Secret Key with any S3-compatible client. Configure the client with the AI Object Storage endpoint `https://cwobject.com`.
These credentials are temporary. Your workload should refresh them by calling the SAML WIF endpoint again before they expire. The permissions available to the client are the permissions granted to the WIF role in your access policies.
For client configuration examples, see [Get started with AI Object Storage](/products/storage/object-storage/get-started-caios).
## Troubleshooting
The following sections cover the most common failure modes when you set up SAML WIF, and where to look first.
### Assertion exchange returns "permission denied"
If the `/temporary-credentials/saml` call returns an error like `{"code": 7, "message": "permission denied", "details": []}`, check:
* **Missing cwobject permission**: Ensure your organization access policy grants `cwobject:CreateAccessKeySAML` to the WIF role. This permission is required for the assertion exchange to succeed.
* **Assertion validity**: Ensure your IdP signs the assertion and that the signature validates against the X.509 certificate in your WIF configuration.
* **Config ID**: Verify you're using the correct Config ID from your WIF configuration.
* **Timing**: Ensure the assertion isn't expired (`NotOnOrAfter`) and isn't used before `NotBefore`.
### Assertion exchange succeeds but S3 operations return AccessDenied
If you receive credentials but S3 operations fail, the issue is in your access policies. Check that at least one organization access policy:
* Allows the needed `s3:*` actions (for example, `s3:Get*`, `s3:List*`, `s3:Put*`).
* Uses the correct short-form resources (`"[BUCKET-NAME]"`, `"[BUCKET-NAME]/*"`).
* Lists the correct WIF role in `principals` using the format `role/[ROLE-VALUE]`.
If you're using bucket access policies in addition to organization policies, confirm they allow the required actions for the relevant principal ARNs. Be aware that explicit `Deny` statements can override other `Allow` statements.
3. Provide the following values:
* **Name**: A unique name for the configuration.
* **IdP Entity ID**: Your identity provider's unique identifier, typically a URI or URL. You can find this value in your IdP's SAML metadata or SSO configuration settings. CoreWeave uses this to verify the source of SAML assertions.
* **X.509 Certificate**: The PEM-encoded public key certificate from your identity provider. CoreWeave uses this to verify that SAML assertions are digitally signed by your trusted IdP. You can typically find this in your IdP's SAML or SSO configuration settings.
* **Description**: A brief description of the configuration.
4. Click **Create** to save the configuration.
After creation, CoreWeave generates a **Config ID**. You use this ID when exchanging assertions for credentials. With the configuration saved, CoreWeave can now validate signed assertions from your IdP, but the role inside those assertions still needs permission to request credentials.
## Step 3: Create organization access policies
Organization access policies control what your SAML role can do. Before your workload can exchange SAML assertions for credentials, you must grant the `cwobject:CreateAccessKeySAML` action to the WIF role.
The principal for your SAML role uses the format `role/[ROLE-VALUE]`, where `[ROLE-VALUE]` matches the value in your SAML assertion's `Role` attribute.
The following policy grants the WIF role permission to create temporary credentials through the SAML endpoint. The `cwobject:` actions are global and must use `"resources": ["*"]`.
```json highlight={9-11} theme={"system"}
{
"policy": {
"version": "v1alpha1",
"name": "allow-saml-key-creation",
"statements": [
{
"name": "allow-create-access-key-from-saml",
"effect": "Allow",
"actions": [
"cwobject:CreateAccessKeySAML"
],
"resources": ["*"],
"principals": [
"role/data-ingest"
]
}
]
}
}
```
### Grant S3 permissions
Once your workload can create credentials, you need policies that grant those credentials permission to access buckets. This policy grants read and write access to a specific bucket:
```json highlight={19-21} theme={"system"}
{
"policy": {
"version": "v1alpha1",
"name": "data-ingest-read-write-my-bucket",
"statements": [
{
"name": "allow-data-ingest-rw-my-bucket",
"effect": "Allow",
"actions": [
"s3:Get*",
"s3:List*",
"s3:Put*",
"s3:DeleteObject"
],
"resources": [
"[BUCKET-NAME]",
"[BUCKET-NAME]/*"
],
"principals": [
"role/data-ingest"
]
}
]
}
}
```
### Example: Role-based access control with multiple roles
This policy demonstrates granting different access levels to different SAML roles:
```json theme={"system"}
{
"policy": {
"version": "v1alpha1",
"name": "role-based-access",
"statements": [
{
"name": "reader-access",
"effect": "Allow",
"actions": ["s3:Get*", "s3:List*"],
"resources": ["[BUCKET-NAME]/*"],
"principals": ["role/reader"]
},
{
"name": "writer-access",
"effect": "Allow",
"actions": ["s3:*"],
"resources": ["[BUCKET-NAME]/*"],
"principals": ["role/writer"]
},
{
"name": "admin-access",
"effect": "Allow",
"actions": ["*"],
"resources": ["*"],
"principals": ["role/admin"]
}
]
}
}
```
For more information, see [About organization access policies](/products/storage/object-storage/auth-access/organization-policies/about).
CoreWeave doesn't provide role management for AI Object Storage access. Role management is your responsibility. CoreWeave assumes that any access granted to a role through a SAML assertion from your organization's IdP is valid.
## Step 4: Add bucket access policies (optional)
Usually, organization access policies are sufficient. However, you can add bucket access policies when you need cross-organization access to specific buckets or bucket-level lifecycle configuration.
Organization access policies and bucket access policies have different syntax requirements:
| Aspect | Organization access policies | Bucket access policies |
| ---------- | ------------------------------------------------------- | --------------------------------------------------------------------------- |
| Principals | Short strings (for example, `role/data-ingest`) | Full ARNs (for example, `arn:aws:iam::[ORG-ID]:role/data-ingest`) |
| Resources | Short bucket names (`[BUCKET-NAME]`, `[BUCKET-NAME]/*`) | Full S3 ARNs (`arn:aws:s3:::[BUCKET-NAME]`, `arn:aws:s3:::[BUCKET-NAME]/*`) |
For more information, see [About bucket access policies](/products/storage/object-storage/auth-access/bucket-access/bucket-policies).
## Step 5: Exchange a SAML assertion for credentials
After your IdP, WIF configuration, and organization access policies are in place, your workload can request temporary credentials from CoreWeave. This step brings the previous configuration together at runtime.
Send an HTTP `POST` request to the SAML WIF endpoint:
```http theme={"system"}
POST https://api.coreweave.com/v1/cwobject/temporary-credentials/saml
Content-Type: application/json
{
"durationSeconds": 300,
"orgId": "[ORG-ID]",
"configId": "[WIF-CONFIG-ID]",
"samlResponse": "[BASE64-ENCODED-SAML-RESPONSE]"
}
```
| Field | Description |
| ----------------- | ---------------------------------------------------------------------------------------------------------------------------------- |
| `durationSeconds` | Lifetime of the credentials in seconds, up to a maximum of 12 hours. |
| `orgId` | Your CoreWeave organization ID. Find this on the [Settings page](https://console.coreweave.com/account/settings) in Cloud Console. |
| `configId` | The Config ID generated when you created your WIF configuration. |
| `samlResponse` | The base64-encoded SAML response from your IdP. |
On success, CoreWeave validates the assertion, parses the role and principal, and returns an Access Key and Secret Key pair that is valid for the requested duration. The credentials inherit permissions from your organization access policies and any applicable bucket policies.
## Step 6: Use the temporary credentials
Use the returned Access Key and Secret Key with any S3-compatible client. Configure the client with the AI Object Storage endpoint `https://cwobject.com`.
These credentials are temporary. Your workload should refresh them by calling the SAML WIF endpoint again before they expire. The permissions available to the client are the permissions granted to the WIF role in your access policies.
For client configuration examples, see [Get started with AI Object Storage](/products/storage/object-storage/get-started-caios).
## Troubleshooting
The following sections cover the most common failure modes when you set up SAML WIF, and where to look first.
### Assertion exchange returns "permission denied"
If the `/temporary-credentials/saml` call returns an error like `{"code": 7, "message": "permission denied", "details": []}`, check:
* **Missing cwobject permission**: Ensure your organization access policy grants `cwobject:CreateAccessKeySAML` to the WIF role. This permission is required for the assertion exchange to succeed.
* **Assertion validity**: Ensure your IdP signs the assertion and that the signature validates against the X.509 certificate in your WIF configuration.
* **Config ID**: Verify you're using the correct Config ID from your WIF configuration.
* **Timing**: Ensure the assertion isn't expired (`NotOnOrAfter`) and isn't used before `NotBefore`.
### Assertion exchange succeeds but S3 operations return AccessDenied
If you receive credentials but S3 operations fail, the issue is in your access policies. Check that at least one organization access policy:
* Allows the needed `s3:*` actions (for example, `s3:Get*`, `s3:List*`, `s3:Put*`).
* Uses the correct short-form resources (`"[BUCKET-NAME]"`, `"[BUCKET-NAME]/*"`).
* Lists the correct WIF role in `principals` using the format `role/[ROLE-VALUE]`.
If you're using bucket access policies in addition to organization policies, confirm they allow the required actions for the relevant principal ARNs. Be aware that explicit `Deny` statements can override other `Allow` statements.