> ## Documentation Index
> Fetch the complete documentation index at: https://docs.coreweave.com/llms.txt
> Use this file to discover all available pages before exploring further.
# Run marimo notebooks on CKS
> Run reactive Python notebooks on CKS with persistent storage and AI Object Storage integration
[marimo](https://marimo.io) is an [open source](https://github.com/marimo-team/marimo) Python notebook designed specifically for machine learning and AI.
This tutorial shows you how to develop with marimo notebooks on CKS, including connecting to CoreWeave Object Storage for data access. It targets cluster administrators who install platform components and researchers and data scientists who want to run reactive Python notebooks on CKS with persistent storage. By the end, you have a marimo notebook running on your cluster with optional access to data in a CoreWeave AI Object Storage bucket.
In this tutorial, you:
1. **Install the marimo operator** on your CKS cluster (for cluster administrators).
2. **Run notebooks with the CLI plugin** (recommended for researchers).
3. **Connect to CoreWeave Object Storage** to access data from your notebooks.
4. **Deploy with manifests** for advanced configuration.
Before you start, you must have:
* A CKS cluster with available resources.
* `kubectl` installed and configured to access your cluster.
* Python 3.10+ with `pip` or `uv`.
* [CoreWeave Intelligent CLI](https://github.com/coreweave/cwic) for storage setup.
* [S3cmd](https://s3tools.org/download) for storage setup.
You'll use these tools:
* [**marimo-operator**](https://github.com/marimo-team/marimo-operator): Manages notebook deployments on Kubernetes.
* [**kubectl-marimo**](https://pypi.org/project/kubectl-marimo/): CLI plugin for running notebooks on Kubernetes.
* [**CoreWeave AI Object Storage**](/products/storage/object-storage): S3-compatible storage for data access.
## Install the marimo operator
This section is for cluster administrators who install the marimo operator on CKS clusters. The operator is a cluster-wide component that manages marimo notebook deployments, so you only install it once per cluster. If the operator is already installed on your cluster, skip to [Install the marimo CLI plugin](#install-the-marimo-cli-plugin).
To use marimo within a CKS cluster, install the marimo operator:
1. Install the operator:
```bash theme={"system"}
kubectl apply -f https://raw.githubusercontent.com/marimo-team/marimo-operator/main/deploy/install.yaml
```
2. Verify the operator is running:
```bash theme={"system"}
kubectl get pods -n marimo-operator-system
```
The output should show the operator pod in a `Running` state:
```text theme={"system"}
NAME READY STATUS RESTARTS AGE
marimo-operator-controller-manager-xxxxx 1/1 Running 0 30s
```
## Install the marimo CLI plugin
The CLI plugin is the quickest way to run notebooks. It handles manifest generation, port forwarding, and credential management automatically, so most researchers interact with marimo on CKS through this plugin.
To install the marimo CLI plugin, install `kubectl-marimo`:
```bash theme={"system"}
# With uv (recommended)
uv tool install kubectl-marimo
# Or with pip
pip install kubectl-marimo
```
## Run a marimo notebook on CKS
After installing the operator and CLI plugin, you can run marimo notebooks on your cluster. This section walks through opening a notebook in the marimo editor and confirms what happens when you start and stop a session.
If you're new to marimo, you can use one of the pre-written CPU or GPU notebooks. For more information about these example notebooks, go to the [marimo operator examples page](https://github.com/marimo-team/marimo-operator/tree/main/plugin/examples).
> **CPU notebook**
>
> ```bash theme={"system"}
> curl -O https://raw.githubusercontent.com/marimo-team/marimo-operator/main/plugin/examples/getting-started.py
> kubectl marimo edit getting-started.py
> ```
>
> **GPU notebook**
>
> ```bash theme={"system"}
> curl -O https://raw.githubusercontent.com/marimo-team/marimo-operator/main/plugin/examples/gpu-getting-started.py
> kubectl marimo edit gpu-getting-started.py
> ```
1. Run and edit a notebook interactively:
```bash theme={"system"}
kubectl marimo edit [EXAMPLE-NOTEBOOK].py
```
Replace `[EXAMPLE-NOTEBOOK].py` with the path to a marimo notebook. If you don't have a marimo notebook, you can create a file with a `.py` extension to use as a starting point. You can also use one of the preceding pre-written notebooks, such as the CPU or GPU notebook.
This command does the following:
* Uploads your notebook to the cluster.
* Creates persistent storage for your changes.
* Starts the marimo server.
* Provides a URL where you can access your notebook. Your notebook opens at `http://localhost:[PORT]`, which runs until you close the connection with `ctrl-C`.
After you close the connection with `ctrl-C` and choose to delete the pod, the plugin:
* Syncs changes you made to your notebook back to your local machine.
* Tears down your pod.
2. To edit a notebook without storage sync and management:
```bash theme={"system"}
kubectl marimo edit --headless notebook.py
```
To run a notebook as a read-only application (useful for dashboards), use `kubectl marimo run --headless notebook.py` instead.
### Specify resources
After you have a notebook running, you can configure the cluster resources it uses, such as image, storage size, and environment variables. You can configure notebook resources directly in your notebook files using Python metadata and frontmatter.
In addition to resource specification, `marimo-operator` sandboxes your environments through the [`marimo` sandbox specification](https://docs.marimo.io/guides/package_management/notebooks_in_projects/).
**Python marimo notebooks (.py):**
```python theme={"system"}
# /// script
# dependencies = ["marimo", "pandas", "numpy"]
#
# [tool.marimo.k8s]
# image = "ghcr.io/marimo-team/marimo:latest"
# storage = "5Gi"
# mounts = ["cw://[BUCKET-NAME]/data"]
# [tool.marimo.k8s.env]
# DEBUG = "true"
# ///
#
```
**Markdown marimo notebooks (.md):**
```yaml theme={"system"}
---
title: my-analysis
image: ghcr.io/marimo-team/marimo:latest
storage: 5Gi
mounts:
- cw://[BUCKET-NAME]/data
env:
DEBUG: "true"
---
```
### Configuration fields
| Field | Description | Default |
| ----------- | ---------------------------------------- | --------------------------------- |
| `title` | Resource name in Kubernetes | filename |
| `image` | Container image | ghcr.io/marimo-team/marimo:latest |
| `port` | Server port | 2718 |
| `storage` | Persistent volume size | none (ephemeral) |
| `resources` | CPU, memory, and GPU requests and limits | none |
| `auth` | Set to "none" to disable authentication | token auth |
| `env` | Environment variables | none |
| `mounts` | Data source URIs to mount | none |
### Resource requests and limits
Specify CPU, memory, and GPU resources using Kubernetes resource quantity format.
**Python notebooks (.py):**
```python theme={"system"}
# /// script
# [tool.marimo.k8s.resources]
# requests.cpu = "500m"
# requests.memory = "2Gi"
# limits.cpu = "2"
# limits.memory = "8Gi"
# limits."nvidia.com/gpu" = 1
# ///
```
**Markdown notebooks (.md):**
```yaml theme={"system"}
---
resources:
requests:
cpu: "500m"
memory: "2Gi"
limits:
cpu: "2"
memory: "8Gi"
nvidia.com/gpu: 1
---
```
* **GPU workloads**. For GPU workloads on CoreWeave, specifying `nvidia.com/gpu` in limits is typically sufficient. The scheduler places your notebook on an appropriate GPU Node. For advanced scheduling (specific GPU types, Node affinity), use [manifest-based deployment](#with-gpu-resources).
* **CRD information**. For the full CRD specification including advanced features like `podOverrides`, `sidecars`, and custom authentication, see the [marimo-operator documentation](https://github.com/marimo-team/marimo-operator).
### Mount URI schemes
| Scheme | Description | Example |
| ---------- | ------------------------ | --------------------------- |
| `cw://` | CoreWeave Object Storage | `cw://bucket/path` |
| `sshfs://` | SSH filesystem mount | `sshfs://user@host:/path` |
| `rsync://` | Local directory sync | `rsync://./data:/notebooks` |
#### Local and bidirectional sync
Local `rsync://` URIs (like `rsync://./data`) sync a local directory to the pod. Remote URIs (like `rsync://user@host:/path`) create continuous bidirectional sync.
### Connect to CoreWeave AI Object Storage
Mount CoreWeave AI Object Storage buckets in your notebooks with automatic credential management. The following steps create a CoreWeave API token, configure local S3 credentials, create a bucket, and mount that bucket into a notebook. You can then read and write data from Python code.
1. Log in to the CoreWeave Intelligent CLI:
```bash theme={"system"}
cwic auth login
```
The following prompt appears and a browser opens the CoreWeave Console:
```text theme={"system"}
Opening browser for authentication...
Please visit: https://console.coreweave.com/tokens
Please enter the token from the browser:
```
2. In the Console, create a new token by selecting **Create Token**, and provide a name and expiration.
3. Paste the token secret into the CoreWeave Intelligent CLI prompt here:
```text theme={"system"}
Please enter the token from the browser:
```
4. Use the CoreWeave Intelligent CLI to create an access token for creating AI Object Storage buckets:
```bash theme={"system"}
cwic cwobject token create --name [TOKEN-NAME] --duration Permanent
```
Replace `[TOKEN-NAME]` with your token name, for example, `marimo-bucket-token`. Save the Access Key ID and Secret Key from the output.
5. Configure your local AI Object Storage credentials (one-time setup).
Create an `.s3cfg` file because the CoreWeave Intelligent CLI uses [S3cmd](https://s3tools.org/s3cmd) to create buckets.
```bash theme={"system"}
cat >> ~/.s3cfg << EOF
[marimo]
access_key = CWXXXXXXXXXX
secret_key = cwXXXXXXXXXXXXXXXXXXXXXXXXXXXXXXXXXXXXXXXX
host_base = cwobject.com
host_bucket = %(bucket)s.cwobject.com
use_https = True
bucket_location = [AVAILABILITY-ZONE]
EOF
```
Replace the `access_key` and `secret_key` values with your actual Access Key ID and Secret Key. Replace `[AVAILABILITY-ZONE]` with your zone, for example, `US-EAST-04A`.
6. Create a bucket.
```bash theme={"system"}
cwic cwobject mb [BUCKET-NAME]
```
Replace `[BUCKET-NAME]` with your bucket name, for example, `my-notebook-data`.
7. Create a file and add it to the bucket:
```bash theme={"system"}
touch some-data.txt
s3cmd put ./some-data.txt s3://[BUCKET-NAME]/
```
Replace `[BUCKET-NAME]` with your bucket name.
8. Deploy with storage mounted:
```bash theme={"system"}
kubectl marimo edit --source=cw://[BUCKET-NAME] [NOTEBOOK-NAME].py
```
Replace `[BUCKET-NAME]` and `[NOTEBOOK-NAME].py` with the names of your bucket and notebook.
The plugin automatically creates the Kubernetes secret from your `~/.s3cfg` file, with no manual `kubectl create secret` required.
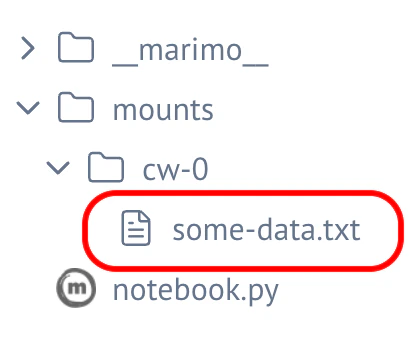
9. Access your data in the notebook:
Files are mounted at `/home/marimo/notebooks/mounts/cw-0/`:
In the marimo notebook, access the mounted storage from the files menu under **mounts** > **cw-0**:
 You can also add this script to the notebook as an example of accessing the mounted storage:
```python theme={"system"}
import os
mount_path = "/home/marimo/notebooks/mounts/cw-0"
# List files in the bucket
files = os.listdir(mount_path)
print(f"Files: {files}")
```
The mount supports full read and write access. Any files you create or modify in the mount directory are saved to your S3-compatible bucket.
### Sync and manage deployments manually
In some workflows, you keep a notebook running while still capturing changes locally, or you remove a deployment when finished. The following commands give you that manual control outside of the automatic sync that happens when you exit `kubectl marimo edit`.
When you're done editing, sync your changes back to your local file without stopping the instance:
```bash theme={"system"}
kubectl marimo sync [NOTEBOOK].py
```
Replace `[NOTEBOOK].py` with your notebook name.
Delete the deployment when finished:
```bash theme={"system"}
kubectl marimo delete [NOTEBOOK].py
```
Replace `[NOTEBOOK].py` with your notebook name.
List all active notebook deployments:
```bash theme={"system"}
kubectl marimo status
```
## CLI plugin reference
This section lists the commands available in the `kubectl-marimo` plugin, along with their options.
### Commands
The plugin provides the following commands for managing notebooks on your cluster.
#### edit
Run a notebook and launch the marimo editor.
```bash theme={"system"}
kubectl marimo edit [OPTIONS] [FILE]
```
| Option | Description |
| ----------------- | ---------------------------------------------------------- |
| `-n, --namespace` | Kubernetes namespace (default: "default") |
| `--source` | Data source URI to mount (cw://, sshfs\://, rsync://) |
| `--dry-run` | Print the generated YAML without applying |
| `--headless` | Deploy without port-forward or browser (for CI or scripts) |
| `-f, --force` | Overwrite existing deployment without prompting |
Examples:
```bash theme={"system"}
kubectl marimo edit notebook.py
kubectl marimo edit --source=cw://[BUCKET-NAME]/data notebook.py
kubectl marimo edit -n staging --headless notebook.py
```
#### run
Deploy a notebook as a read-only application (useful for dashboards).
```bash theme={"system"}
kubectl marimo run [OPTIONS] [FILE]
```
Options are the same as `edit`.
#### sync
Pull changes from the cluster back to your local file.
```bash theme={"system"}
kubectl marimo sync [OPTIONS] [FILE]
```
| Option | Description |
| ----------------- | -------------------------------------- |
| `-n, --namespace` | Kubernetes namespace |
| `-f, --force` | Overwrite local file without prompting |
#### delete
Remove a notebook deployment from the cluster.
```bash theme={"system"}
kubectl marimo delete [OPTIONS] [FILE]
```
| Option | Description |
| ----------------- | ----------------------------------------- |
| `-n, --namespace` | Kubernetes namespace |
| `--delete-pvc` | Remove persistent storage after deletion |
| `--no-sync` | Delete without syncing changes back first |
#### status
List active notebook deployments.
```bash theme={"system"}
kubectl marimo status
```
## Deploy with manifests
If you need fine-grained control beyond what the CLI plugin provides, deploy notebooks by applying `MarimoNotebook` resources directly. For example, use this approach to integrate with GitOps workflows or to set scheduling and authentication options. This section shows a basic manifest, then adds storage and GPU resources.
### Basic manifest
1. Create a file named `notebook.yaml`:
```yaml title="notebook.yaml" theme={"system"}
apiVersion: marimo.io/v1alpha1
kind: MarimoNotebook
metadata:
name: my-notebook
spec:
source: https://github.com/marimo-team/examples.git # Must be a valid .git repository path.
storage:
size: 1Gi
```
2. Apply the manifest:
```bash theme={"system"}
kubectl apply -f notebook.yaml
```
3. Check the status:
```bash theme={"system"}
kubectl get marimos
```
The output shows your notebook and its status:
```text theme={"system"}
NAME PHASE URL AGE
my-notebook Running http://my-notebook:2718 45s
```
4. To access the notebook, set up port forwarding:
```bash theme={"system"}
kubectl port-forward service/my-notebook 2718:2718
```
5. Get the URL with the access token by getting the Pod's logs:
```bash theme={"system"}
kubectl logs [MARIMO-NAME]
```
Replace `[MARIMO-NAME]` with the manifest name.
6. Copy the URL with the access token and paste it into your browser. You should now see the notebook defined in the manifest's `source` field.
### Add storage manually
To manually add storage, complete the following steps:
1. Create the credentials secret:
```bash theme={"system"}
kubectl create secret generic cw-credentials \
--from-literal=AWS_ACCESS_KEY_ID=CWXXXXXXXXXX \
--from-literal=AWS_SECRET_ACCESS_KEY=cwXXXXXXXXXXXXXX
```
2. Add mounts to your manifest:
```yaml theme={"system"}
apiVersion: marimo.io/v1alpha1
kind: MarimoNotebook
metadata:
name: my-notebook
spec:
source: https://github.com/marimo-team/examples.git # Must be a valid .git repository path.
storage:
size: 5Gi
mounts:
- cw://my-notebook-data
```
### Add GPU resources
To run notebooks with GPU access, specify resource requests and limits:
```yaml highlight={13-16} theme={"system"}
apiVersion: marimo.io/v1alpha1
kind: MarimoNotebook
metadata:
name: gpu-notebook
spec:
source: https://github.com/your-org/notebooks.git # Must be a valid .git repository path.
storage:
size: 5Gi
resources:
requests:
cpu: "500m"
memory: 4Gi
limits:
cpu: "4"
memory: 16Gi
nvidia.com/gpu: 1
```
For specific GPU types or Node placement, use `podOverrides`:
```yaml highlight={17-19} theme={"system"}
apiVersion: marimo.io/v1alpha1
kind: MarimoNotebook
metadata:
name: gpu-notebook
spec:
source: https://github.com/your-org/notebooks.git # Must be a valid .git repository path.
storage:
size: 5Gi
resources:
requests:
cpu: "500m"
memory: 4Gi
limits:
cpu: "4"
memory: 16Gi
nvidia.com/gpu: 1
podOverrides:
nodeSelector:
gpu.nvidia.com/class: Quadro_RTX_4000
tolerations:
- key: nvidia.com/gpu
operator: Exists
effect: NoSchedule
```
## Clean up
When you're finished with the tutorial, remove the notebook resources from your cluster to free up compute and storage.
Delete your notebook deployment:
```bash theme={"system"}
kubectl delete marimo [MARIMO-NAME]
```
Replace `[MARIMO-NAME]` with the name in the manifest.
Using `kubectl delete` directly does **not** sync your changes back to your local file.
* Run `kubectl marimo sync` to sync local changes.
* Run `kubectl marimo delete` to automatically sync before deletion.
* Run `kubectl marimo delete --delete-pvc` to also delete the persistent data.
## Additional resources
For more information, see the following resources:
* [marimo documentation](https://docs.marimo.io)
* [marimo-operator on GitHub](https://github.com/marimo-team/marimo-operator)
* [CoreWeave Object Storage](/products/storage/object-storage)
You can also add this script to the notebook as an example of accessing the mounted storage:
```python theme={"system"}
import os
mount_path = "/home/marimo/notebooks/mounts/cw-0"
# List files in the bucket
files = os.listdir(mount_path)
print(f"Files: {files}")
```
The mount supports full read and write access. Any files you create or modify in the mount directory are saved to your S3-compatible bucket.
### Sync and manage deployments manually
In some workflows, you keep a notebook running while still capturing changes locally, or you remove a deployment when finished. The following commands give you that manual control outside of the automatic sync that happens when you exit `kubectl marimo edit`.
When you're done editing, sync your changes back to your local file without stopping the instance:
```bash theme={"system"}
kubectl marimo sync [NOTEBOOK].py
```
Replace `[NOTEBOOK].py` with your notebook name.
Delete the deployment when finished:
```bash theme={"system"}
kubectl marimo delete [NOTEBOOK].py
```
Replace `[NOTEBOOK].py` with your notebook name.
List all active notebook deployments:
```bash theme={"system"}
kubectl marimo status
```
## CLI plugin reference
This section lists the commands available in the `kubectl-marimo` plugin, along with their options.
### Commands
The plugin provides the following commands for managing notebooks on your cluster.
#### edit
Run a notebook and launch the marimo editor.
```bash theme={"system"}
kubectl marimo edit [OPTIONS] [FILE]
```
| Option | Description |
| ----------------- | ---------------------------------------------------------- |
| `-n, --namespace` | Kubernetes namespace (default: "default") |
| `--source` | Data source URI to mount (cw://, sshfs\://, rsync://) |
| `--dry-run` | Print the generated YAML without applying |
| `--headless` | Deploy without port-forward or browser (for CI or scripts) |
| `-f, --force` | Overwrite existing deployment without prompting |
Examples:
```bash theme={"system"}
kubectl marimo edit notebook.py
kubectl marimo edit --source=cw://[BUCKET-NAME]/data notebook.py
kubectl marimo edit -n staging --headless notebook.py
```
#### run
Deploy a notebook as a read-only application (useful for dashboards).
```bash theme={"system"}
kubectl marimo run [OPTIONS] [FILE]
```
Options are the same as `edit`.
#### sync
Pull changes from the cluster back to your local file.
```bash theme={"system"}
kubectl marimo sync [OPTIONS] [FILE]
```
| Option | Description |
| ----------------- | -------------------------------------- |
| `-n, --namespace` | Kubernetes namespace |
| `-f, --force` | Overwrite local file without prompting |
#### delete
Remove a notebook deployment from the cluster.
```bash theme={"system"}
kubectl marimo delete [OPTIONS] [FILE]
```
| Option | Description |
| ----------------- | ----------------------------------------- |
| `-n, --namespace` | Kubernetes namespace |
| `--delete-pvc` | Remove persistent storage after deletion |
| `--no-sync` | Delete without syncing changes back first |
#### status
List active notebook deployments.
```bash theme={"system"}
kubectl marimo status
```
## Deploy with manifests
If you need fine-grained control beyond what the CLI plugin provides, deploy notebooks by applying `MarimoNotebook` resources directly. For example, use this approach to integrate with GitOps workflows or to set scheduling and authentication options. This section shows a basic manifest, then adds storage and GPU resources.
### Basic manifest
1. Create a file named `notebook.yaml`:
```yaml title="notebook.yaml" theme={"system"}
apiVersion: marimo.io/v1alpha1
kind: MarimoNotebook
metadata:
name: my-notebook
spec:
source: https://github.com/marimo-team/examples.git # Must be a valid .git repository path.
storage:
size: 1Gi
```
2. Apply the manifest:
```bash theme={"system"}
kubectl apply -f notebook.yaml
```
3. Check the status:
```bash theme={"system"}
kubectl get marimos
```
The output shows your notebook and its status:
```text theme={"system"}
NAME PHASE URL AGE
my-notebook Running http://my-notebook:2718 45s
```
4. To access the notebook, set up port forwarding:
```bash theme={"system"}
kubectl port-forward service/my-notebook 2718:2718
```
5. Get the URL with the access token by getting the Pod's logs:
```bash theme={"system"}
kubectl logs [MARIMO-NAME]
```
Replace `[MARIMO-NAME]` with the manifest name.
6. Copy the URL with the access token and paste it into your browser. You should now see the notebook defined in the manifest's `source` field.
### Add storage manually
To manually add storage, complete the following steps:
1. Create the credentials secret:
```bash theme={"system"}
kubectl create secret generic cw-credentials \
--from-literal=AWS_ACCESS_KEY_ID=CWXXXXXXXXXX \
--from-literal=AWS_SECRET_ACCESS_KEY=cwXXXXXXXXXXXXXX
```
2. Add mounts to your manifest:
```yaml theme={"system"}
apiVersion: marimo.io/v1alpha1
kind: MarimoNotebook
metadata:
name: my-notebook
spec:
source: https://github.com/marimo-team/examples.git # Must be a valid .git repository path.
storage:
size: 5Gi
mounts:
- cw://my-notebook-data
```
### Add GPU resources
To run notebooks with GPU access, specify resource requests and limits:
```yaml highlight={13-16} theme={"system"}
apiVersion: marimo.io/v1alpha1
kind: MarimoNotebook
metadata:
name: gpu-notebook
spec:
source: https://github.com/your-org/notebooks.git # Must be a valid .git repository path.
storage:
size: 5Gi
resources:
requests:
cpu: "500m"
memory: 4Gi
limits:
cpu: "4"
memory: 16Gi
nvidia.com/gpu: 1
```
For specific GPU types or Node placement, use `podOverrides`:
```yaml highlight={17-19} theme={"system"}
apiVersion: marimo.io/v1alpha1
kind: MarimoNotebook
metadata:
name: gpu-notebook
spec:
source: https://github.com/your-org/notebooks.git # Must be a valid .git repository path.
storage:
size: 5Gi
resources:
requests:
cpu: "500m"
memory: 4Gi
limits:
cpu: "4"
memory: 16Gi
nvidia.com/gpu: 1
podOverrides:
nodeSelector:
gpu.nvidia.com/class: Quadro_RTX_4000
tolerations:
- key: nvidia.com/gpu
operator: Exists
effect: NoSchedule
```
## Clean up
When you're finished with the tutorial, remove the notebook resources from your cluster to free up compute and storage.
Delete your notebook deployment:
```bash theme={"system"}
kubectl delete marimo [MARIMO-NAME]
```
Replace `[MARIMO-NAME]` with the name in the manifest.
Using `kubectl delete` directly does **not** sync your changes back to your local file.
* Run `kubectl marimo sync` to sync local changes.
* Run `kubectl marimo delete` to automatically sync before deletion.
* Run `kubectl marimo delete --delete-pvc` to also delete the persistent data.
## Additional resources
For more information, see the following resources:
* [marimo documentation](https://docs.marimo.io)
* [marimo-operator on GitHub](https://github.com/marimo-team/marimo-operator)
* [CoreWeave Object Storage](/products/storage/object-storage)