> ## Documentation Index
> Fetch the complete documentation index at: https://docs.coreweave.com/llms.txt
> Use this file to discover all available pages before exploring further.
# Manage Node Pools
> Delete and modify Node Pools using the API or Cloud Console
This page explains how to modify, delete, and inspect Node Pools in CKS. Use it when you need to scale workloads, update hardware configurations, or remove unused resources. You can modify Node Pools after creation, either by editing them in the Cloud Console or by deploying an adjusted manifest with Kubernetes.
To reboot Nodes in a Node Pool, see [Reboot Nodes](/products/cks/nodes/reboot).
## Modify a Node Pool using the Cloud Console
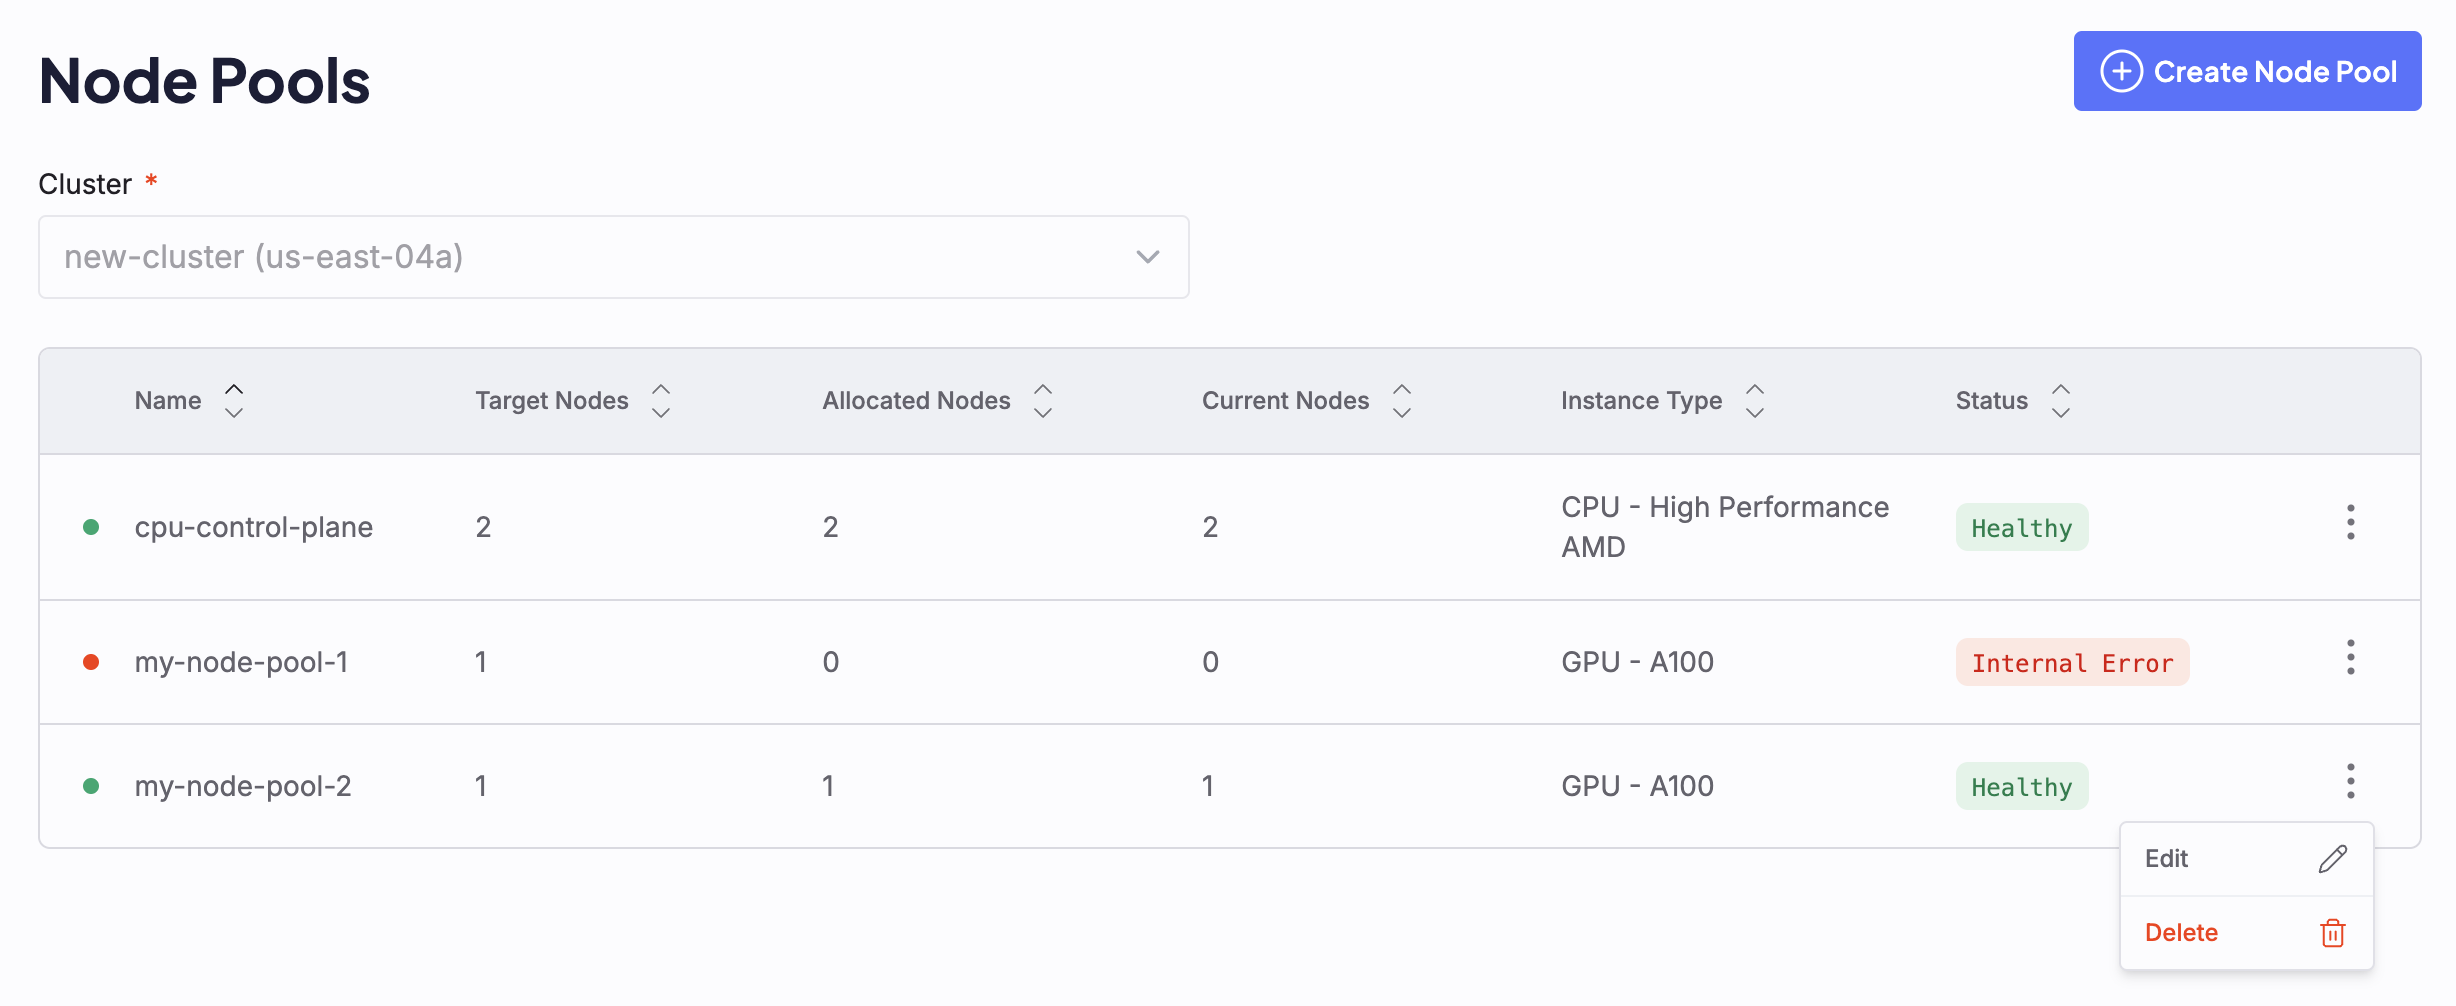
1. In the Cloud Console, navigate to [Node Pools](https://console.coreweave.com/node-pools).
All existing Node Pools are listed on the Node Pool dashboard, including the Node Pool containing Control Plane CPU Nodes:
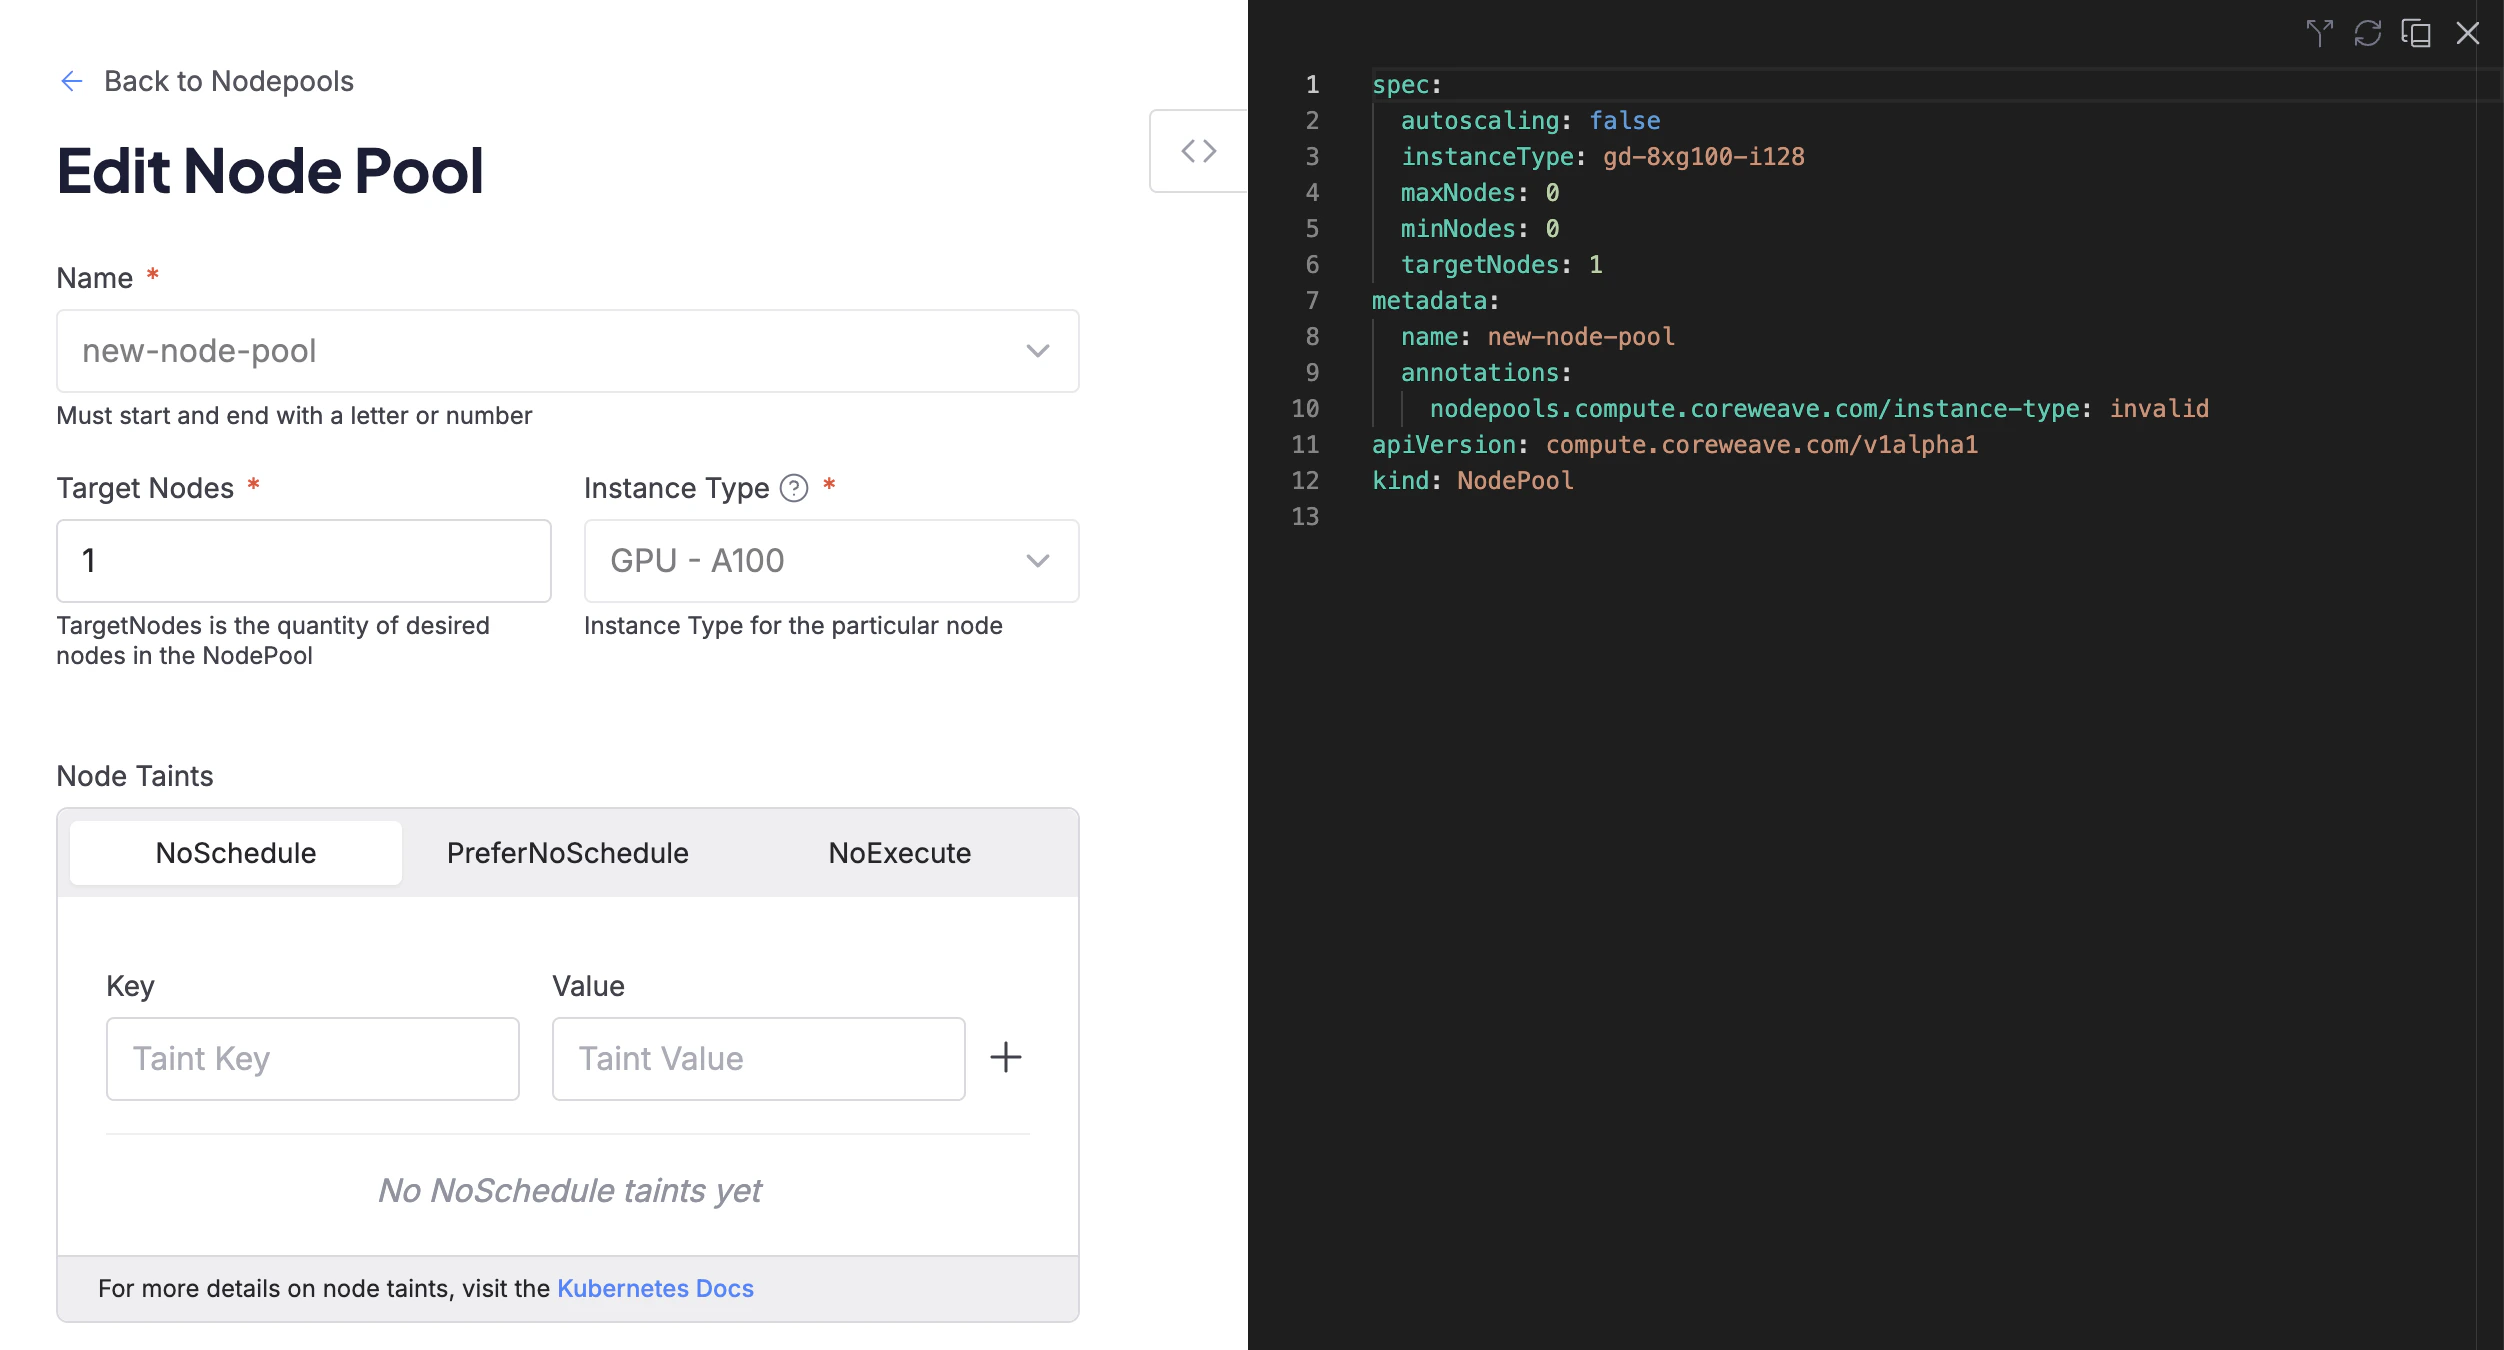
 2. Click the vertical dot menu to the right of the Node Pool, then click **Edit** to open the manifest editor:
 3. After you make your changes, click the **Submit** button.
CKS applies the updated configuration to the Node Pool.
Changes may take a moment to display on the Cloud Console. To learn more about the current status of the Node Pool, hover over the status in the dashboard.
## Modify a Node Pool using Kubernetes
To modify a Node Pool, first edit the Node Pool manifest, then `apply` the changed manifest using `kubectl`.
For example, take a Node Pool deployed with the following manifest:
```yaml title="example-nodepool.yaml" highlight={9} theme={"system"}
apiVersion: compute.coreweave.com/v1alpha1
kind: NodePool
metadata:
name: example-nodepool
spec:
computeClass: default
instanceType: gd-8xh100ib-i128
autoscaling: false
targetNodes: 10
minNodes: 0
maxNodes: 0
```
This manifest deploys a Node Pool with `10` Nodes. To change it to have only `5` Nodes, first adjust the manifest to change the `targetNodes` value to `5` as highlighted in the following example:
```yaml title="example-nodepool.yaml" highlight={9} theme={"system"}
apiVersion: compute.coreweave.com/v1alpha1
kind: NodePool
metadata:
name: example-nodepool
spec:
computeClass: default
instanceType: gd-8xh100ib-i128
autoscaling: false
targetNodes: 5
minNodes: 0
maxNodes: 0
```
To apply the changes, apply the updated manifest using `kubectl`:
```bash title="Example command" theme={"system"}
kubectl apply -f example-nodepool.yaml
```
After you apply the manifest, CKS adjusts the number of Nodes in the Node Pool to match.
* Removing Nodes from a Node Pool can take some time.
* See [Scaling strategies](/products/cks/nodes/nodes-and-node-pools#scaling-strategies) to learn how CKS responds when the value of `targetNodes` changes.
### Use `kubectl scale`
You can also use `kubectl` to adjust `targetNodes` without editing the manifest directly.
For example, to set `targetNodes` to 5 in `example-nodepool`, run:
```bash title="Example command" theme={"system"}
kubectl scale nodepool example-nodepool --replicas 5
```
`kubectl scale` writes to `targetNodes` and is not compatible with Node Pools that use `targetRacks` (rack-based instance types such as GB200 and GB300). To scale a rack-based Node Pool, edit the manifest and update `targetRacks` directly, then apply with `kubectl apply`.
### Verify the updated Node Pool
To check the status of the modified Node Pool, target the Node Pool with `kubectl get nodepool`. For example:
```bash title="Example command" theme={"system"}
kubectl get nodepool example-nodepool
```
This returns information about the current status of the targeted Node Pool, such as:
```text title="Example output" theme={"system"}
NAME INSTANCE TYPE TARGET INPROGRESS CURRENT VALIDATED CAPACITY QUOTA AGE
example-nodepool gd-1xgh200 1 1 Valid Sufficient Under 42h
```
After the adjustment completes, the value of `CURRENT` (the number of Nodes currently in the Node Pool) should match the value of `TARGET` (the number of Nodes desired in the Node Pool).
To see further details about the Node Pool in YAML format, target the Node Pool with `kubectl get nodepool -o yaml`.
```bash title="Example command" theme={"system"}
kubectl get nodepool example-nodepool -o yaml
```
If you need to reboot a Node or Node Pool, see [Reboot Nodes](/products/cks/nodes/reboot).
## View Node details
Standard `kubectl get nodes` output doesn't include CoreWeave-specific metadata such as instance type, reservation status, ncore version, and Node state. Use the [CoreWeave Intelligent CLI](https://github.com/coreweave/cwic) (`cwic`) or a custom `kubectl` command to view these details.
The following sections describe both approaches.
### Use CoreWeave Intelligent CLI
For installation and authentication instructions, see the [CoreWeave Intelligent CLI](https://github.com/coreweave/cwic) repository.
To list all Nodes in your cluster with CoreWeave-specific details, run:
```bash theme={"system"}
cwic node get
```
This returns Node information including the instance type, reservation status, Node Pool, ncore version, and lifecycle state:
```text title="Example output" theme={"system"}
NAME IP TYPE RESERVED NODEPOOL READY ACTIVE CORDON RECONFIGURE VERSION STATE PENDING STATE
g1f0000 10.176.222.21 gd-8xh100ib-i128 012345 example-nodepool true true false NotRequired 2.26.0 production none
g400000 10.176.207.22 cd-hp-a96-genoa 012345 example-nodepool true true false NotRequired 2.26.0 production none
```
To list Nodes in a specific Node Pool, run:
```bash theme={"system"}
cwic nodepool nodes get [NODEPOOL-NAME]
```
### Use `kubectl`
To view CoreWeave-specific Node details with `kubectl`, add the following alias to your shell configuration:
```bash theme={"system"}
alias nodes="kubectl get nodes -o=custom-columns=\"NAME:metadata.name,IP:status.addresses[?(@.type=='InternalIP')].address,TYPE:metadata.labels['node\.coreweave\.cloud\/type'],RESERVED:metadata.labels['node\.coreweave\.cloud\/reserved'],READY:status.conditions[?(@.type=='Ready')].status,CORDON:spec.unschedulable,VERSION:metadata.labels['node\.coreweave\.cloud\/version'],STATE:metadata.labels['node\.coreweave\.cloud\/state']\""
```
Then run:
```bash theme={"system"}
nodes
```
```text title="Example output" theme={"system"}
NAME IP TYPE RESERVED READY CORDON VERSION STATE
g1f0000 10.176.222.21 gd-8xh100ib-i128 012345 True 2.26.0 production
g400000 10.176.207.22 cd-gp-i64-erapids 012345 True 2.33.0 production
```
## Enable Node Pool prefill
Prefill is opt in and off by default. You can enable prefill on new and existing Node Pools when creating or editing the Kubernetes manifest.
For an overview of Node Pool prefill, see [Node Pool prefill](/products/cks/nodes/nodes-and-node-pools#node-pool-prefill).
Prefill is available for all instance types except rack-scale instances, for example, `gb200`, `gb300`, which are managed at the rack level rather than at the Node level.
Prefill has two implementation requirements:
* **Autoscaling must be disabled.** Set `autoscaling: false`. You cannot enable prefill and autoscaling on the same Node Pool.
* **The Node Pool must use `computeClass: default`.** Prefill is not supported on Spot Node Pools.
Add a `prefill` block under `spec` in the Node Pool manifest. For example:
```yaml title="example-nodepool.yaml" highlight={10-13} theme={"system"}
apiVersion: compute.coreweave.com/v1alpha1
kind: NodePool
metadata:
name: example-nodepool
spec:
computeClass: default
instanceType: gd-8xh100ib-i128
autoscaling: false
targetNodes: 10
prefill:
enabled: true
timeout: "24h"
maxNodes: 3
```
* `timeout`: Maximum timeout is 24 hours. Default is 24 hours.
* `maxNodes`: Can be between 1 and 4. Default is 3.
Apply the change by editing the manifest and running `kubectl apply -f example-nodepool.yaml`. For an overview of prefill behavior and Node conditions, see [Node Pool prefill](/products/cks/nodes/nodes-and-node-pools#node-pool-prefill). For full field details, see the [Node Pool reference](/products/cks/reference/node-pool#prefill).
## Target specific GPUs or CPUs
To ensure CKS schedules your workloads on the correct hardware in a cluster with different GPU types, use a combination of Kubernetes [resource requests](https://kubernetes.io/docs/concepts/configuration/manage-resources-containers/#requests-and-limits) and [node affinities](https://kubernetes.io/docs/concepts/scheduling-eviction/assign-pod-node/#node-affinity). CKS uses these built-in Kubernetes scheduling features so you can allocate resources for your workloads:
| Label | Use case |
| ------------------------------------------------ | --------------------------------------------------------------- |
| `gpu.nvidia.com/class` or `gpu.nvidia.com/model` | Use when you want to select Nodes with a cloud-neutral label. |
| `node.coreweave.cloud/type` | Use when you want to select a CoreWeave-specific instance type. |
| `node.coreweave.cloud/cpu` | Use when you want to select a specific CPU type. |
These labels are mutually exclusive: use the GPU label only to select GPU types, and the CPU label only to select CPU types. You can't explicitly select a specific CPU type for GPU Nodes.
### Example specs
Select one of the following example specs:
```yaml theme={"system"}
spec:
containers:
- name: example
resources:
requests:
cpu: 120
memory: 1800Gi
limits:
nvidia.com/gpu: 8
affinity:
nodeAffinity:
requiredDuringSchedulingIgnoredDuringExecution:
nodeSelectorTerms:
- matchExpressions:
- key: node.coreweave.cloud/type
operator: In
values:
- gd-8xh100ib-i128
```
```yaml theme={"system"}
spec:
containers:
- name: example
resources:
requests:
cpu: 180
memory: 3800Gi
limits:
nvidia.com/gpu: 8
affinity:
nodeAffinity:
requiredDuringSchedulingIgnoredDuringExecution:
nodeSelectorTerms:
- matchExpressions:
- key: node.coreweave.cloud/type
operator: In
values:
- b300-8x
```
```yaml theme={"system"}
spec:
containers:
- name: example
resources:
requests:
cpu: 120
memory: 900Gi
limits:
nvidia.com/gpu: 8
affinity:
nodeAffinity:
requiredDuringSchedulingIgnoredDuringExecution:
nodeSelectorTerms:
- matchExpressions:
- key: node.coreweave.cloud/type
operator: In
values:
- rtxp6000-8x
```
Kubernetes lets you schedule resources with `requests` and `limits`. When you specify only `limits`, Kubernetes sets the `requests` to the same amount as the limit.
## Manage Node Pool configuration
CKS uses Node Pool configurations to boot Nodes into a desired state. Configurations contain information like the ncore (OS) image and GPU Driver version. A unique identifier called a `nodeProfile` references each configuration.
The following sections describe how CKS generates configurations, how to stage a pending configuration, and how to roll back to a previous one.
To see a Node Pool's active configuration, inspect the `status.nodeProfile` and the [`status.nodeConfigurationRevisions`](/products/cks/reference/node-pool#node-configuration-revisions), which displays information for all the configurations staged onto your Node Pool, including the active one.
```yaml title="example-nodepool.yaml" highlight={10-18} theme={"system"}
apiVersion: compute.coreweave.com/v1alpha1
kind: NodePool
metadata:
name: example-nodepool
spec:
instanceType: gd-8xh100ib-i128
targetNodes: 1
status:
currentNodes: 1
nodeConfigurationRevisions:
- activeNodes: 1
createdAt: "2026-01-05T16:50:23Z"
nodeProfile: tnt-v2-75e00e7d8b223b100521280041ba22f790591c98
summary:
- 'NCore Version: 2.26.0'
- 'GPU Driver Version: 580.105.08-0ubuntu1'
- 'K8s Version: v1.35'
nodeProfile: tnt-v2-75e00e7d8b223b100521280041ba22f790591c98
```
### Generate Node Pool configurations
CKS generates Node Pool configurations based on the Node Pool spec. If you modify the following fields in your Node Pool spec, CKS generates a new configuration for you:
* [`image`](/products/cks/reference/node-pool#image)
* [`gpu`](/products/cks/reference/node-pool#gpu)
With the default [nodeConfigurationUpdateStrategy.type `OnSpecUpdate`](/products/cks/reference/node-pool#node-pool-spec), CKS automatically stages the resulting `nodeProfile` onto your NodePool as the default `nodeProfile` and onto your Nodes. Existing Nodes may need a reconfigure reboot for the configuration updates to take effect.
When updates are available for your Node Pool, such as a newer ncore image, CKS also generates a new pending configuration for you. The new configuration doesn't take effect until you stage it. See the [Stage Node Pool Configurations](#stage-node-pool-configurations) section for an example.
### Stage Node Pool configurations
How CKS applies a new configuration depends on what triggered it and your [`nodeConfigurationUpdateStrategy.type`](/products/cks/reference/node-pool#node-pool-spec):
| Strategy | Behavior |
| ------------ | ---------------------------------------------------------------------------------------------------------------------------------------------------------------------------------------------------------------------------------------------------------------------------- |
| Manual | Updates require user intervention to stage onto the NodePool. You can inspect updates in [`pendingNodeConfigurations`](/products/cks/reference/node-pool#pending-node-configuration) and apply them with the [CoreWeave Intelligent CLI](https://github.com/coreweave/cwic). |
| OnSpecUpdate | Updates are staged automatically only if triggered by a direct change to the NodePool spec (for example, modifying the GPU driver version). |
| Always | Updates are staged automatically for both user-initiated spec changes and any available upstream updates. |
To stage a pending configuration, see [CoreWeave Intelligent CLI](#coreweave-intelligent-cli). CKS automatically applies any pending CKS-initiated changes when you make a user-initiated change to your Node Pool spec.
The following example shows a Node Pool with a CKS-initiated pending configuration that requires manual acceptance.
```yaml title="example-nodepool.yaml" highlight={21-28} theme={"system"}
apiVersion: compute.coreweave.com/v1alpha1
kind: NodePool
metadata:
name: example-nodepool
spec:
instanceType: gd-8xh100ib-i128
nodeConfigurationUpdateStrategy:
type: Manual
targetNodes: 1
status:
currentNodes: 1
nodeConfigurationRevisions:
- activeNodes: 1
createdAt: "2026-01-05T16:50:23Z"
nodeProfile: tnt-v2-75e00e7d8b223b100521280041ba22f790591c98
summary:
- 'NCore Version: 2.26.0'
- 'GPU Driver Version: 580.105.08-0ubuntu1'
- 'K8s Version: v1.35'
nodeProfile: tnt-v2-75e00e7d8b223b100521280041ba22f790591c98
# This pending configuration must be manually applied to take effect
pendingNodeConfiguration:
createdAt: "2026-01-08T14:00:33Z"
nodeProfile: tnt-v2-8f8ce337708c526919218d747756ae655afe1cda
summary:
- 'NCore Version: 2.27.0'
- 'GPU Driver Version: 580.105.08-0ubuntu1'
- 'K8s Version: v1.35'
```
Before staging the configuration (CKS-initiated change), inspect the features in the `pendingNodeConfiguration`. Staging the configuration sets it as the active `status.nodeProfile` and tracks it in the `nodeConfigurationRevisions`.
After CKS applies a new configuration to the Node Pool, new Nodes boot into the desired configuration. Existing Nodes in your Node Pool may need a reconfigure reboot to pick up the new configuration. For more information, see [CoreWeave Intelligent CLI](#coreweave-intelligent-cli).
#### User-initiated updates
With `OnSpecUpdate` set as your `nodeConfigurationUpdateStrategy`, when you initiate an update to your Node Pool, CKS automatically stages and applies the resulting new configuration. For example, if you modify the `image` or `gpu` fields in your Node Pool spec, that's a user-initiated update. CKS also stages any Nodes already in the Node Pool with the auto-applied NodeProfile.
CKS automatically stages and applies these user-initiated Node Pool configuration updates regardless of which tools you use to update your Node Pool (including `kubectl`, [Cloud Console](/products/cks/nodes/manage#modify-a-node-pool-using-the-cloud-console), [GitOps](/products/cks/nodes/manage#gitops) or [`cwic`](/products/cks/nodes/manage#coreweave-intelligent-cli)).
The following example shows a properly configured Node Pool with an automatically staged configuration:
```yaml title="example-nodepool.yaml" highlight={12-16, 19-27} theme={"system"}
apiVersion: compute.coreweave.com/v1alpha1
kind: NodePool
metadata:
name: example-nodepool
spec:
instanceType: gd-8xh100ib-i128
nodeConfigurationUpdateStrategy:
type: OnSpecUpdate
targetNodes: 1
gpu:
version: "570"
status:
currentNodes: 1
nodeConfigurationRevisions:
- activeNodes: 1
createdAt: "2026-01-05T16:50:23Z"
nodeProfile: tnt-v2-75e00e7d8b223b100521280041ba22f790591c98
summary:
- 'NCore Version: 2.26.0'
- 'GPU Driver Version: 580.105.08-0ubuntu1'
- 'K8s Version: v1.35'
nodeProfile: tnt-v2-75e00e7d8b223b100521280041ba22f790591c98
```
#### GitOps
GitOps tools such as ArgoCD are the primary way to manage your Node Pool configuration in environments where you don't have a kubeconfig or the correct permissions.
Because CKS auto-stages user-initiated updates to the Node Pool configuration with the default `OnSpecUpdate` strategy, you don't need to take any further action when you update your Node Pool configuration with GitOps aside from [reconfigure rebooting](/products/cks/nodes/apply-updates) existing Nodes.
The following example shows a git diff of the minimum required YAML updates to set the GPU version to 570:
```diff theme={"system"}
spec:
+ gpu:
+ version: "570"
- version: "560"
```
This workflow is purely declarative: what you merge in Git is the spec. When the GitOps operation syncs, the spec changes and CKS stages the new Node Profile automatically.
#### Cloud Console
Similar to `kubectl` and GitOps workflows, you can make updates to the Node Pool manifest in the Cloud Console. Doing so automatically stages a new Node Profile on the `status.nodeProfile` field and stages any existing Nodes in the Node Pool. New Nodes boot into this newly staged Node Profile.
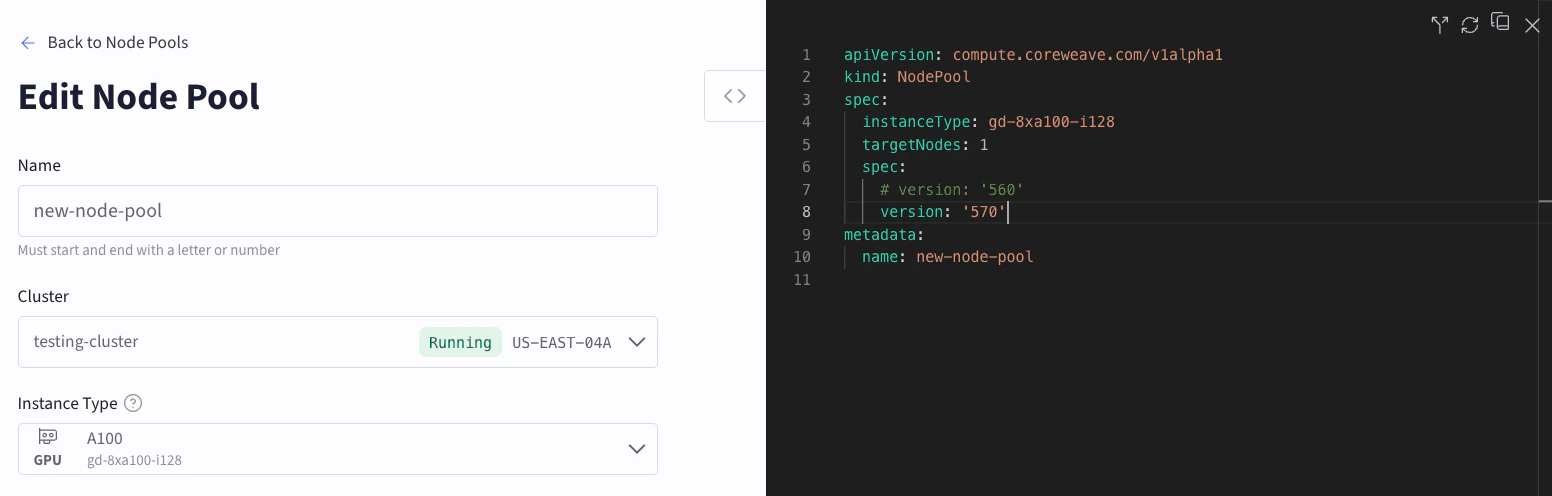
The following example shows a GPU update made to the Node Pool:
3. After you make your changes, click the **Submit** button.
CKS applies the updated configuration to the Node Pool.
Changes may take a moment to display on the Cloud Console. To learn more about the current status of the Node Pool, hover over the status in the dashboard.
## Modify a Node Pool using Kubernetes
To modify a Node Pool, first edit the Node Pool manifest, then `apply` the changed manifest using `kubectl`.
For example, take a Node Pool deployed with the following manifest:
```yaml title="example-nodepool.yaml" highlight={9} theme={"system"}
apiVersion: compute.coreweave.com/v1alpha1
kind: NodePool
metadata:
name: example-nodepool
spec:
computeClass: default
instanceType: gd-8xh100ib-i128
autoscaling: false
targetNodes: 10
minNodes: 0
maxNodes: 0
```
This manifest deploys a Node Pool with `10` Nodes. To change it to have only `5` Nodes, first adjust the manifest to change the `targetNodes` value to `5` as highlighted in the following example:
```yaml title="example-nodepool.yaml" highlight={9} theme={"system"}
apiVersion: compute.coreweave.com/v1alpha1
kind: NodePool
metadata:
name: example-nodepool
spec:
computeClass: default
instanceType: gd-8xh100ib-i128
autoscaling: false
targetNodes: 5
minNodes: 0
maxNodes: 0
```
To apply the changes, apply the updated manifest using `kubectl`:
```bash title="Example command" theme={"system"}
kubectl apply -f example-nodepool.yaml
```
After you apply the manifest, CKS adjusts the number of Nodes in the Node Pool to match.
* Removing Nodes from a Node Pool can take some time.
* See [Scaling strategies](/products/cks/nodes/nodes-and-node-pools#scaling-strategies) to learn how CKS responds when the value of `targetNodes` changes.
### Use `kubectl scale`
You can also use `kubectl` to adjust `targetNodes` without editing the manifest directly.
For example, to set `targetNodes` to 5 in `example-nodepool`, run:
```bash title="Example command" theme={"system"}
kubectl scale nodepool example-nodepool --replicas 5
```
`kubectl scale` writes to `targetNodes` and is not compatible with Node Pools that use `targetRacks` (rack-based instance types such as GB200 and GB300). To scale a rack-based Node Pool, edit the manifest and update `targetRacks` directly, then apply with `kubectl apply`.
### Verify the updated Node Pool
To check the status of the modified Node Pool, target the Node Pool with `kubectl get nodepool`. For example:
```bash title="Example command" theme={"system"}
kubectl get nodepool example-nodepool
```
This returns information about the current status of the targeted Node Pool, such as:
```text title="Example output" theme={"system"}
NAME INSTANCE TYPE TARGET INPROGRESS CURRENT VALIDATED CAPACITY QUOTA AGE
example-nodepool gd-1xgh200 1 1 Valid Sufficient Under 42h
```
After the adjustment completes, the value of `CURRENT` (the number of Nodes currently in the Node Pool) should match the value of `TARGET` (the number of Nodes desired in the Node Pool).
To see further details about the Node Pool in YAML format, target the Node Pool with `kubectl get nodepool -o yaml`.
```bash title="Example command" theme={"system"}
kubectl get nodepool example-nodepool -o yaml
```
If you need to reboot a Node or Node Pool, see [Reboot Nodes](/products/cks/nodes/reboot).
## View Node details
Standard `kubectl get nodes` output doesn't include CoreWeave-specific metadata such as instance type, reservation status, ncore version, and Node state. Use the [CoreWeave Intelligent CLI](https://github.com/coreweave/cwic) (`cwic`) or a custom `kubectl` command to view these details.
The following sections describe both approaches.
### Use CoreWeave Intelligent CLI
For installation and authentication instructions, see the [CoreWeave Intelligent CLI](https://github.com/coreweave/cwic) repository.
To list all Nodes in your cluster with CoreWeave-specific details, run:
```bash theme={"system"}
cwic node get
```
This returns Node information including the instance type, reservation status, Node Pool, ncore version, and lifecycle state:
```text title="Example output" theme={"system"}
NAME IP TYPE RESERVED NODEPOOL READY ACTIVE CORDON RECONFIGURE VERSION STATE PENDING STATE
g1f0000 10.176.222.21 gd-8xh100ib-i128 012345 example-nodepool true true false NotRequired 2.26.0 production none
g400000 10.176.207.22 cd-hp-a96-genoa 012345 example-nodepool true true false NotRequired 2.26.0 production none
```
To list Nodes in a specific Node Pool, run:
```bash theme={"system"}
cwic nodepool nodes get [NODEPOOL-NAME]
```
### Use `kubectl`
To view CoreWeave-specific Node details with `kubectl`, add the following alias to your shell configuration:
```bash theme={"system"}
alias nodes="kubectl get nodes -o=custom-columns=\"NAME:metadata.name,IP:status.addresses[?(@.type=='InternalIP')].address,TYPE:metadata.labels['node\.coreweave\.cloud\/type'],RESERVED:metadata.labels['node\.coreweave\.cloud\/reserved'],READY:status.conditions[?(@.type=='Ready')].status,CORDON:spec.unschedulable,VERSION:metadata.labels['node\.coreweave\.cloud\/version'],STATE:metadata.labels['node\.coreweave\.cloud\/state']\""
```
Then run:
```bash theme={"system"}
nodes
```
```text title="Example output" theme={"system"}
NAME IP TYPE RESERVED READY CORDON VERSION STATE
g1f0000 10.176.222.21 gd-8xh100ib-i128 012345 True 2.26.0 production
g400000 10.176.207.22 cd-gp-i64-erapids 012345 True 2.33.0 production
```
## Enable Node Pool prefill
Prefill is opt in and off by default. You can enable prefill on new and existing Node Pools when creating or editing the Kubernetes manifest.
For an overview of Node Pool prefill, see [Node Pool prefill](/products/cks/nodes/nodes-and-node-pools#node-pool-prefill).
Prefill is available for all instance types except rack-scale instances, for example, `gb200`, `gb300`, which are managed at the rack level rather than at the Node level.
Prefill has two implementation requirements:
* **Autoscaling must be disabled.** Set `autoscaling: false`. You cannot enable prefill and autoscaling on the same Node Pool.
* **The Node Pool must use `computeClass: default`.** Prefill is not supported on Spot Node Pools.
Add a `prefill` block under `spec` in the Node Pool manifest. For example:
```yaml title="example-nodepool.yaml" highlight={10-13} theme={"system"}
apiVersion: compute.coreweave.com/v1alpha1
kind: NodePool
metadata:
name: example-nodepool
spec:
computeClass: default
instanceType: gd-8xh100ib-i128
autoscaling: false
targetNodes: 10
prefill:
enabled: true
timeout: "24h"
maxNodes: 3
```
* `timeout`: Maximum timeout is 24 hours. Default is 24 hours.
* `maxNodes`: Can be between 1 and 4. Default is 3.
Apply the change by editing the manifest and running `kubectl apply -f example-nodepool.yaml`. For an overview of prefill behavior and Node conditions, see [Node Pool prefill](/products/cks/nodes/nodes-and-node-pools#node-pool-prefill). For full field details, see the [Node Pool reference](/products/cks/reference/node-pool#prefill).
## Target specific GPUs or CPUs
To ensure CKS schedules your workloads on the correct hardware in a cluster with different GPU types, use a combination of Kubernetes [resource requests](https://kubernetes.io/docs/concepts/configuration/manage-resources-containers/#requests-and-limits) and [node affinities](https://kubernetes.io/docs/concepts/scheduling-eviction/assign-pod-node/#node-affinity). CKS uses these built-in Kubernetes scheduling features so you can allocate resources for your workloads:
| Label | Use case |
| ------------------------------------------------ | --------------------------------------------------------------- |
| `gpu.nvidia.com/class` or `gpu.nvidia.com/model` | Use when you want to select Nodes with a cloud-neutral label. |
| `node.coreweave.cloud/type` | Use when you want to select a CoreWeave-specific instance type. |
| `node.coreweave.cloud/cpu` | Use when you want to select a specific CPU type. |
These labels are mutually exclusive: use the GPU label only to select GPU types, and the CPU label only to select CPU types. You can't explicitly select a specific CPU type for GPU Nodes.
### Example specs
Select one of the following example specs:
```yaml theme={"system"}
spec:
containers:
- name: example
resources:
requests:
cpu: 120
memory: 1800Gi
limits:
nvidia.com/gpu: 8
affinity:
nodeAffinity:
requiredDuringSchedulingIgnoredDuringExecution:
nodeSelectorTerms:
- matchExpressions:
- key: node.coreweave.cloud/type
operator: In
values:
- gd-8xh100ib-i128
```
```yaml theme={"system"}
spec:
containers:
- name: example
resources:
requests:
cpu: 180
memory: 3800Gi
limits:
nvidia.com/gpu: 8
affinity:
nodeAffinity:
requiredDuringSchedulingIgnoredDuringExecution:
nodeSelectorTerms:
- matchExpressions:
- key: node.coreweave.cloud/type
operator: In
values:
- b300-8x
```
```yaml theme={"system"}
spec:
containers:
- name: example
resources:
requests:
cpu: 120
memory: 900Gi
limits:
nvidia.com/gpu: 8
affinity:
nodeAffinity:
requiredDuringSchedulingIgnoredDuringExecution:
nodeSelectorTerms:
- matchExpressions:
- key: node.coreweave.cloud/type
operator: In
values:
- rtxp6000-8x
```
Kubernetes lets you schedule resources with `requests` and `limits`. When you specify only `limits`, Kubernetes sets the `requests` to the same amount as the limit.
## Manage Node Pool configuration
CKS uses Node Pool configurations to boot Nodes into a desired state. Configurations contain information like the ncore (OS) image and GPU Driver version. A unique identifier called a `nodeProfile` references each configuration.
The following sections describe how CKS generates configurations, how to stage a pending configuration, and how to roll back to a previous one.
To see a Node Pool's active configuration, inspect the `status.nodeProfile` and the [`status.nodeConfigurationRevisions`](/products/cks/reference/node-pool#node-configuration-revisions), which displays information for all the configurations staged onto your Node Pool, including the active one.
```yaml title="example-nodepool.yaml" highlight={10-18} theme={"system"}
apiVersion: compute.coreweave.com/v1alpha1
kind: NodePool
metadata:
name: example-nodepool
spec:
instanceType: gd-8xh100ib-i128
targetNodes: 1
status:
currentNodes: 1
nodeConfigurationRevisions:
- activeNodes: 1
createdAt: "2026-01-05T16:50:23Z"
nodeProfile: tnt-v2-75e00e7d8b223b100521280041ba22f790591c98
summary:
- 'NCore Version: 2.26.0'
- 'GPU Driver Version: 580.105.08-0ubuntu1'
- 'K8s Version: v1.35'
nodeProfile: tnt-v2-75e00e7d8b223b100521280041ba22f790591c98
```
### Generate Node Pool configurations
CKS generates Node Pool configurations based on the Node Pool spec. If you modify the following fields in your Node Pool spec, CKS generates a new configuration for you:
* [`image`](/products/cks/reference/node-pool#image)
* [`gpu`](/products/cks/reference/node-pool#gpu)
With the default [nodeConfigurationUpdateStrategy.type `OnSpecUpdate`](/products/cks/reference/node-pool#node-pool-spec), CKS automatically stages the resulting `nodeProfile` onto your NodePool as the default `nodeProfile` and onto your Nodes. Existing Nodes may need a reconfigure reboot for the configuration updates to take effect.
When updates are available for your Node Pool, such as a newer ncore image, CKS also generates a new pending configuration for you. The new configuration doesn't take effect until you stage it. See the [Stage Node Pool Configurations](#stage-node-pool-configurations) section for an example.
### Stage Node Pool configurations
How CKS applies a new configuration depends on what triggered it and your [`nodeConfigurationUpdateStrategy.type`](/products/cks/reference/node-pool#node-pool-spec):
| Strategy | Behavior |
| ------------ | ---------------------------------------------------------------------------------------------------------------------------------------------------------------------------------------------------------------------------------------------------------------------------- |
| Manual | Updates require user intervention to stage onto the NodePool. You can inspect updates in [`pendingNodeConfigurations`](/products/cks/reference/node-pool#pending-node-configuration) and apply them with the [CoreWeave Intelligent CLI](https://github.com/coreweave/cwic). |
| OnSpecUpdate | Updates are staged automatically only if triggered by a direct change to the NodePool spec (for example, modifying the GPU driver version). |
| Always | Updates are staged automatically for both user-initiated spec changes and any available upstream updates. |
To stage a pending configuration, see [CoreWeave Intelligent CLI](#coreweave-intelligent-cli). CKS automatically applies any pending CKS-initiated changes when you make a user-initiated change to your Node Pool spec.
The following example shows a Node Pool with a CKS-initiated pending configuration that requires manual acceptance.
```yaml title="example-nodepool.yaml" highlight={21-28} theme={"system"}
apiVersion: compute.coreweave.com/v1alpha1
kind: NodePool
metadata:
name: example-nodepool
spec:
instanceType: gd-8xh100ib-i128
nodeConfigurationUpdateStrategy:
type: Manual
targetNodes: 1
status:
currentNodes: 1
nodeConfigurationRevisions:
- activeNodes: 1
createdAt: "2026-01-05T16:50:23Z"
nodeProfile: tnt-v2-75e00e7d8b223b100521280041ba22f790591c98
summary:
- 'NCore Version: 2.26.0'
- 'GPU Driver Version: 580.105.08-0ubuntu1'
- 'K8s Version: v1.35'
nodeProfile: tnt-v2-75e00e7d8b223b100521280041ba22f790591c98
# This pending configuration must be manually applied to take effect
pendingNodeConfiguration:
createdAt: "2026-01-08T14:00:33Z"
nodeProfile: tnt-v2-8f8ce337708c526919218d747756ae655afe1cda
summary:
- 'NCore Version: 2.27.0'
- 'GPU Driver Version: 580.105.08-0ubuntu1'
- 'K8s Version: v1.35'
```
Before staging the configuration (CKS-initiated change), inspect the features in the `pendingNodeConfiguration`. Staging the configuration sets it as the active `status.nodeProfile` and tracks it in the `nodeConfigurationRevisions`.
After CKS applies a new configuration to the Node Pool, new Nodes boot into the desired configuration. Existing Nodes in your Node Pool may need a reconfigure reboot to pick up the new configuration. For more information, see [CoreWeave Intelligent CLI](#coreweave-intelligent-cli).
#### User-initiated updates
With `OnSpecUpdate` set as your `nodeConfigurationUpdateStrategy`, when you initiate an update to your Node Pool, CKS automatically stages and applies the resulting new configuration. For example, if you modify the `image` or `gpu` fields in your Node Pool spec, that's a user-initiated update. CKS also stages any Nodes already in the Node Pool with the auto-applied NodeProfile.
CKS automatically stages and applies these user-initiated Node Pool configuration updates regardless of which tools you use to update your Node Pool (including `kubectl`, [Cloud Console](/products/cks/nodes/manage#modify-a-node-pool-using-the-cloud-console), [GitOps](/products/cks/nodes/manage#gitops) or [`cwic`](/products/cks/nodes/manage#coreweave-intelligent-cli)).
The following example shows a properly configured Node Pool with an automatically staged configuration:
```yaml title="example-nodepool.yaml" highlight={12-16, 19-27} theme={"system"}
apiVersion: compute.coreweave.com/v1alpha1
kind: NodePool
metadata:
name: example-nodepool
spec:
instanceType: gd-8xh100ib-i128
nodeConfigurationUpdateStrategy:
type: OnSpecUpdate
targetNodes: 1
gpu:
version: "570"
status:
currentNodes: 1
nodeConfigurationRevisions:
- activeNodes: 1
createdAt: "2026-01-05T16:50:23Z"
nodeProfile: tnt-v2-75e00e7d8b223b100521280041ba22f790591c98
summary:
- 'NCore Version: 2.26.0'
- 'GPU Driver Version: 580.105.08-0ubuntu1'
- 'K8s Version: v1.35'
nodeProfile: tnt-v2-75e00e7d8b223b100521280041ba22f790591c98
```
#### GitOps
GitOps tools such as ArgoCD are the primary way to manage your Node Pool configuration in environments where you don't have a kubeconfig or the correct permissions.
Because CKS auto-stages user-initiated updates to the Node Pool configuration with the default `OnSpecUpdate` strategy, you don't need to take any further action when you update your Node Pool configuration with GitOps aside from [reconfigure rebooting](/products/cks/nodes/apply-updates) existing Nodes.
The following example shows a git diff of the minimum required YAML updates to set the GPU version to 570:
```diff theme={"system"}
spec:
+ gpu:
+ version: "570"
- version: "560"
```
This workflow is purely declarative: what you merge in Git is the spec. When the GitOps operation syncs, the spec changes and CKS stages the new Node Profile automatically.
#### Cloud Console
Similar to `kubectl` and GitOps workflows, you can make updates to the Node Pool manifest in the Cloud Console. Doing so automatically stages a new Node Profile on the `status.nodeProfile` field and stages any existing Nodes in the Node Pool. New Nodes boot into this newly staged Node Profile.
The following example shows a GPU update made to the Node Pool:
 #### CoreWeave Intelligent CLI
Use the [CoreWeave Intelligent CLI](https://github.com/coreweave/cwic) (`cwic`) to stage a pending configuration. After you stage the configuration, **only newly created Nodes** use the configuration. You need to initiate a reconfigure reboot on the existing Nodes in the Node Pool to [Apply Node Pool updates](/products/cks/nodes/apply-updates).
The following steps walk through how to stage a pending configuration:
1. To see which Node Pools have a pending configuration:
```bash theme={"system"}
cwic nodepool get [NODEPOOL-NAME]
```
* `NODEPOOL-NAME`: Replace with the name of your Node Pool.
The `PENDING CONFIG` column lists the Node Pools with a new configuration that you can stage to the Node Pool:
```text theme={"system"}
NAME INSTANCE TYPE TARGET QUEUED INPROGRESS CURRENT PENDING CONFIG STAGED NODES REQUIRING RECONFIG
example-nodepool gd-8xl40-i128 1 0 0 1 true false 0/1
```
2. Stage the new Node Pool configuration:
```bash title="Example command" theme={"system"}
cwic nodepool upgrade [NODEPOOL-NAME]
```
* `NODEPOOL-NAME`: Replace with the name of your Node Pool.
You can see the new Node Profile updates and confirm whether to proceed with staging them.
3. To determine which existing Nodes in the Node Pool need the new configuration:
```bash title="Example command" theme={"system"}
cwic nodepool nodes get [NODEPOOL-NAME] [-r|--requiring-reconfiguration]
```
* `NODEPOOL-NAME`: Replace with the name of your Node Pool.
```text title="Example output (see the RECONFIGURE column)" theme={"system"}
NAME IP TYPE RESERVED NODEPOOL READY ACTIVE CORDON RECONFIGURE VERSION STATE PENDING STATE
node-0 10.x.y.z gd-8xh100ib-i128 org123 example-nodepool true true false Required 2.26.0 production none
```
In this example, `node-0` needs a reconfiguration reboot to apply the new Node Profile. For more information on how to perform a reconfigure reboot, see [Apply Node Pool updates](/products/cks/nodes/apply-updates).
### Roll back to a previous Node configuration
You can roll back to a previous configuration. The [`nodeConfigurationRevisions`](/products/cks/reference/node-pool#node-configuration-revisions) enumerates all configurations previously applied to the Node Pool for your reference.
If you want to manually roll back a configuration, you must set your [`nodeConfigurationUpdateStrategy`](/products/cks/reference/node-pool#node-pool-spec) to `Manual` so that a new auto-staged configuration doesn't overwrite it.
With the [CoreWeave Intelligent CLI](https://github.com/coreweave/cwic) (`cwic`) `rollback` command, you can omit the `nodeProfile` identifier to roll back to the previous configuration, or you can specify a `nodeProfile` to roll back to an exact configuration.
```bash title="Example command" theme={"system"}
cwic nodepool rollback [NODEPOOL-NAME] [NODEPROFILE]
```
* `NODEPOOL-NAME`: Replace with the name of your Node Pool.
* `NODEPROFILE`: Replace with the Node Profile you want to roll back to.
When you perform a rollback, CKS sets your active `status.nodeProfile` to the desired configuration. Any new Nodes delivered to your Node Pool boot into the rolled-back configuration, and existing Nodes in your cluster may require a reconfigure reboot to pick up the configuration. See [Stage Node Pool configurations](#stage-node-pool-configurations) for more details.
The `nodeConfigurationRevisions` is subject to garbage collection. For any given Node Pool, CKS tracks at most 5 inactive configurations and makes them available for rollback. If 6 or more inactive configurations exist, CKS removes them starting from the oldest.
### Manually update `ncore` image
In environments where automated configuration updates aren't available, you can request a manual `ncore` image update from CoreWeave Support. To request support with updating your `ncore` images, complete the following steps:
1. Check the `ncore` versions on your Nodes using `grep` and `ncore-image`. Replace `[NODE-ID]` with your Node ID:
```bash theme={"system"}
kubectl describe node [NODE-ID] | grep ncore-image
```
This returns the `ncore` image tag and type, for example:
```text theme={"system"}
node.coreweave.cloud/ncore-image-tag=2.24.1
node.coreweave.cloud/ncore-image-type=ofed-5.8-3.0.7.0
```
2. To see the `ncore` image for all Nodes in a given Node Pool, replace `[NODE-POOL-NAME]` with the name of your Node Pool:
```bash theme={"system"}
kubectl get nodes -l compute.coreweave.com/node-pool=[NODE-POOL-NAME] \
-o go-template='{{range .items}}{{.metadata.name}}{{"\t"}}{{"ncore-image-"}}{{index .metadata.labels "node.coreweave.cloud/ncore-image-tag"}}{{"-"}}{{index .metadata.labels "node.coreweave.cloud/ncore-image-type"}}{{"\n"}}{{end}}'
```
3. After you get your `ncore` image versions, contact Support to request a reboot of your Nodes to upgrade your `ncore` images.
Before you contact Support, identify the specific `ncore` image you want to update to. This lets Support monitor and confirm that Nodes upgrade successfully.
For instructions on contacting support, see [Contact Support](/support).
## Delete a Node Pool using the Cloud Console
1. In the Cloud Console, navigate to [Node Pools](https://console.coreweave.com/node-pools).
2. Click the vertical dot menu beside the Node Pool to delete, then click **Delete** to open the confirmation modal.
Enter the name of the Node Pool to confirm deletion. The dashboard updates immediately, removing the deleted Node Pool from the list.
## Delete a Node Pool using Kubernetes
To delete a Node Pool using Kubernetes, delete the Node Pool resource directly using `kubectl`:
```bash theme={"system"}
kubectl delete nodepool example-nodepool
```
Deleting the `nodepool` resource first removes all Nodes associated with the Node Pool from the cluster, then deletes the Node Pool resource itself.
To avoid data loss when removing Node Pools, first ensure nothing is running in the Node Pool before you delete it. CKS doesn't wait for workloads to complete before removing Nodes.
## Next steps
* [Reboot Nodes](/products/cks/nodes/reboot) to reboot Nodes manually.
* [Apply Node Pool updates](/products/cks/nodes/apply-updates) to apply Node Pool updates by queuing a reconfigure reboot.
* [Connect to a Node](/products/cks/nodes/connect) to troubleshoot issues with a Node.
#### CoreWeave Intelligent CLI
Use the [CoreWeave Intelligent CLI](https://github.com/coreweave/cwic) (`cwic`) to stage a pending configuration. After you stage the configuration, **only newly created Nodes** use the configuration. You need to initiate a reconfigure reboot on the existing Nodes in the Node Pool to [Apply Node Pool updates](/products/cks/nodes/apply-updates).
The following steps walk through how to stage a pending configuration:
1. To see which Node Pools have a pending configuration:
```bash theme={"system"}
cwic nodepool get [NODEPOOL-NAME]
```
* `NODEPOOL-NAME`: Replace with the name of your Node Pool.
The `PENDING CONFIG` column lists the Node Pools with a new configuration that you can stage to the Node Pool:
```text theme={"system"}
NAME INSTANCE TYPE TARGET QUEUED INPROGRESS CURRENT PENDING CONFIG STAGED NODES REQUIRING RECONFIG
example-nodepool gd-8xl40-i128 1 0 0 1 true false 0/1
```
2. Stage the new Node Pool configuration:
```bash title="Example command" theme={"system"}
cwic nodepool upgrade [NODEPOOL-NAME]
```
* `NODEPOOL-NAME`: Replace with the name of your Node Pool.
You can see the new Node Profile updates and confirm whether to proceed with staging them.
3. To determine which existing Nodes in the Node Pool need the new configuration:
```bash title="Example command" theme={"system"}
cwic nodepool nodes get [NODEPOOL-NAME] [-r|--requiring-reconfiguration]
```
* `NODEPOOL-NAME`: Replace with the name of your Node Pool.
```text title="Example output (see the RECONFIGURE column)" theme={"system"}
NAME IP TYPE RESERVED NODEPOOL READY ACTIVE CORDON RECONFIGURE VERSION STATE PENDING STATE
node-0 10.x.y.z gd-8xh100ib-i128 org123 example-nodepool true true false Required 2.26.0 production none
```
In this example, `node-0` needs a reconfiguration reboot to apply the new Node Profile. For more information on how to perform a reconfigure reboot, see [Apply Node Pool updates](/products/cks/nodes/apply-updates).
### Roll back to a previous Node configuration
You can roll back to a previous configuration. The [`nodeConfigurationRevisions`](/products/cks/reference/node-pool#node-configuration-revisions) enumerates all configurations previously applied to the Node Pool for your reference.
If you want to manually roll back a configuration, you must set your [`nodeConfigurationUpdateStrategy`](/products/cks/reference/node-pool#node-pool-spec) to `Manual` so that a new auto-staged configuration doesn't overwrite it.
With the [CoreWeave Intelligent CLI](https://github.com/coreweave/cwic) (`cwic`) `rollback` command, you can omit the `nodeProfile` identifier to roll back to the previous configuration, or you can specify a `nodeProfile` to roll back to an exact configuration.
```bash title="Example command" theme={"system"}
cwic nodepool rollback [NODEPOOL-NAME] [NODEPROFILE]
```
* `NODEPOOL-NAME`: Replace with the name of your Node Pool.
* `NODEPROFILE`: Replace with the Node Profile you want to roll back to.
When you perform a rollback, CKS sets your active `status.nodeProfile` to the desired configuration. Any new Nodes delivered to your Node Pool boot into the rolled-back configuration, and existing Nodes in your cluster may require a reconfigure reboot to pick up the configuration. See [Stage Node Pool configurations](#stage-node-pool-configurations) for more details.
The `nodeConfigurationRevisions` is subject to garbage collection. For any given Node Pool, CKS tracks at most 5 inactive configurations and makes them available for rollback. If 6 or more inactive configurations exist, CKS removes them starting from the oldest.
### Manually update `ncore` image
In environments where automated configuration updates aren't available, you can request a manual `ncore` image update from CoreWeave Support. To request support with updating your `ncore` images, complete the following steps:
1. Check the `ncore` versions on your Nodes using `grep` and `ncore-image`. Replace `[NODE-ID]` with your Node ID:
```bash theme={"system"}
kubectl describe node [NODE-ID] | grep ncore-image
```
This returns the `ncore` image tag and type, for example:
```text theme={"system"}
node.coreweave.cloud/ncore-image-tag=2.24.1
node.coreweave.cloud/ncore-image-type=ofed-5.8-3.0.7.0
```
2. To see the `ncore` image for all Nodes in a given Node Pool, replace `[NODE-POOL-NAME]` with the name of your Node Pool:
```bash theme={"system"}
kubectl get nodes -l compute.coreweave.com/node-pool=[NODE-POOL-NAME] \
-o go-template='{{range .items}}{{.metadata.name}}{{"\t"}}{{"ncore-image-"}}{{index .metadata.labels "node.coreweave.cloud/ncore-image-tag"}}{{"-"}}{{index .metadata.labels "node.coreweave.cloud/ncore-image-type"}}{{"\n"}}{{end}}'
```
3. After you get your `ncore` image versions, contact Support to request a reboot of your Nodes to upgrade your `ncore` images.
Before you contact Support, identify the specific `ncore` image you want to update to. This lets Support monitor and confirm that Nodes upgrade successfully.
For instructions on contacting support, see [Contact Support](/support).
## Delete a Node Pool using the Cloud Console
1. In the Cloud Console, navigate to [Node Pools](https://console.coreweave.com/node-pools).
2. Click the vertical dot menu beside the Node Pool to delete, then click **Delete** to open the confirmation modal.
Enter the name of the Node Pool to confirm deletion. The dashboard updates immediately, removing the deleted Node Pool from the list.
## Delete a Node Pool using Kubernetes
To delete a Node Pool using Kubernetes, delete the Node Pool resource directly using `kubectl`:
```bash theme={"system"}
kubectl delete nodepool example-nodepool
```
Deleting the `nodepool` resource first removes all Nodes associated with the Node Pool from the cluster, then deletes the Node Pool resource itself.
To avoid data loss when removing Node Pools, first ensure nothing is running in the Node Pool before you delete it. CKS doesn't wait for workloads to complete before removing Nodes.
## Next steps
* [Reboot Nodes](/products/cks/nodes/reboot) to reboot Nodes manually.
* [Apply Node Pool updates](/products/cks/nodes/apply-updates) to apply Node Pool updates by queuing a reconfigure reboot.
* [Connect to a Node](/products/cks/nodes/connect) to troubleshoot issues with a Node.