> ## Documentation Index
> Fetch the complete documentation index at: https://docs.coreweave.com/llms.txt
> Use this file to discover all available pages before exploring further.
# LiteLLM
> LiteLLM을 통해 이루어지는 LLM Call을 자동으로 추적하고 로깅합니다
 `weave.init()`을 호출하면 Weave가 LiteLLM을 통해 이루어지는 LLM Call을 자동으로 추적하고 로깅합니다. 이 가이드에서는 LiteLLM과 함께 Weave를 사용하여 트레이스를 캡처하고, Call을 버전 관리되는 Op로 래핑하고, `Model`로 실험을 체계화하고, 함수 호출(function calling) 동작을 추적하는 방법을 설명합니다. LLM 애플리케이션을 구축하면서 LiteLLM이 지원하는 여러 모델 공급자 전반에서 관측성을 확보하고 싶다면 이 가이드를 참고하세요.
트레이스
개발 단계든 프로덕션 환경이든 LLM 애플리케이션의 트레이스는 중앙 데이터베이스에 저장해 두는 것이 중요합니다. 저장한 트레이스는 디버깅에 활용할 수 있고, 애플리케이션 개선에 도움이 되는 데이터셋으로도 사용할 수 있습니다.
> **참고:** LiteLLM을 사용할 때는 `from litellm import completion` 대신 `import litellm`으로 라이브러리를 임포트하고, `litellm.completion()`으로 completion 함수를 호출하세요. 그래야 모든 함수와 매개변수가 올바르게 참조됩니다.
Weave는 LiteLLM의 트레이스를 자동으로 캡처합니다. 먼저 `weave.init()`을 호출한 다음 평소처럼 라이브러리를 사용하세요.
```python lines {4} theme={"system"}
import litellm
import weave
weave.init("weave_litellm_integration")
openai_response = litellm.completion(
model="gpt-3.5-turbo",
messages=[{"role": "user", "content": "Translate 'Hello, how are you?' to French"}],
max_tokens=1024
)
print(openai_response.choices[0].message.content)
claude_response = litellm.completion(
model="claude-3-5-sonnet-20240620",
messages=[{"role": "user", "content": "Translate 'Hello, how are you?' to French"}],
max_tokens=1024
)
print(claude_response.choices[0].message.content)
```
이제 Weave가 LiteLLM을 통해 이루어지는 모든 LLM Call을 추적하고 로깅합니다. 트레이스는 Weave 웹 인터페이스에서 확인할 수 있습니다. 기본 트레이싱이 준비되었으니, 다음 섹션에서는 LiteLLM Call을 직접 만든 Weave Op로 래핑하여 애플리케이션 로직을 버전별로 더 세밀하게 추적하는 방법을 알아봅니다.
자체 Op로 래핑하기
Weave Op는 실험하는 동안 코드 버전을 자동으로 관리해 결과를 재현할 수 있게 해 주며, 입력과 출력도 캡처합니다. LiteLLM의 completion 함수를 호출하는 함수를 만들고 `@weave.op()` 데코레이터를 적용하면 Weave가 입력과 출력을 자동으로 추적합니다. 예시는 다음과 같습니다.
```python lines {4,6} theme={"system"}
import litellm
import weave
weave.init("weave_litellm_integration")
@weave.op()
def translate(text: str, target_language: str, model: str) -> str:
response = litellm.completion(
model=model,
messages=[{"role": "user", "content": f"Translate '{text}' to {target_language}"}],
max_tokens=1024
)
return response.choices[0].message.content
print(translate("Hello, how are you?", "French", "gpt-3.5-turbo"))
print(translate("Hello, how are you?", "Spanish", "claude-3-5-sonnet-20240620"))
```
실험을 더 쉽게 하기 위한 `Model` 만들기
여러 요소가 동시에 바뀌는 상황에서는 실험을 체계적으로 관리하기가 어렵습니다. `Model` 클래스를 사용하면 system 프롬프트나 사용 중인 모델 등 앱의 실험 세부 정보를 캡처하고 정리할 수 있습니다. 이를 통해 앱의 여러 반복 버전을 체계적으로 정리하고 비교할 수 있습니다.
Model은 코드 버전 관리와 입력 및 출력 캡처 외에도 애플리케이션의 동작을 제어하는 구조화된 매개변수를 캡처하므로, 어떤 매개변수가 가장 효과적인지 찾는 데 도움이 됩니다. Weave Model은 `serve` 및 Evaluations와 함께 사용할 수도 있습니다.
다음 예시에서는 다양한 모델과 temperature 값으로 실험할 수 있습니다.
```python lines {4,6,10} theme={"system"}
import litellm
import weave
weave.init('weave_litellm_integration')
class TranslatorModel(weave.Model):
model: str
temperature: float
@weave.op()
def predict(self, text: str, target_language: str):
response = litellm.completion(
model=self.model,
messages=[
{"role": "system", "content": f"You are a translator. Translate the given text to {target_language}."},
{"role": "user", "content": text}
],
max_tokens=1024,
temperature=self.temperature
)
return response.choices[0].message.content
# 모델별로 인스턴스 생성
gpt_translator = TranslatorModel(model="gpt-3.5-turbo", temperature=0.3)
claude_translator = TranslatorModel(model="claude-3-5-sonnet-20240620", temperature=0.1)
# 여러 모델로 번역 실행
english_text = "Hello, how are you today?"
print("GPT-3.5 Translation to French:")
print(gpt_translator.predict(english_text, "French"))
print("\nClaude-3.5 Sonnet Translation to Spanish:")
print(claude_translator.predict(english_text, "Spanish"))
```
함수 호출
LiteLLM은 호환되는 모델에서 함수 호출을 지원합니다. Weave는 이러한 함수 호출을 자동으로 추적하므로 함수, 인수, 응답을 다른 트레이스와 함께 확인할 수 있습니다.
```python lines {4} theme={"system"}
import litellm
import weave
weave.init("weave_litellm_integration")
response = litellm.completion(
model="gpt-3.5-turbo",
messages=[{"role": "user", "content": "Translate 'Hello, how are you?' to French"}],
functions=[
{
"name": "translate",
"description": "Translate text to a specified language",
"parameters": {
"type": "object",
"properties": {
"text": {
"type": "string",
"description": "The text to translate",
},
"target_language": {
"type": "string",
"description": "The language to translate to",
}
},
"required": ["text", "target_language"],
},
},
],
)
print(response)
```
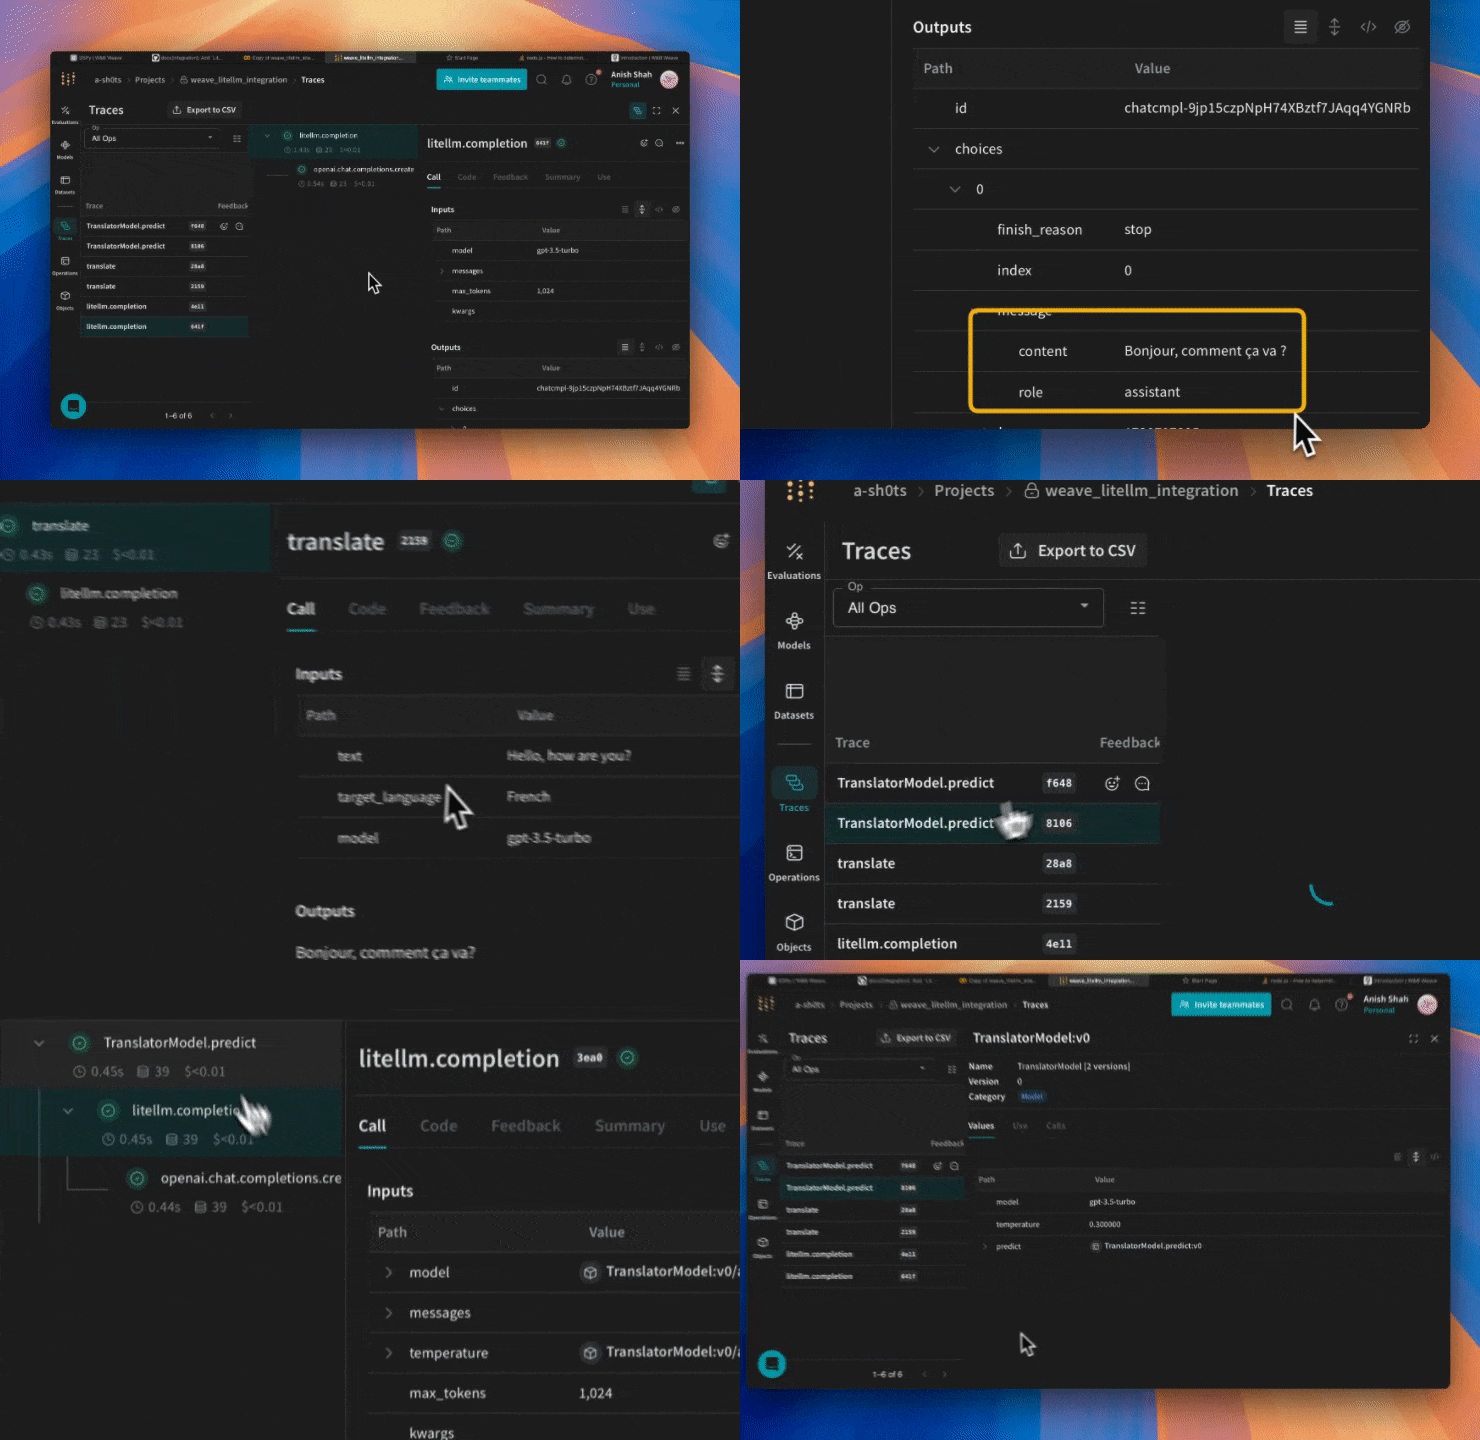
Weave는 프롬프트에서 사용하는 함수를 자동으로 캡처하고 버전을 관리합니다.
[ ](https://forge.coreweave.com/wandb/a-sh0ts/weave_litellm_integration/weave/calls)
## Related topics
- [예시 코드 및 노트북](/ko/products/wandb/examples.md)
](https://forge.coreweave.com/wandb/a-sh0ts/weave_litellm_integration/weave/calls)
## Related topics
- [예시 코드 및 노트북](/ko/products/wandb/examples.md)