> ## Documentation Index
> Fetch the complete documentation index at: https://docs.coreweave.com/llms.txt
> Use this file to discover all available pages before exploring further.
# Google
> Use Weave to trace and log Google GenAI model calls
 [LLM Playground](/ko/products/wandb/weave/guides/tools/playground)를 사용하여 별도의 설정 없이 Weave에서 Google AI 모델을 실험할 수 있습니다.
이 페이지는 Google Vertex AI API 및 Google Gemini API와 함께 W\&B Weave를 사용하는 방법을 설명하므로 Google GenAI 애플리케이션을 평가, 모니터링 및 반복할 수 있습니다.
Weave는 다음 항목에 대한 트레이스를 자동으로 캡처합니다:
* [Google GenAI SDK](https://github.com/googleapis/python-genai): Python SDK, Node.js SDK, Go SDK 및 REST를 통해 액세스할 수 있습니다.
* [Google Vertex AI API](https://cloud.google.com/vertex-ai/docs): Google의 Gemini 모델 및 [파트너 모델](https://cloud.google.com/vertex-ai/generative-ai/docs/partner-models/use-partner-models)에 대한 액세스를 제공합니다.
Weave는 사용 중단된 [Gemini API용 Google AI Python SDK](https://github.com/google-gemini/deprecated-generative-ai-python)도 지원합니다. 이 지원도 사용 중단되었으며 향후 버전에서 제거될 예정입니다.
[LLM Playground](/ko/products/wandb/weave/guides/tools/playground)를 사용하여 별도의 설정 없이 Weave에서 Google AI 모델을 실험할 수 있습니다.
이 페이지는 Google Vertex AI API 및 Google Gemini API와 함께 W\&B Weave를 사용하는 방법을 설명하므로 Google GenAI 애플리케이션을 평가, 모니터링 및 반복할 수 있습니다.
Weave는 다음 항목에 대한 트레이스를 자동으로 캡처합니다:
* [Google GenAI SDK](https://github.com/googleapis/python-genai): Python SDK, Node.js SDK, Go SDK 및 REST를 통해 액세스할 수 있습니다.
* [Google Vertex AI API](https://cloud.google.com/vertex-ai/docs): Google의 Gemini 모델 및 [파트너 모델](https://cloud.google.com/vertex-ai/generative-ai/docs/partner-models/use-partner-models)에 대한 액세스를 제공합니다.
Weave는 사용 중단된 [Gemini API용 Google AI Python SDK](https://github.com/google-gemini/deprecated-generative-ai-python)도 지원합니다. 이 지원도 사용 중단되었으며 향후 버전에서 제거될 예정입니다.
시작하기
다음 예시는 지원되는 각 SDK에서 트레이싱을 활성화하는 방법을 보여줍니다. 두 경우 모두 Weave에 필요한 유일한 단계는 `weave.init`을 호출하는 것입니다. 기존 Google GenAI 또는 Vertex AI 코드는 그대로 유지됩니다.
Weave는 [Google GenAI SDK](https://github.com/googleapis/python-genai)의 트레이스를 자동으로 캡처합니다. 추적을 시작하려면 `weave.init(project_name="[YOUR-WANDB-PROJECT-NAME]")`을 호출하고 평소처럼 라이브러리를 사용하세요.
```python lines theme={"system"}
import os
from google import genai
import weave
weave.init(project_name="google-genai")
google_client = genai.Client(api_key=os.getenv("GOOGLE_GENAI_KEY"))
response = google_client.models.generate_content(
model="gemini-2.0-flash",
contents="What's the capital of France?",
)
```
[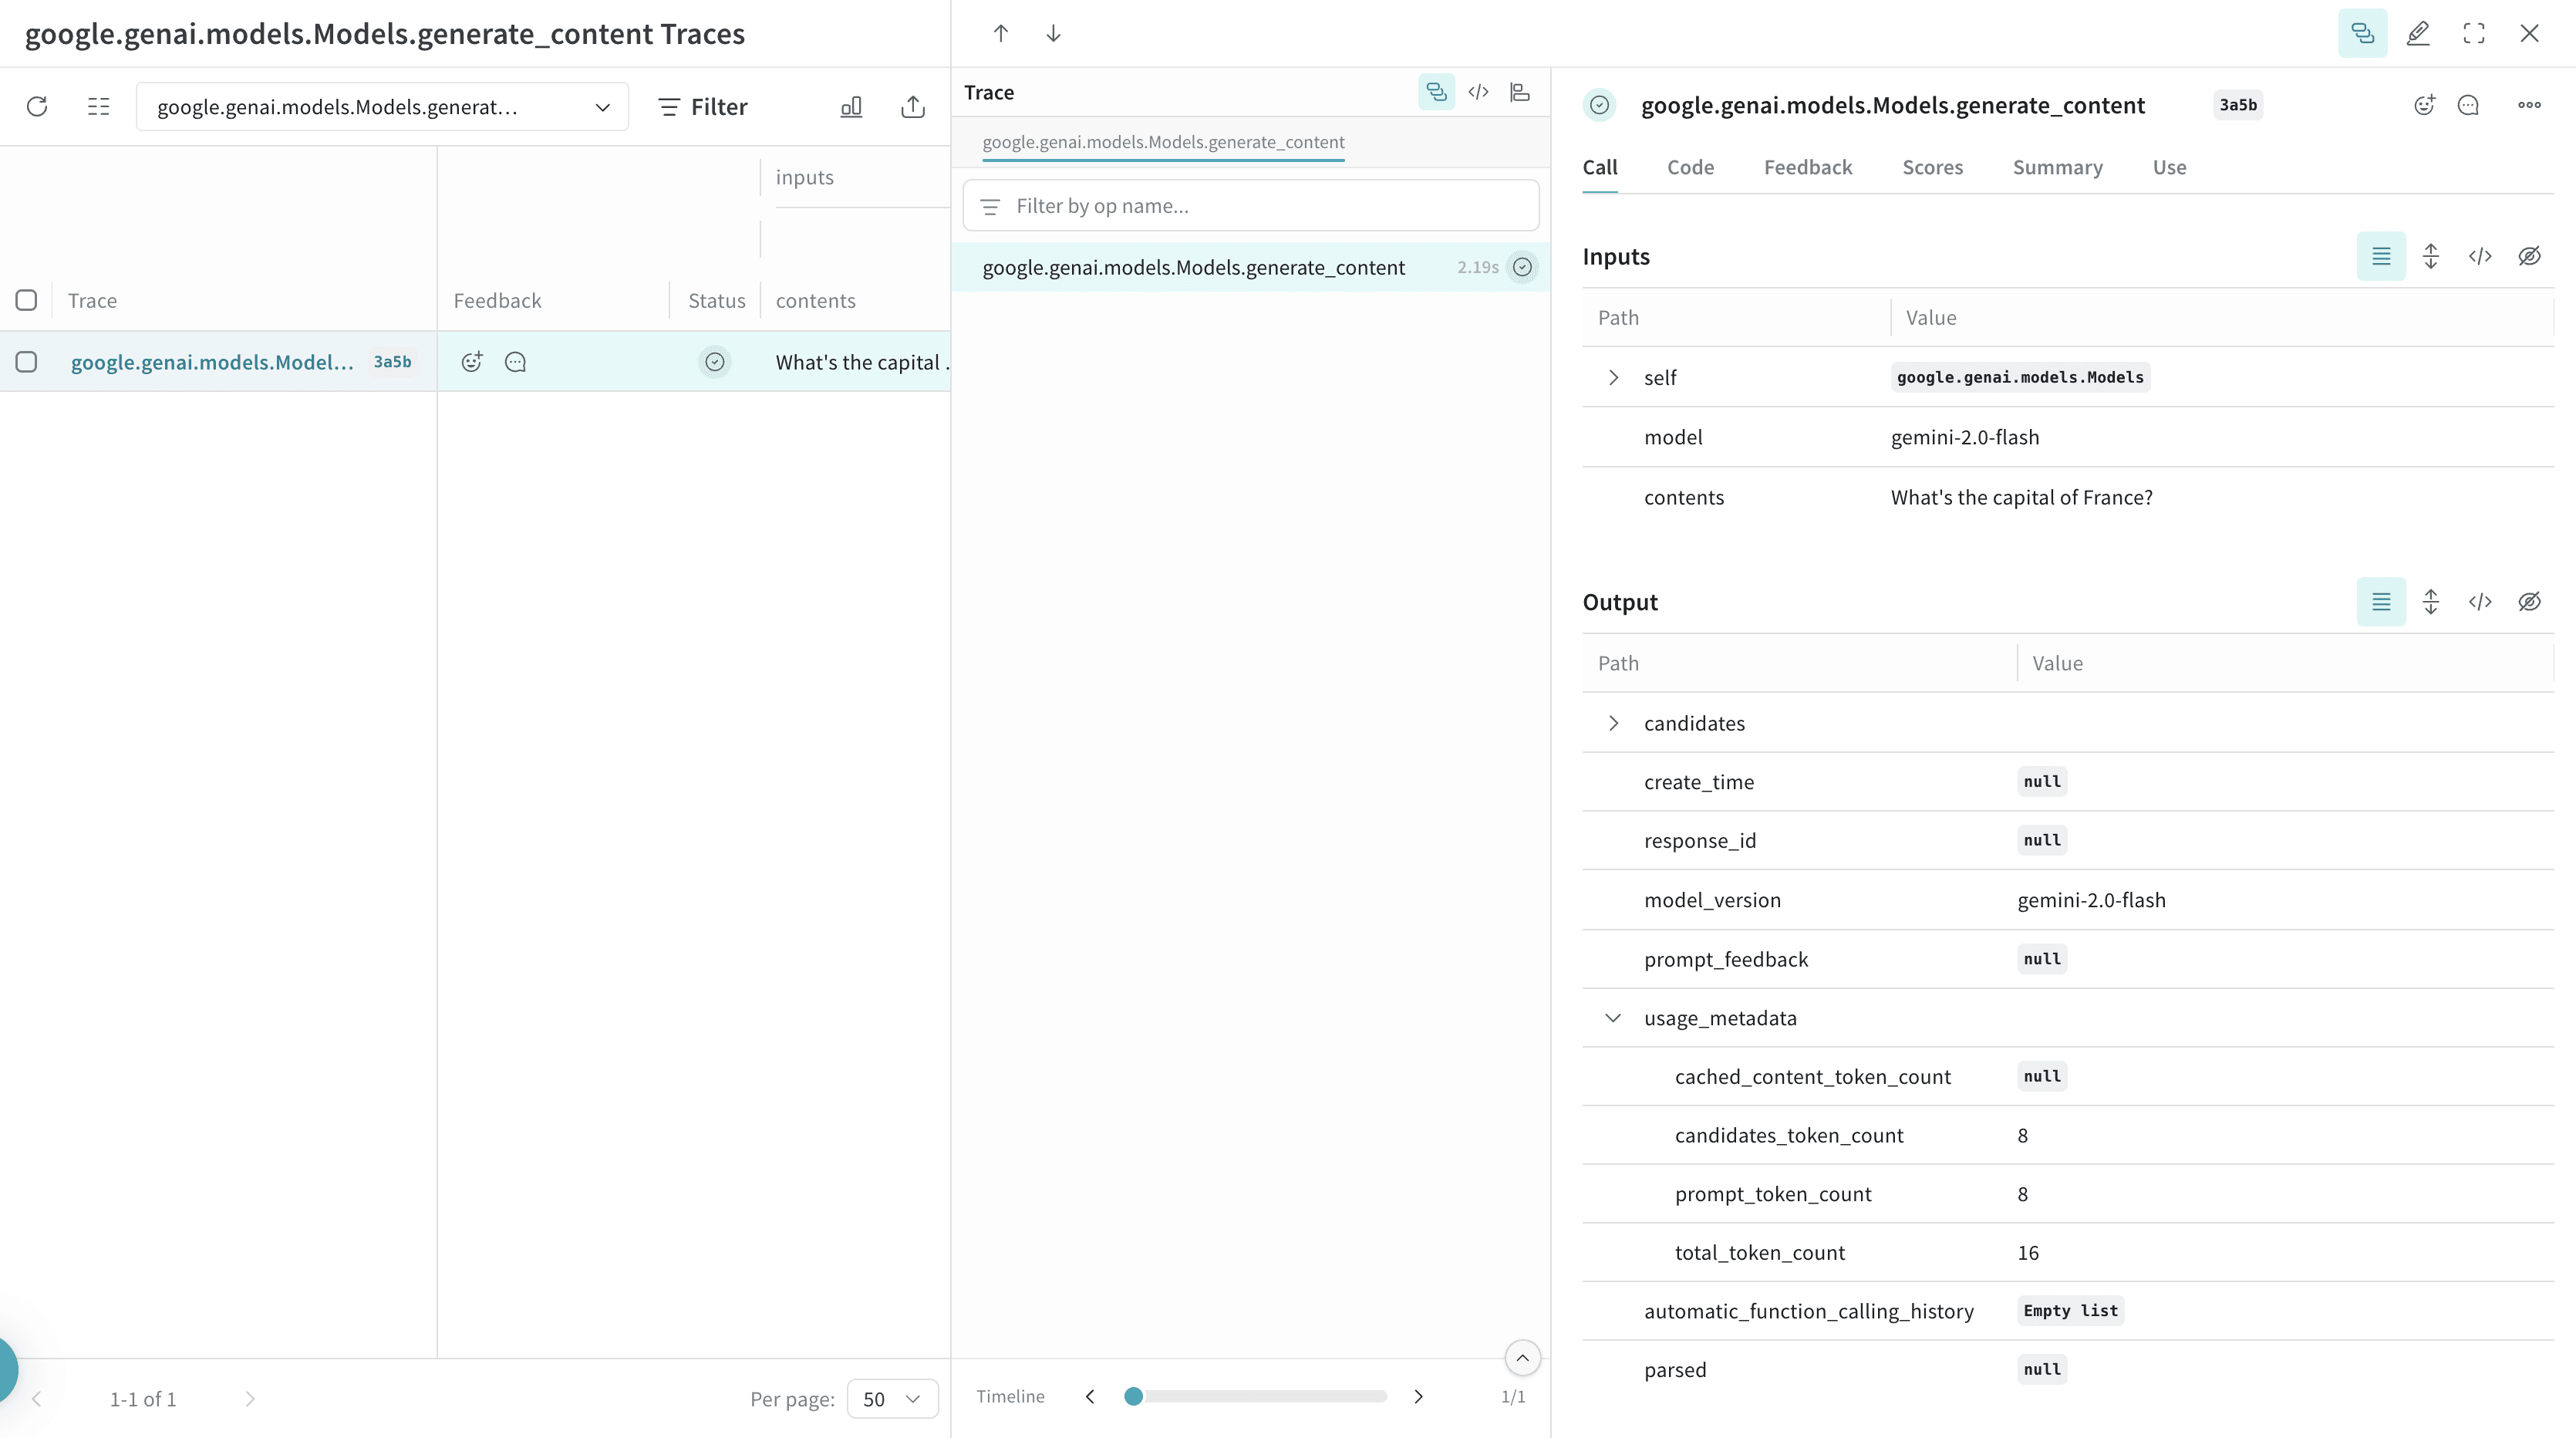 ](https://forge.coreweave.com/wandb/geekyrakshit/google-genai/weave/traces)
Weave는 [Vertex APIs](https://github.com/googleapis/python-aiplatform/tree/main/vertexai/generative_models)의 트레이스도 자동으로 캡처합니다. 추적을 시작하려면 `weave.init(project_name="[YOUR-WANDB-PROJECT-NAME]")`를 호출한 다음 평소처럼 라이브러리를 사용하세요.
```python lines theme={"system"}
import vertexai
import weave
from vertexai.generative_models import GenerativeModel
weave.init(project_name="vertex-ai-test")
vertexai.init(project="[YOUR-VERTEX-AI-PROJECT-NAME]", location="[YOUR-VERTEX-AI-PROJECT-LOCATION]")
model = GenerativeModel("gemini-1.5-flash-002")
response = model.generate_content(
"What's a good name for a flower shop specialising in selling dried flower bouquets?"
)
```
](https://forge.coreweave.com/wandb/geekyrakshit/google-genai/weave/traces)
Weave는 [Vertex APIs](https://github.com/googleapis/python-aiplatform/tree/main/vertexai/generative_models)의 트레이스도 자동으로 캡처합니다. 추적을 시작하려면 `weave.init(project_name="[YOUR-WANDB-PROJECT-NAME]")`를 호출한 다음 평소처럼 라이브러리를 사용하세요.
```python lines theme={"system"}
import vertexai
import weave
from vertexai.generative_models import GenerativeModel
weave.init(project_name="vertex-ai-test")
vertexai.init(project="[YOUR-VERTEX-AI-PROJECT-NAME]", location="[YOUR-VERTEX-AI-PROJECT-LOCATION]")
model = GenerativeModel("gemini-1.5-flash-002")
response = model.generate_content(
"What's a good name for a flower shop specialising in selling dried flower bouquets?"
)
```
Track your own Op
함수를 `@weave.op`으로 감싸서 입력, 출력 및 앱 로직을 캡처하기 시작하면 데이터가 앱을 통해 어떻게 흐르는지 디버그할 수 있습니다. Op를 깊게 중첩하고 추적하려는 함수 트리를 구축할 수 있습니다. 또한 실험하면서 코드를 자동으로 버전 관리하여 git에 커밋되지 않은 임시 세부 정보를 캡처합니다.
[`@weave.op`](/ko/products/wandb/weave/guides/tracking/ops)으로 데코레이트된 함수를 만드세요.
다음 예시에서 함수 `recommend_places_to_visit`은 `@weave.op`으로 감싸져 있으며 도시에서 방문할 장소를 추천합니다.
```python lines theme={"system"}
import os
from google import genai
import weave
weave.init(project_name="google-genai")
google_client = genai.Client(api_key=os.getenv("GOOGLE_GENAI_KEY"))
@weave.op()
def recommend_places_to_visit(city: str, model: str = "gemini-1.5-flash"):
response = google_client.models.generate_content(
model=model,
contents="You are a helpful assistant meant to suggest all budget-friendly places to visit in a city",
)
return response.text
recommend_places_to_visit("New York")
recommend_places_to_visit("Paris")
recommend_places_to_visit("Kolkata")
```
[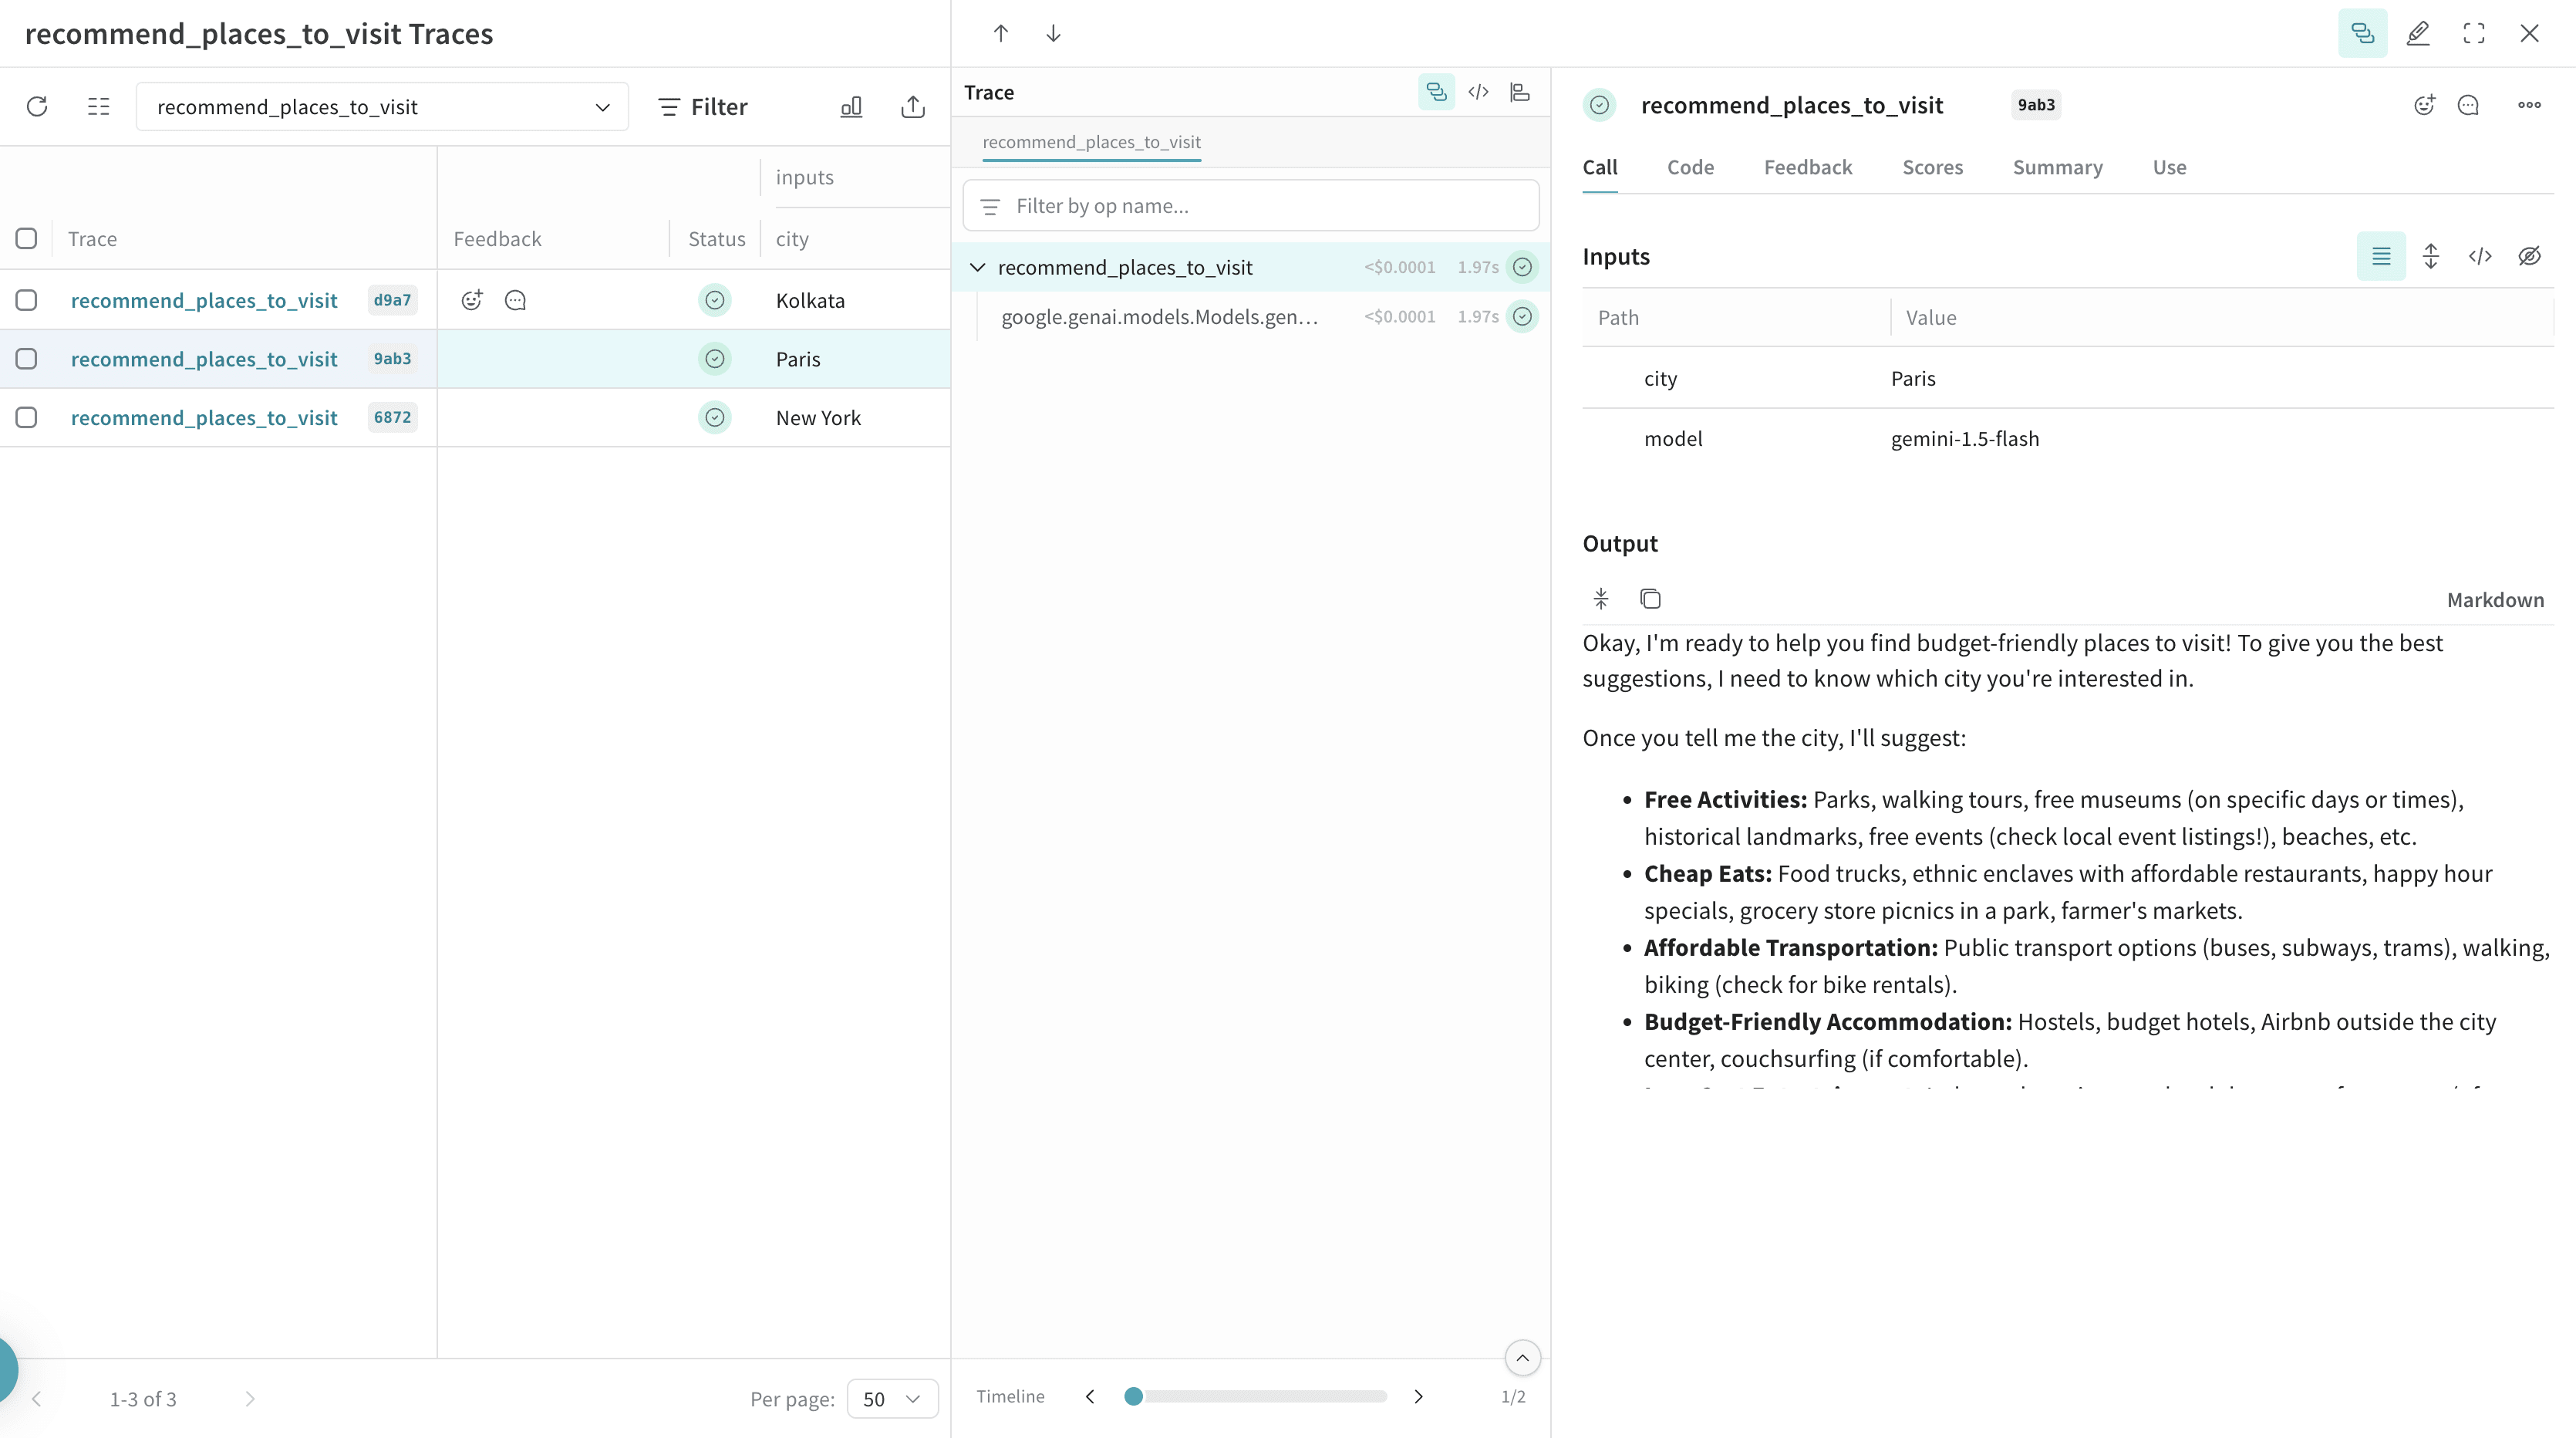 ](https://forge.coreweave.com/wandb/geekyrakshit/google-genai/weave/traces)
더 쉬운 실험을 위한 `Model` 만들기
실험을 구성하는 것은 많은 요소가 움직일 때 어렵습니다. [`Model`](/ko/products/wandb/weave/guides/core-types/models) 클래스를 사용하면 system 프롬프트나 사용하는 모델과 같은 앱의 실험 세부 정보를 캡처하고 구성할 수 있습니다. 이는 앱의 다양한 반복을 구성하고 비교하는 데 도움이 됩니다.
코드 버전 관리 및 입력/출력 캡처 외에도 [`Model`](/ko/products/wandb/weave/guides/core-types/models)s는 애플리케이션의 동작을 제어하는 구조화된 매개변수를 캡처하여 어떤 매개변수가 가장 잘 작동했는지 찾는 데 도움을 줍니다. 또한 Weave Models를 `serve`와 [`Evaluation`](/ko/products/wandb/weave/guides/core-types/evaluations)s에서 사용할 수 있습니다.
다음 예시에서는 `CityVisitRecommender`로 실험할 수 있습니다. 이 중 하나를 변경할 때마다 `CityVisitRecommender`의 새로운 *버전*을 얻게 됩니다. 이는 사용해 본 각 설정에 대한 버전이 지정된 기록을 제공하므로 나중에 비교하거나 평가할 수 있습니다.
```python lines theme={"system"}
import os
from google import genai
import weave
weave.init(project_name="google-genai")
google_client = genai.Client(api_key=os.getenv("GOOGLE_GENAI_KEY"))
class CityVisitRecommender(weave.Model):
model: str
@weave.op()
def predict(self, city: str) -> str:
response = google_client.models.generate_content(
model=self.model,
contents="You are a helpful assistant meant to suggest all budget-friendly places to visit in a city",
)
return response.text
city_recommender = CityVisitRecommender(model="gemini-1.5-flash")
print(city_recommender.predict("New York"))
print(city_recommender.predict("San Francisco"))
print(city_recommender.predict("Los Angeles"))
```