> ## Documentation Index
> Fetch the complete documentation index at: https://docs.coreweave.com/llms.txt
> Use this file to discover all available pages before exploring further.
# Weave로 컴퓨터 비전 파이프라인 트레이스 및 평가하기
> W&B Weave로 컴퓨터 비전 파이프라인을 트레이스하고 평가하는 방법을 알아보세요
이것은 대화형 노트북입니다. 로컬에서 실행하거나 아래 링크를 사용할 수 있습니다:
* [Open in Google Colab](https://colab.research.google.com/github/wandb/docs/blob/main/weave/cookbooks/source/ocr-pipeline.ipynb)
* [View source on GitHub](https://github.com/wandb/docs/blob/main/weave/cookbooks/source/ocr-pipeline.ipynb)
이 튜토리얼에서는 손으로 쓴 환자 정보 이미지에서 개체명 인식(NER)을 수행하는 컴퓨터 비전 파이프라인을 구축하고, 트레이스하고, 평가하는 방법을 알아봅니다. 튜토리얼을 마치면 비전-언어 모델(VLM) 기반의 광학 문자 인식(OCR) 파이프라인과, 이 파이프라인이 이미지에서 구조화된 필드를 얼마나 정확하게 추출하는지 측정하는 W\&B Weave Evaluation을 갖추게 됩니다. 이 가이드는 Weave를 사용해 프롬프트를 반복적으로 개선하고 멀티모달 추출 파이프라인의 품질을 체계적으로 측정하려는 개발자를 대상으로 합니다.
다음 섹션에서는 프롬프트 생성 및 반복 개선, 데이터셋 가져오기, NER 파이프라인 구축, Scorer 정의, 평가 실행의 다섯 단계를 차례로 안내합니다.
사전 요구 사항
시작하기 전에 필수 라이브러리를 설치하고 임포트한 다음, W\&B API 키를 조회하고 Weave 프로젝트를 초기화하세요. 이 단계를 완료하면 환경에서 W\&B 인증을 수행하고 Weave 프로젝트에 트레이스를 로깅할 수 있습니다.
```python lines theme={"system"}
# 필요한 의존성 설치
!pip install openai weave -q
python
import json
import os
from google.colab import userdata
from openai import OpenAI
import weave
python
# API 키 조회
os.environ["OPENAI_API_KEY"] = userdata.get(
"OPENAI_API_KEY"
) # 왼쪽 메뉴에서 키를 Colab 환경 시크릿으로 설정하세요
os.environ["WANDB_API_KEY"] = userdata.get("WANDB_API_KEY")
# 프로젝트 이름 설정
# PROJECT 값을 자신의 프로젝트 이름으로 바꾸세요
PROJECT = "vlm-handwritten-ner"
# Weave 프로젝트 초기화
weave.init(PROJECT)
```
Weave로 프롬프트 생성 및 반복
좋은 프롬프트 엔지니어링은 모델이 엔티티를 올바르게 추출하도록 안내하는 데 중요합니다. 이 섹션에서는 초기 프롬프트를 작성하고, 시간 경과에 따른 변경 사항을 추적할 수 있도록 Weave에 게시한 다음, 더 엄격한 검증 규칙으로 이를 개선합니다.
먼저, 이미지 데이터에서 무엇을 추출하고 어떻게 형식화할지에 대한 지침을 모델에 제공하는 기본 프롬프트를 만듭니다. 그런 다음, 추적 및 반복을 위해 Weave에 프롬프트를 저장합니다.
````python lines theme={"system"}
# Weave로 프롬프트 객체를 만드세요
prompt = """
Extract all readable text from this image. Format the extracted entities as a valid JSON.
Do not return any extra text, just the JSON. Do not include ```json```
Use the following format:
{"Patient Name": "James James","Date": "4/22/2025","Patient ID": "ZZZZZZZ123","Group Number": "3452542525"}
"""
system_prompt = weave.StringPrompt(prompt)
# Weave에 프롬프트를 게시하세요
weave.publish(system_prompt, name="NER-prompt")
````
다음으로, 프롬프트에 지침과 검증 규칙을 추가하여 출력의 오류를 줄이도록 개선하세요. 수정한 버전을 같은 이름으로 게시하면 Weave가 해당 프롬프트를 새 버전으로 추적하므로, 반복 버전 간의 결과를 비교할 수 있습니다.
````python lines theme={"system"}
better_prompt = """
You are a precision OCR assistant. Given an image of patient information, extract exactly these fields into a single JSON object (and nothing else):
- Patient Name
- Date (MM/DD/YYYY)
- Patient ID
- Group Number
Validation rules:
1. Date must match MM/DD/YY; if not, set Date to "".
2. Patient ID must be alphanumeric; if unreadable, set to "".
3. Always zero-pad months and days (e.g. "04/07/25").
4. Omit any markup, commentary, or code fences.
5. Return strictly valid JSON with only those four keys.
Do not return any extra text, just the JSON. Do not include ```json```
Example output:
{"Patient Name":"James James","Date":"04/22/25","Patient ID":"ZZZZZZZ123","Group Number":"3452542525"}
"""
# 프롬프트 편집
system_prompt = weave.StringPrompt(better_prompt)
# 편집한 프롬프트를 Weave에 게시
weave.publish(system_prompt, name="NER-prompt")
````
데이터셋 조회
프롬프트가 준비되면, 다음으로 파이프라인을 실행할 입력 데이터가 필요합니다. OCR 파이프라인의 입력으로 사용되는 필기 노트 데이터셋을 조회하세요.
데이터셋의 이미지는 이미 `base64`로 인코딩되어 있어, LLM이 별도의 전처리 없이 데이터를 사용할 수 있습니다.
```python lines theme={"system"}
# 다음 Weave 프로젝트에서 데이터셋 조회
dataset = weave.ref(
"weave://wandb-smle/vlm-handwritten-ner/object/NER-eval-dataset:G8MEkqWBtvIxPYAY23sXLvqp8JKZ37Cj0PgcG19dGjw"
).get()
# 데이터셋에서 특정 예시 액세스
example_image = dataset.rows[3]["image_base64"]
# example_image 표시
from IPython.display import HTML, display
html = f' '
display(HTML(html))
```
'
display(HTML(html))
```
NER 파이프라인 구축
이제 프롬프트와 데이터셋이 준비되었으므로, 이를 VLM에 연결하는 NER 파이프라인을 구축하세요. 파이프라인은 두 개의 함수로 구성됩니다:
* 데이터셋에서 PIL 이미지를 받아 VLM에 전달할 수 있는 `base64`로 인코딩된 이미지의 문자열 표현을 반환하는 `encode_image` 함수입니다.
* 이미지와 system 프롬프트를 받아 system 프롬프트에 설명된 대로 해당 이미지에서 추출된 엔티티를 반환하는 `extract_named_entities_from_image` 함수입니다.
```python lines theme={"system"}
# GPT-4-Vision을 사용하는 추적 가능한 함수
def extract_named_entities_from_image(image_base64) -> dict:
# LLM 클라이언트 초기화
client = OpenAI()
# 지시 프롬프트 설정
# Weave에 저장된 프롬프트를 선택적으로 사용할 수 있습니다. weave.ref("weave://wandb-smle/vlm-handwritten-ner/object/NER-prompt:FmCv4xS3RFU21wmNHsIYUFal3cxjtAkegz2ylM25iB8").get().content.strip()
prompt = better_prompt
response = client.responses.create(
model="gpt-4.1",
input=[
{
"role": "user",
"content": [
{"type": "input_text", "text": prompt},
{
"type": "input_image",
"image_url": image_base64,
},
],
}
],
)
return response.output_text
```
이제 다음 작업을 수행하는 `named_entity_recognation` 함수를 만드세요.
* 이미지 데이터를 NER 파이프라인에 전달합니다.
* 결과를 올바른 형식의 JSON으로 반환합니다.
[`@weave.op()` decorator](/ko/products/wandb/weave/reference/python-sdk/trace/op)를 사용하면 Weights & Biases UI에서 함수 실행을 자동으로 추적하고 트레이스할 수 있습니다.
`named_entity_recognation`이 실행될 때마다 전체 트레이스 결과가 Weights & Biases UI에 표시됩니다. 트레이스를 보려면 Weave 프로젝트의 **Traces** 탭으로 이동하세요.
```python lines theme={"system"}
# 평가를 위한 NER 함수
@weave.op()
def named_entity_recognation(image_base64, id):
result = {}
try:
# 1) 비전 op를 호출하여 JSON 문자열을 가져옵니다
output_text = extract_named_entities_from_image(image_base64)
# 2) JSON을 정확히 한 번 파싱합니다
result = json.loads(output_text)
print(f"Processed: {str(id)}")
except Exception as e:
print(f"Failed to process {str(id)}: {e}")
return result
```
마지막으로 데이터셋에 대해 파이프라인을 실행하고 결과를 확인하세요. 이 단계에서 생성되는 모델 출력은 다음 섹션에서 평가합니다.
다음 코드는 데이터셋을 순회하면서 결과를 로컬 파일 `processing_results.json`에 저장합니다. 결과는 Weights & Biases UI에서도 확인할 수 있습니다.
```python lines theme={"system"}
# 출력 결과
results = []
# 데이터셋의 모든 이미지에 대해 반복
for row in dataset.rows:
result = named_entity_recognation(row["image_base64"], str(row["id"]))
result["image_id"] = str(row["id"])
results.append(result)
# 모든 결과를 JSON 파일에 저장
output_file = "processing_results.json"
with open(output_file, "w") as f:
json.dump(results, f, indent=2)
print(f"Results saved to: {output_file}")
```
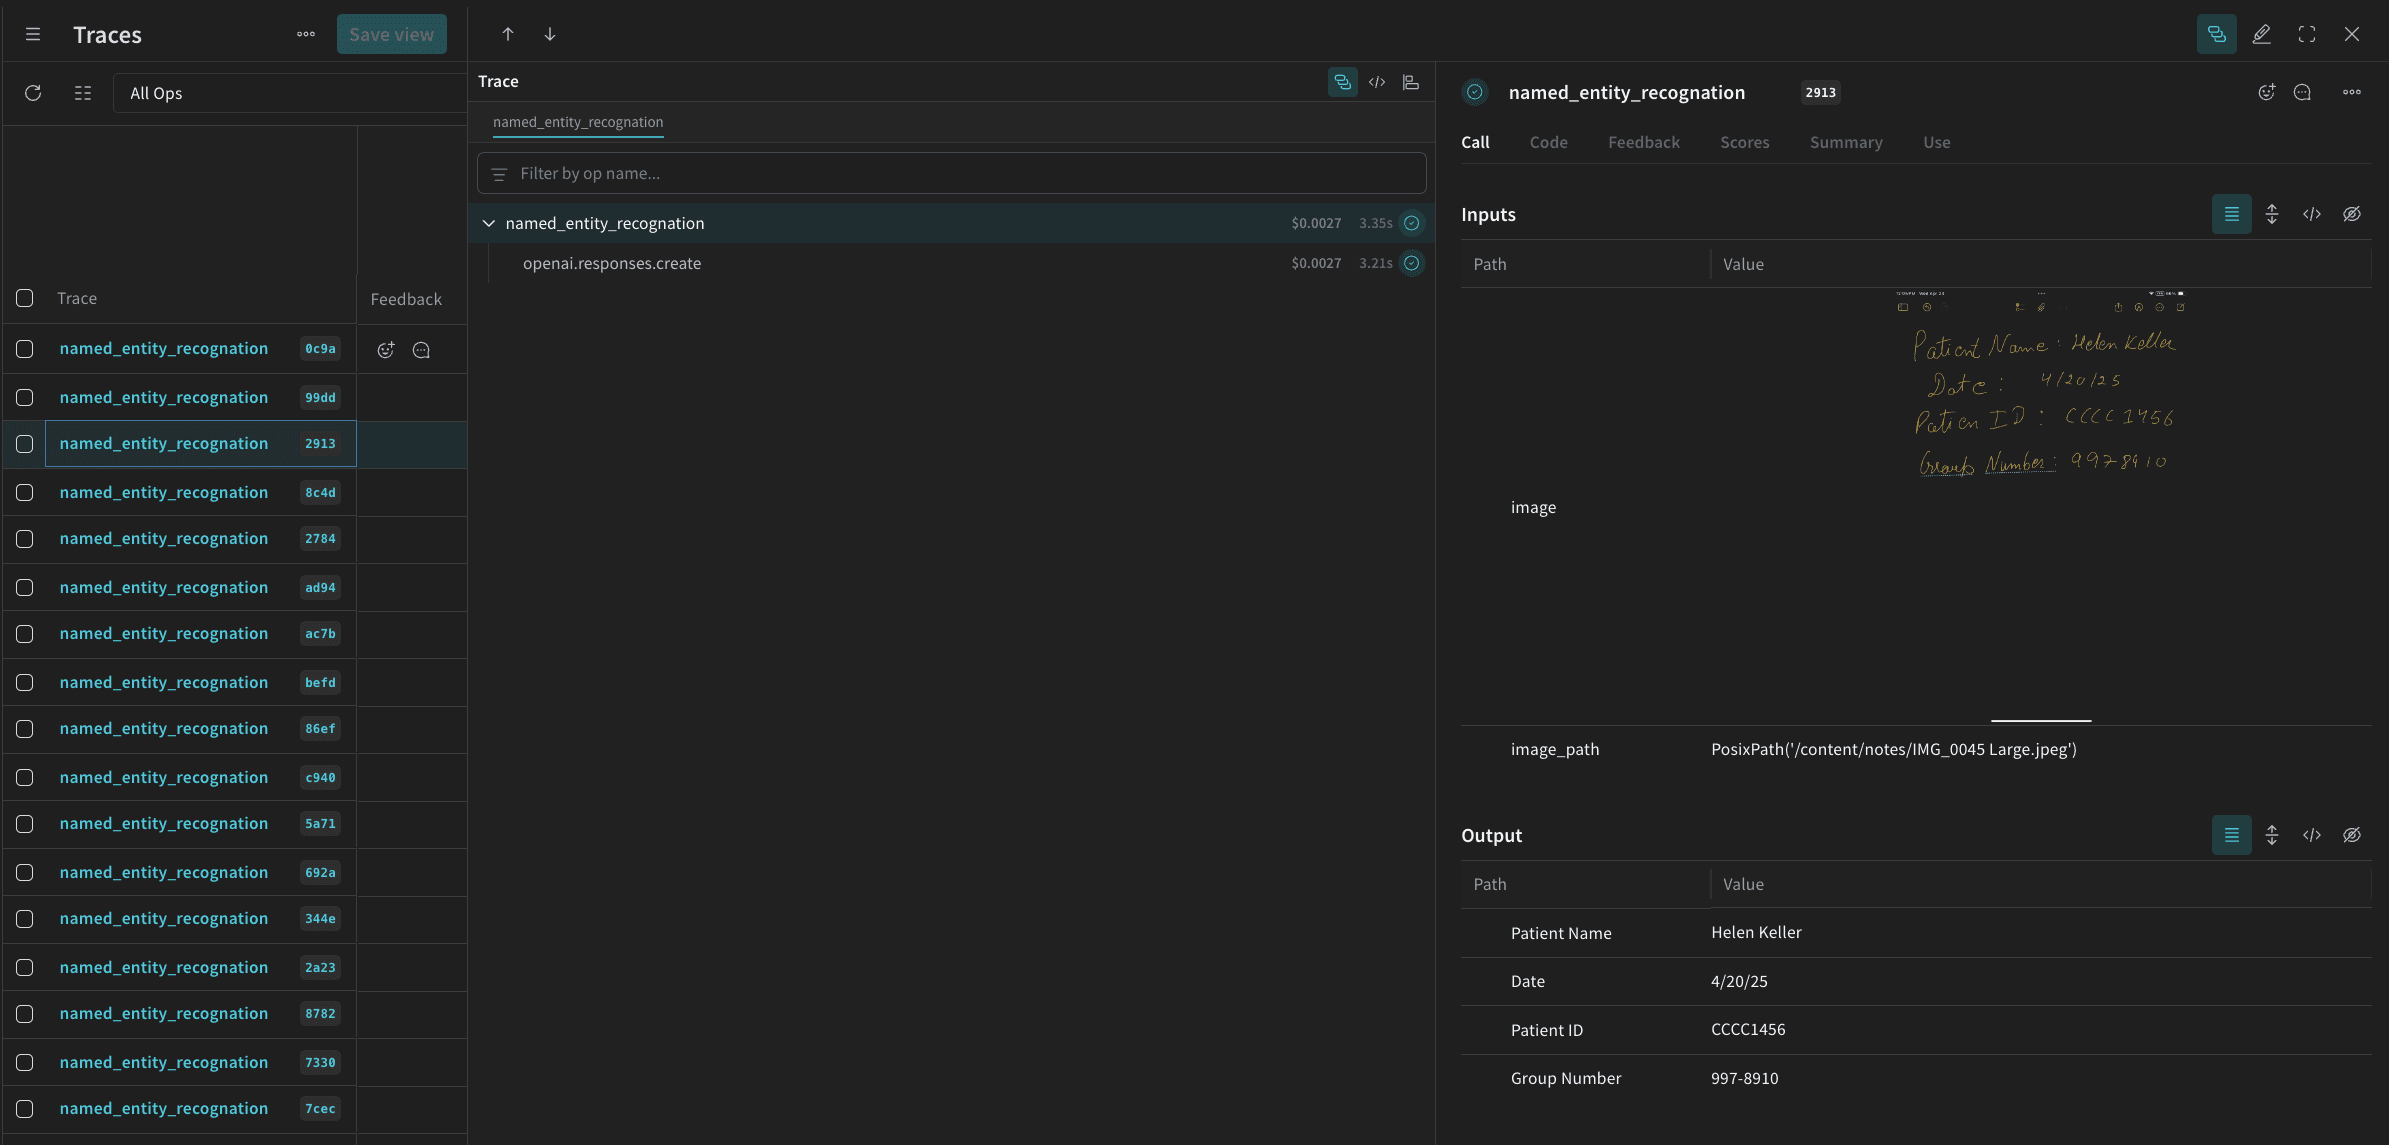
Weights & Biases UI의 **Traces** table에 다음과 비슷한 결과가 표시됩니다.
Weave를 사용하여 파이프라인 평가하기
VLM을 사용해 NER을 수행하는 파이프라인을 만들었으니, 이제 Weave로 파이프라인을 체계적으로 평가하여 성능이 어느 정도인지 확인할 수 있습니다. 파이프라인을 평가하면 표본 검사에 의존하지 않고 전체 데이터셋을 대상으로 추출 품질을 측정할 수 있습니다. Weave의 Evaluations에 대한 자세한 내용은 [Evaluations 개요](/ko/products/wandb/weave/guides/core-types/evaluations)를 참조하세요.
Weave Evaluation의 핵심 요소는 [Scorer](/ko/products/wandb/weave/guides/evaluation/scorers)입니다. Scorer는 AI 출력을 평가하고 평가 메트릭을 반환합니다. AI의 출력을 받아 분석한 뒤 결과 딕셔너리를 반환합니다. 필요한 경우 입력 데이터를 레퍼런스로 활용할 수 있으며, 평가에 대한 설명이나 추론 같은 추가 정보를 출력할 수도 있습니다.
이 섹션에서는 파이프라인을 평가할 Scorer 두 가지를 만듭니다.
* 프로그래밍 방식 Scorer
* LLM-as-a-judge scorer
프로그래밍 방식 Scorer
첫 번째 Scorer는 LLM 없이 실행되는 결정론적 검사입니다. 프로그래밍 방식 Scorer인 `check_for_missing_fields_programatically`는 모델 출력(`named_entity_recognition` 함수의 출력)을 받아 결과에서 누락되거나 비어 있는 `keys`를 파악합니다.
이 검사는 모델이 필드를 캡처하지 못한 샘플을 파악하는 데 유용합니다.
```python lines theme={"system"}
# weave.op()를 추가하여 Scorer의 실행을 추적하세요
@weave.op()
def check_for_missing_fields_programatically(model_output):
# 모든 항목에 필요한 키
required_fields = {"Patient Name", "Date", "Patient ID", "Group Number"}
for key in required_fields:
if (
key not in model_output
or model_output[key] is None
or str(model_output[key]).strip() == ""
):
return False # 이 항목에 누락되거나 비어 있는 필드가 있습니다
return True # 모든 필수 필드가 존재하며 비어 있지 않습니다
```
LLM-as-a-judge scorer
프로그래밍 방식 Scorer는 누락되었거나 비어 있는 필드만 감지하므로, 추출된 값이 이미지에 나타난 내용과 일치하는지 확인하려면 두 번째 Scorer가 필요합니다. 평가의 이 단계에서는 이미지 데이터와 모델의 출력을 함께 제공하여 평가 결과가 실제 NER 성능을 반영하도록 합니다. 모델 출력뿐 아니라 이미지 콘텐츠도 명시적으로 참조합니다.
이 단계에서 사용하는 Scorer인 `check_for_missing_fields_with_llm`은 LLM(구체적으로는 OpenAI의 `gpt-4o`)을 사용하여 점수화를 수행합니다. `eval_prompt`에 명시된 대로 `check_for_missing_fields_with_llm`은 `Boolean` 값을 출력합니다. 모든 필드가 이미지의 정보와 일치하고 형식이 올바르면 Scorer는 `true`를 반환합니다. 필드 중 하나라도 누락되었거나, 비어 있거나, 올바르지 않거나, 이미지와 일치하지 않으면 결과는 `false`이며, Scorer는 문제를 설명하는 메시지도 함께 반환합니다.
```python lines theme={"system"}
# LLM-as-a-judge용 system 프롬프트
eval_prompt = """
You are an OCR validation system. Your role is to assess whether the structured text extracted from an image accurately reflects the information in that image.
Only validate the structured text and use the image as your source of truth.
Expected input text format:
{"Patient Name": "First Last", "Date": "04/23/25", "Patient ID": "131313JJH", "Group Number": "35453453"}
Evaluation criteria:
- All four fields must be present.
- No field should be empty or contain placeholder/malformed values.
- The "Date" should be in MM/DD/YY format (e.g., "04/07/25") (zero padding the date is allowed)
Scoring:
- Return: {"Correct": true, "Reason": ""} if **all fields** match the information in the image and formatting is correct.
- Return: {"Correct": false, "Reason": "EXPLANATION"} if **any** field is missing, empty, incorrect, or mismatched.
Output requirements:
- Respond with a valid JSON object only.
- "Correct" must be a JSON boolean: true or false (not a string or number).
- "Reason" must be a short, specific string indicating all the problem — e.g., "Patient Name mismatch", "Date not zero-padded", or "Missing Group Number".
- Do not return any additional explanation or formatting.
Your response must be exactly one of the following:
{"Correct": true, "Reason": null}
OR
{"Correct": false, "Reason": "EXPLANATION_HERE"}
"""
# Scorer 실행을 추적하도록 weave.op() 추가
@weave.op()
def check_for_missing_fields_with_llm(model_output, image_base64):
client = OpenAI()
response = client.chat.completions.create(
model="gpt-4o",
messages=[
{"role": "developer", "content": [{"text": eval_prompt, "type": "text"}]},
{
"role": "user",
"content": [
{
"type": "image_url",
"image_url": {
"url": image_base64,
},
},
{"type": "text", "text": str(model_output)},
],
},
],
response_format={"type": "json_object"},
)
response = json.loads(response.choices[0].message.content)
return response
```
평가 실행
두 Scorer를 모두 정의했으므로 이제 평가를 실행할 수 있습니다. 전달된 `dataset`을 자동으로 순회하며 결과를 Weights & Biases UI에 함께 로깅하는 평가 호출을 정의합니다.
다음 코드는 평가를 시작하고 NER 파이프라인의 모든 출력에 두 Scorer를 적용합니다. 결과는 Weights & Biases UI의 **Evals** 탭에서 확인할 수 있습니다.
```python lines theme={"system"}
evaluation = weave.Evaluation(
dataset=dataset,
scorers=[
check_for_missing_fields_with_llm,
check_for_missing_fields_programatically,
],
name="Evaluate_4.1_NER",
)
print(await evaluation.evaluate(named_entity_recognation))
```
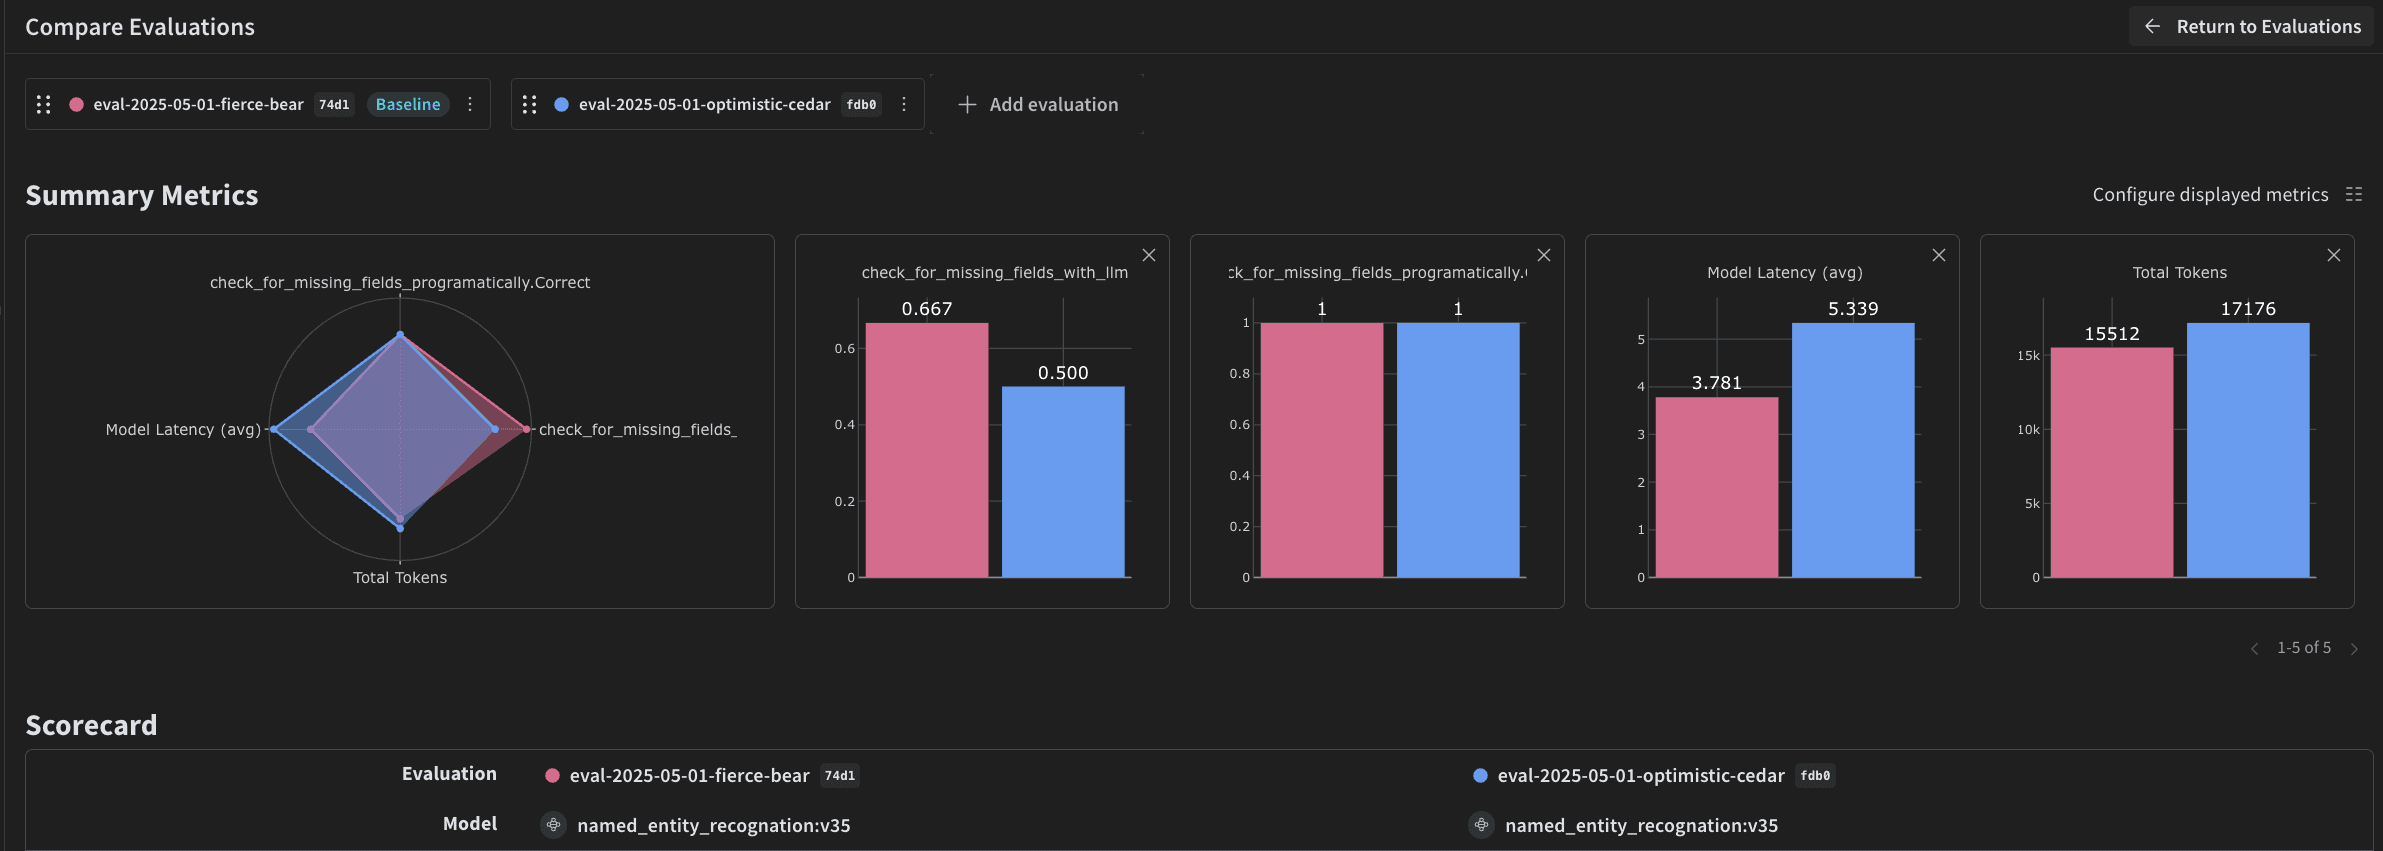
앞의 코드를 실행하면 Weave가 Weights & Biases UI의 Evaluation table로 연결되는 링크를 생성합니다. 링크를 따라가 결과를 확인하고, 원하는 모델, 프롬프트, 데이터셋별로 파이프라인의 여러 반복 버전을 비교하세요. Weights & Biases UI는 팀을 위해 다음과 같은 시각화를 자동으로 생성합니다.