> ## Documentation Index
> Fetch the complete documentation index at: https://docs.coreweave.com/llms.txt
> Use this file to discover all available pages before exploring further.
# Not Diamond 맞춤형 라우팅
> W&B Weave에서 Not Diamond 맞춤형 라우팅을 사용하는 방법을 알아보세요
이 문서는 대화형 노트북입니다. 로컬에서 실행하거나 다음 링크를 이용할 수 있습니다.
* [Google Colab에서 열기](https://colab.research.google.com/github/wandb/docs/blob/main/weave/cookbooks/source/notdiamond_custom_routing.ipynb)
* [GitHub에서 소스 보기](https://github.com/wandb/docs/blob/main/weave/cookbooks/source/notdiamond_custom_routing.ipynb)
이 노트북에서는 Weave와 [Not Diamond의 맞춤형 라우팅](https://docs.notdiamond.ai/docs/router-training-quickstart)을 함께 사용해 평가 결과를 바탕으로 LLM 프롬프트를 가장 적합한 모델로 라우팅하는 방법을 알아봅니다. 이 노트북을 끝까지 진행하면 코딩 프롬프트용 맞춤형 라우터를 트레이닝하고, 이 라우터로 새 프롬프트에 사용할 대상 모델을 선택한 뒤, 가장 성능이 좋은 단일 모델과 비교해 라우터의 성능을 평가하게 됩니다.
프롬프트 라우팅
이 섹션에서는 여러 LLM을 함께 사용할 때 맞춤형 라우팅이 왜 유용한지 설명합니다.
복잡한 LLM 워크플로를 구축하다 보면 정확도, 비용, 호출 지연 시간에 따라 서로 다른 모델에 프롬프트를 보내야 할 때가 있습니다.
[Not Diamond](https://www.notdiamond.ai/)를 사용하면 이러한 워크플로의 프롬프트를 요구 사항에 가장 적합한 모델로 라우팅하여, 모델 비용은 절감하면서 정확도는 극대화할 수 있습니다.
어떤 데이터 분포에서든 단일 모델이 모든 쿼리에서 다른 모든 모델보다 뛰어난 경우는 드뭅니다. 여러 모델을 결합해 각 LLM을 언제 호출할지 학습하는 "메타 모델"을 만들면, 어떤 개별 모델보다도 뛰어난 성능을 낼 수 있을 뿐 아니라 비용과 지연 시간까지 줄일 수 있습니다.
맞춤형 라우팅
프롬프트에 맞는 맞춤형 라우터를 트레이닝하려면 다음 입력이 필요합니다.
1. **LLM 프롬프트 세트**: 프롬프트는 문자열이어야 하며, 애플리케이션에서 실제로 사용하는 프롬프트를 잘 대표해야 합니다.
2. **LLM 응답**: 각 입력에 대해 후보 LLM이 생성한 응답입니다. 후보 LLM에는 지원되는 LLM과 자체 맞춤형 모델을 모두 포함할 수 있습니다.
3. **후보 LLM이 입력에 대해 생성한 응답의 평가 점수**: 점수는 숫자이며, 필요에 맞는 메트릭이라면 무엇이든 사용할 수 있습니다.
이 데이터를 Not Diamond API에 제출하면 각 워크플로에 맞게 조정된 맞춤형 라우터를 트레이닝할 수 있습니다.
트레이닝 데이터 설정
이 섹션에서는 맞춤형 라우터가 학습할 트레이닝 데이터와 테스트 데이터를 준비합니다.
실제로는 자체 Evaluations를 사용해 맞춤형 라우터를 트레이닝합니다. 하지만 이 예시 노트북에서는 [HumanEval 데이터셋](https://github.com/openai/human-eval)에 대한 LLM 응답을
사용해 코딩 작업용 맞춤형 라우터를 트레이닝합니다.
먼저 이 예제용으로 준비된 데이터셋을 다운로드한 다음, LLM 응답을 모델별 `EvaluationResults`로 파싱합니다. 이렇게 분할한 트레이닝 데이터와 테스트 데이터는 이후 섹션에서 라우터를 트레이닝하고 표본 외(out-of-sample) 성능을 평가하는 데 사용합니다.
```python lines theme={"system"}
!curl -L "https://drive.google.com/uc?export=download&id=1q1zNZHioy9B7M-WRjsJPkfvFosfaHX38" -o humaneval.csv
python
import random
import weave
from weave.flow.dataset import Dataset
from weave.flow.eval import EvaluationResults
from weave.integrations.notdiamond.util import get_model_evals
pct_train = 0.8
pct_test = 1 - pct_train
# 실제로는 사용자의 데이터셋으로 Evaluation을 구축한 뒤
# `evaluation.get_eval_results(model)`을 호출합니다
model_evals = get_model_evals("./humaneval.csv")
model_train = {}
model_test = {}
for model, evaluation_results in model_evals.items():
n_results = len(evaluation_results.rows)
all_idxs = list(range(n_results))
train_idxs = random.sample(all_idxs, k=int(n_results * pct_train))
test_idxs = [idx for idx in all_idxs if idx not in train_idxs]
model_train[model] = EvaluationResults(
rows=weave.Table([evaluation_results.rows[idx] for idx in train_idxs])
)
model_test[model] = Dataset(
rows=weave.Table([evaluation_results.rows[idx] for idx in test_idxs])
)
print(
f"Found {len(train_idxs)} train rows and {len(test_idxs)} test rows for {model}."
)
```
맞춤형 라우터 트레이닝하기
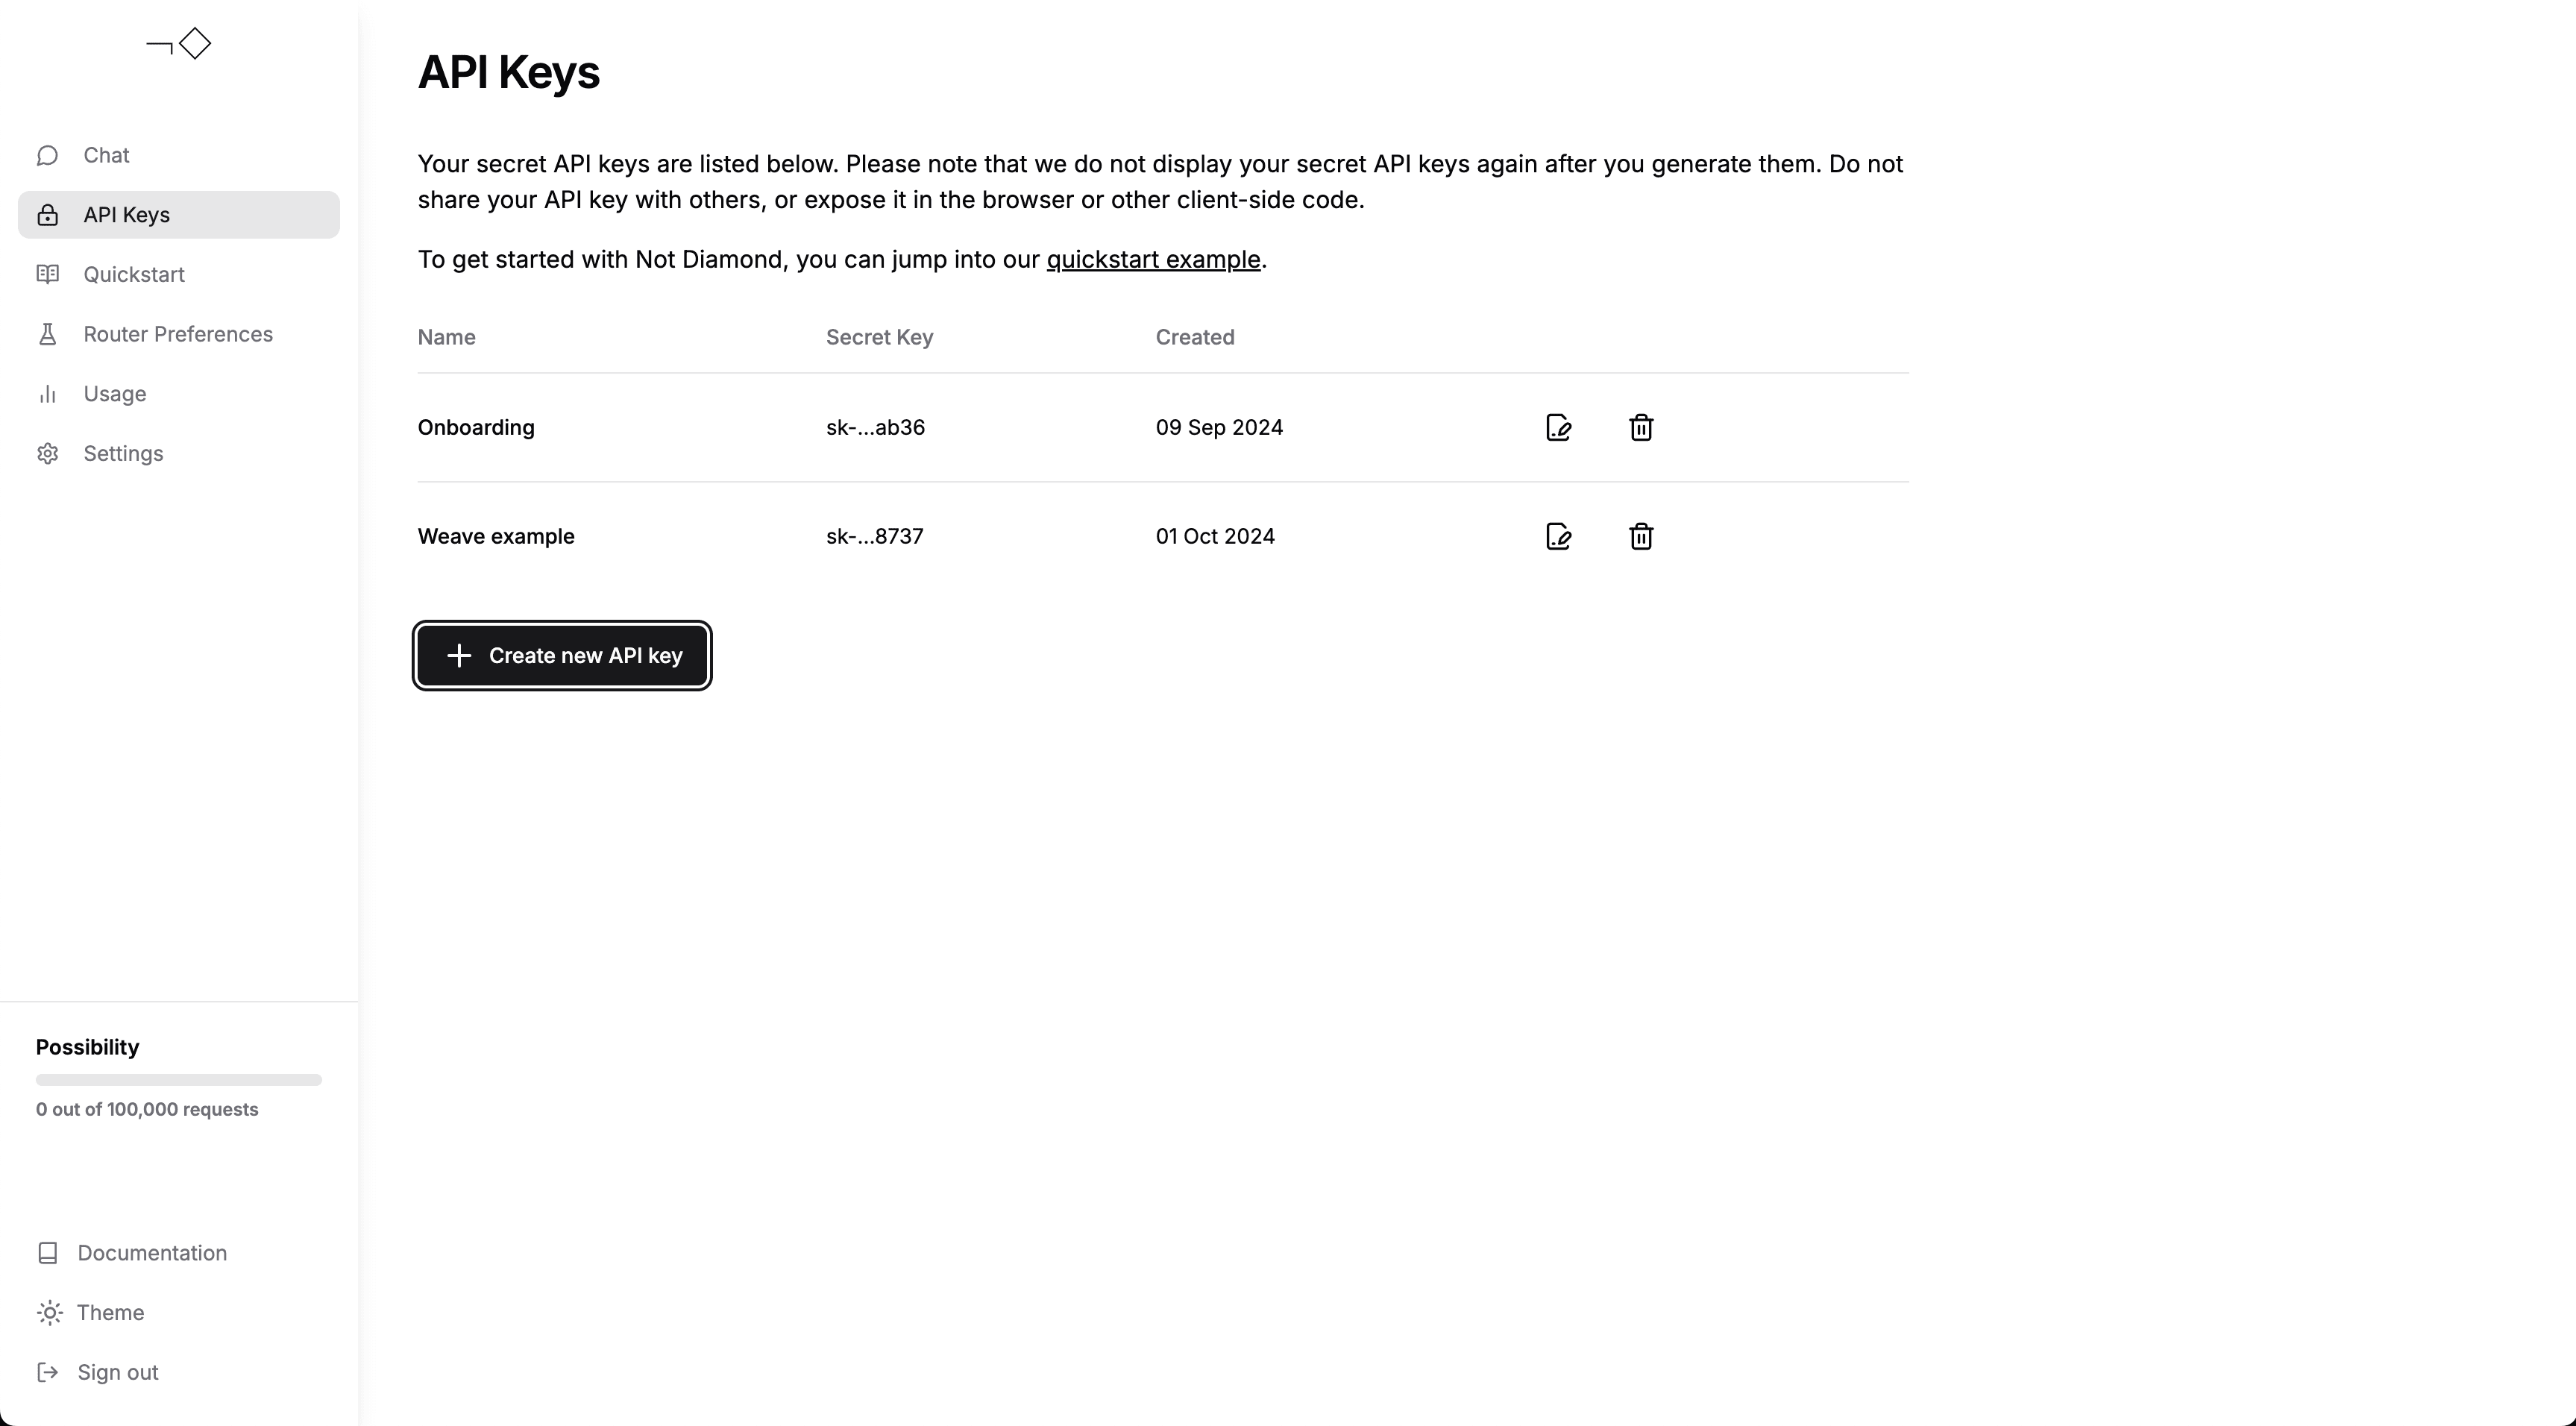
`EvaluationResults`가 준비되었으면 이를 Not Diamond에 제출하여 맞춤형 라우터를 트레이닝할 수 있습니다. [계정을 생성](https://app.notdiamond.ai/keys)하고
[API 키를 발급](https://app.notdiamond.ai/keys)받은 후, 다음 코드에 API 키를 입력하세요. API 키는 트레이닝 요청을 인증하는 데 사용됩니다.
 ```python lines theme={"system"}
import os
from weave.integrations.notdiamond.custom_router import train_router
api_key = os.getenv("NOTDIAMOND_API_KEY", "")
preference_id = train_router(
model_evals=model_train,
prompt_column="prompt",
response_column="actual",
language="en",
maximize=True,
api_key=api_key,
# 맞춤형 라우터를 처음 학습시키는 경우 이 줄을 주석 처리된 상태로 두세요
# 기존 맞춤형 라우터를 새로 만들지 않고 재학습시키려면 이 줄의 주석을 해제하세요
# preference_id=preference_id,
)
```
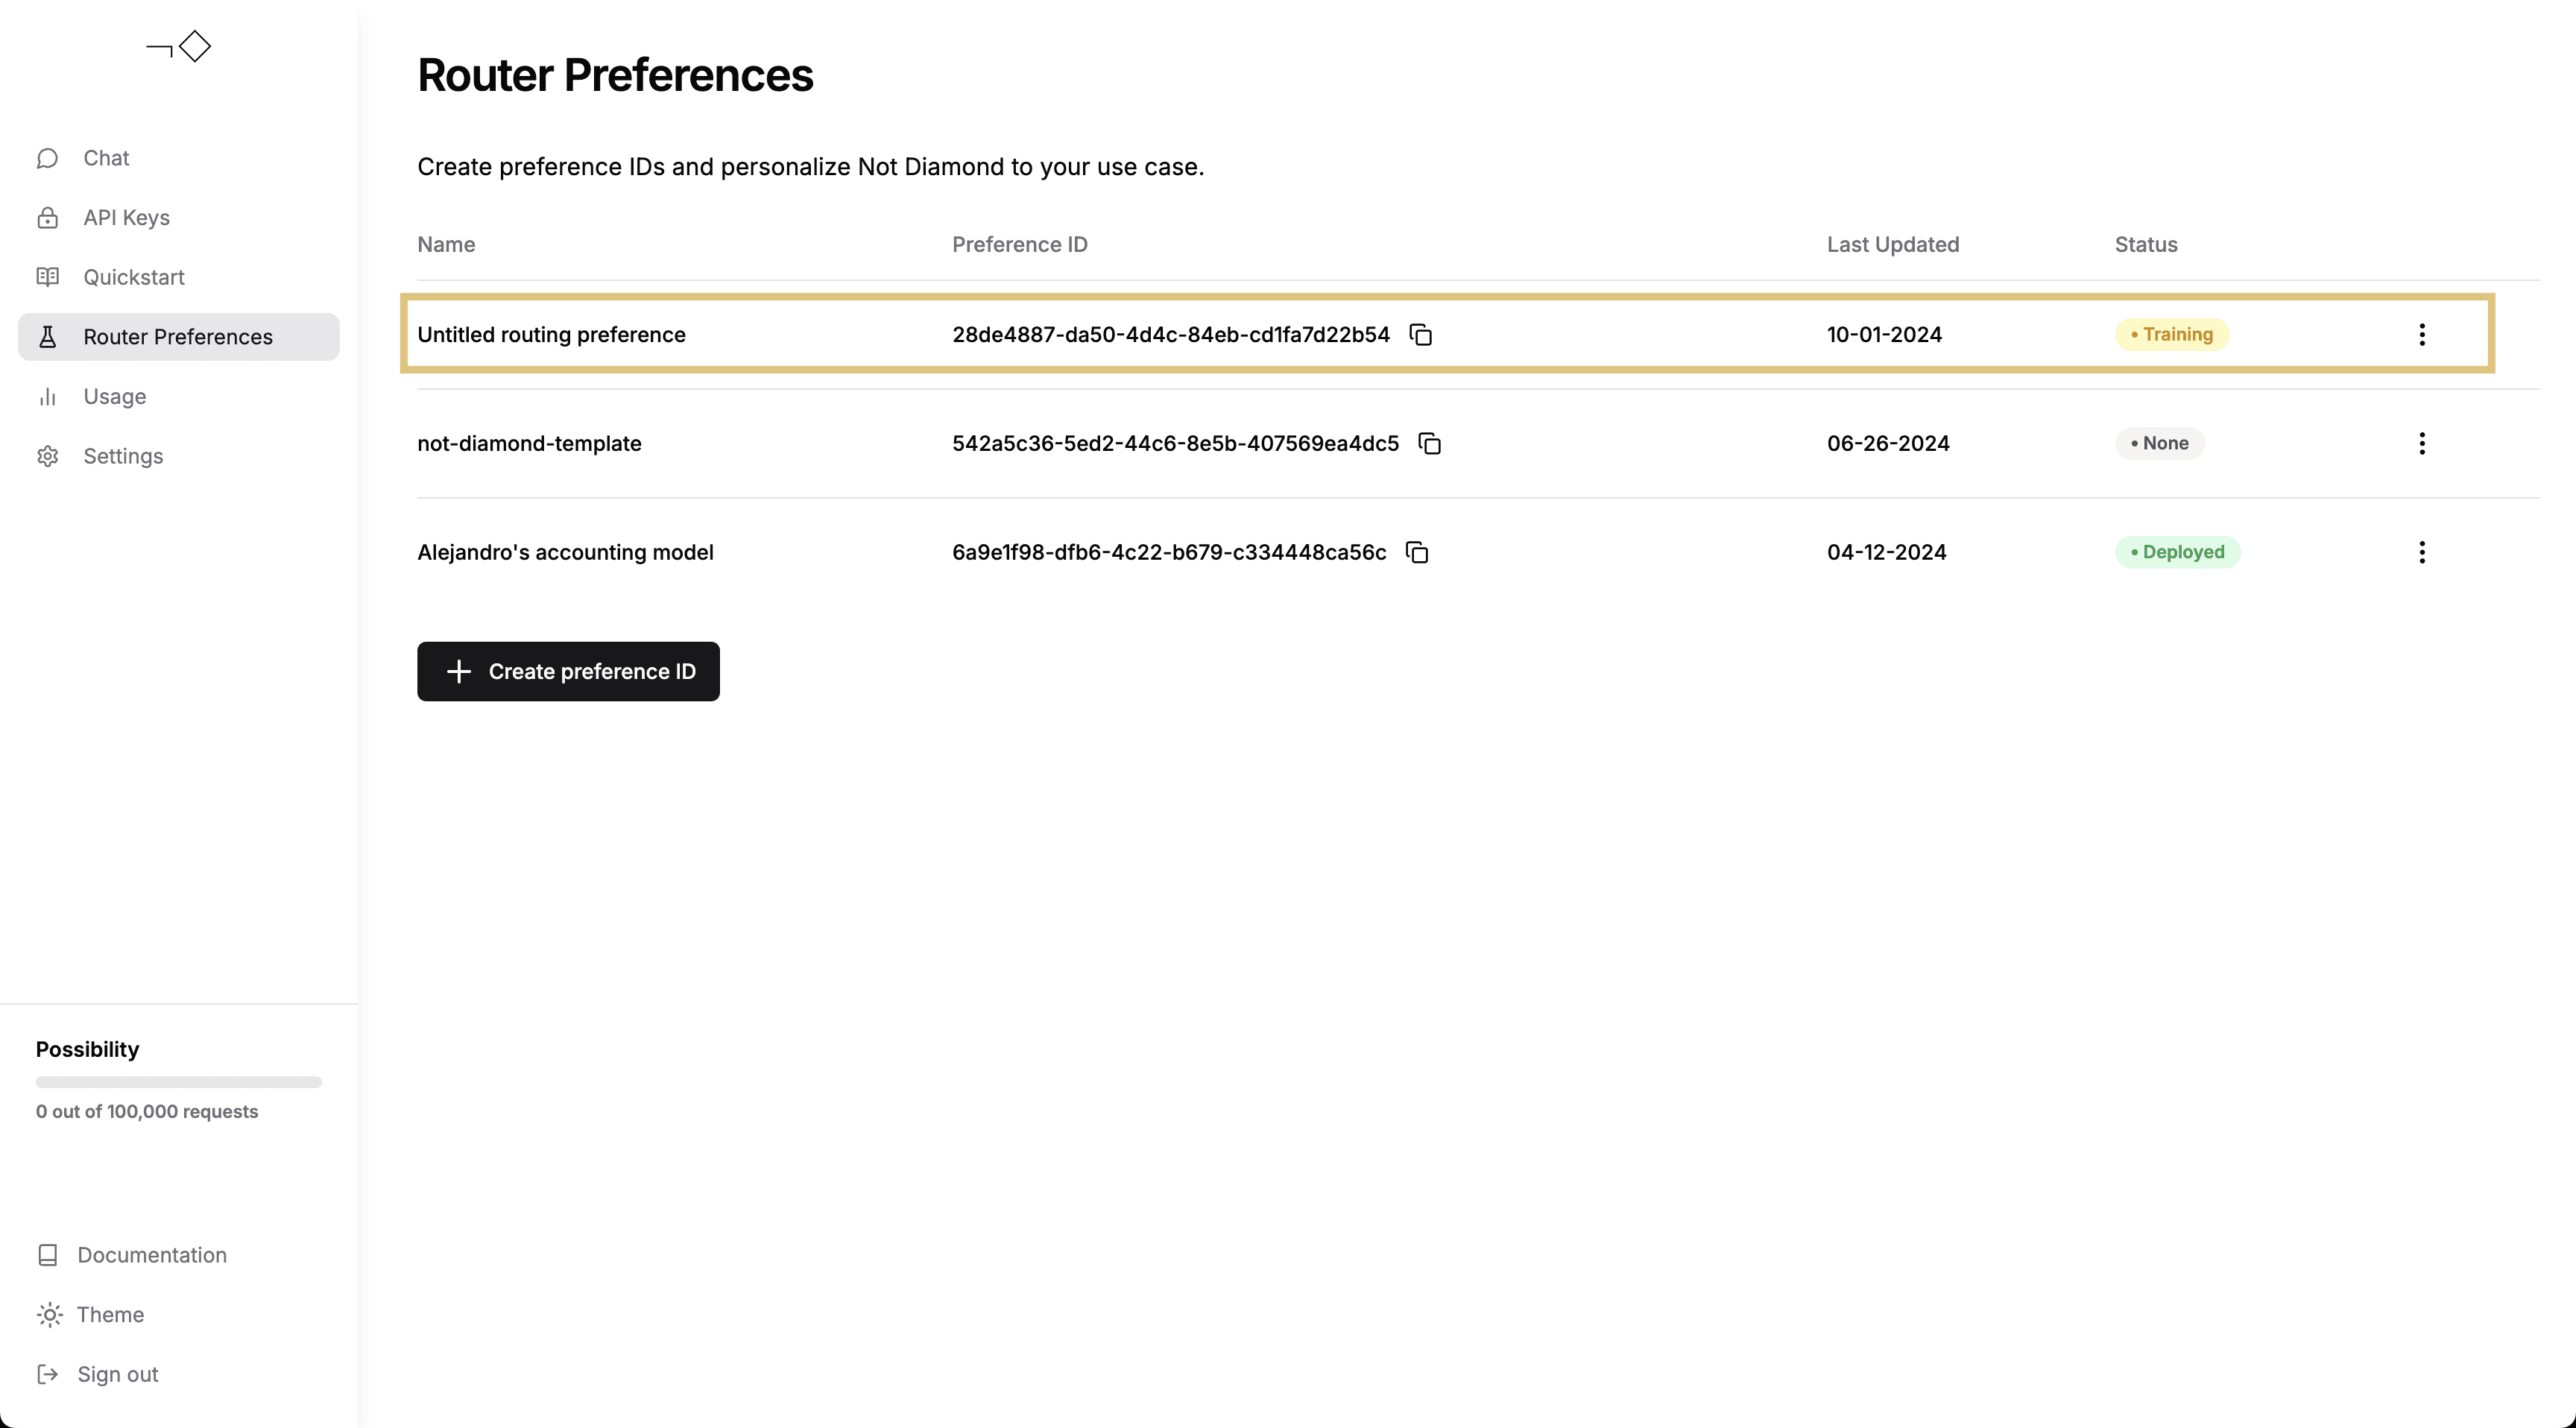
이후 Not Diamond 앱에서 맞춤형 라우터의 트레이닝 진행 과정을 확인할 수 있습니다.
```python lines theme={"system"}
import os
from weave.integrations.notdiamond.custom_router import train_router
api_key = os.getenv("NOTDIAMOND_API_KEY", "")
preference_id = train_router(
model_evals=model_train,
prompt_column="prompt",
response_column="actual",
language="en",
maximize=True,
api_key=api_key,
# 맞춤형 라우터를 처음 학습시키는 경우 이 줄을 주석 처리된 상태로 두세요
# 기존 맞춤형 라우터를 새로 만들지 않고 재학습시키려면 이 줄의 주석을 해제하세요
# preference_id=preference_id,
)
```
이후 Not Diamond 앱에서 맞춤형 라우터의 트레이닝 진행 과정을 확인할 수 있습니다.
 맞춤형 라우터의 트레이닝이 완료되면 이 라우터로 프롬프트를 라우팅할 수 있습니다.
```python lines theme={"system"}
from notdiamond import NotDiamond
import weave
weave.init("notdiamond-quickstart")
llm_configs = [
"anthropic/claude-3-5-sonnet-20240620",
"openai/gpt-4o-2024-05-13",
"google/gemini-1.5-pro-latest",
"openai/gpt-4-turbo-2024-04-09",
"anthropic/claude-3-opus-20240229",
]
client = NotDiamond(api_key=api_key, llm_configs=llm_configs)
new_prompt = (
"""
You are a helpful coding assistant. Using the provided function signature, write the implementation for the function
in Python. Write only the function. Do not include any other text.
from typing import List
def has_close_elements(numbers: List[float], threshold: float) -> bool:
"""
""" Check if in given list of numbers, are any two numbers closer to each other than
given threshold.
>>> has_close_elements([1.0, 2.0, 3.0], 0.5)
False
>>> has_close_elements([1.0, 2.8, 3.0, 4.0, 5.0, 2.0], 0.3)
True
"""
"""
"""
)
session_id, routing_target_model = client.model_select(
messages=[{"role": "user", "content": new_prompt}],
preference_id=preference_id,
)
print(f"Session ID: {session_id}")
print(f"Target Model: {routing_target_model}")
```
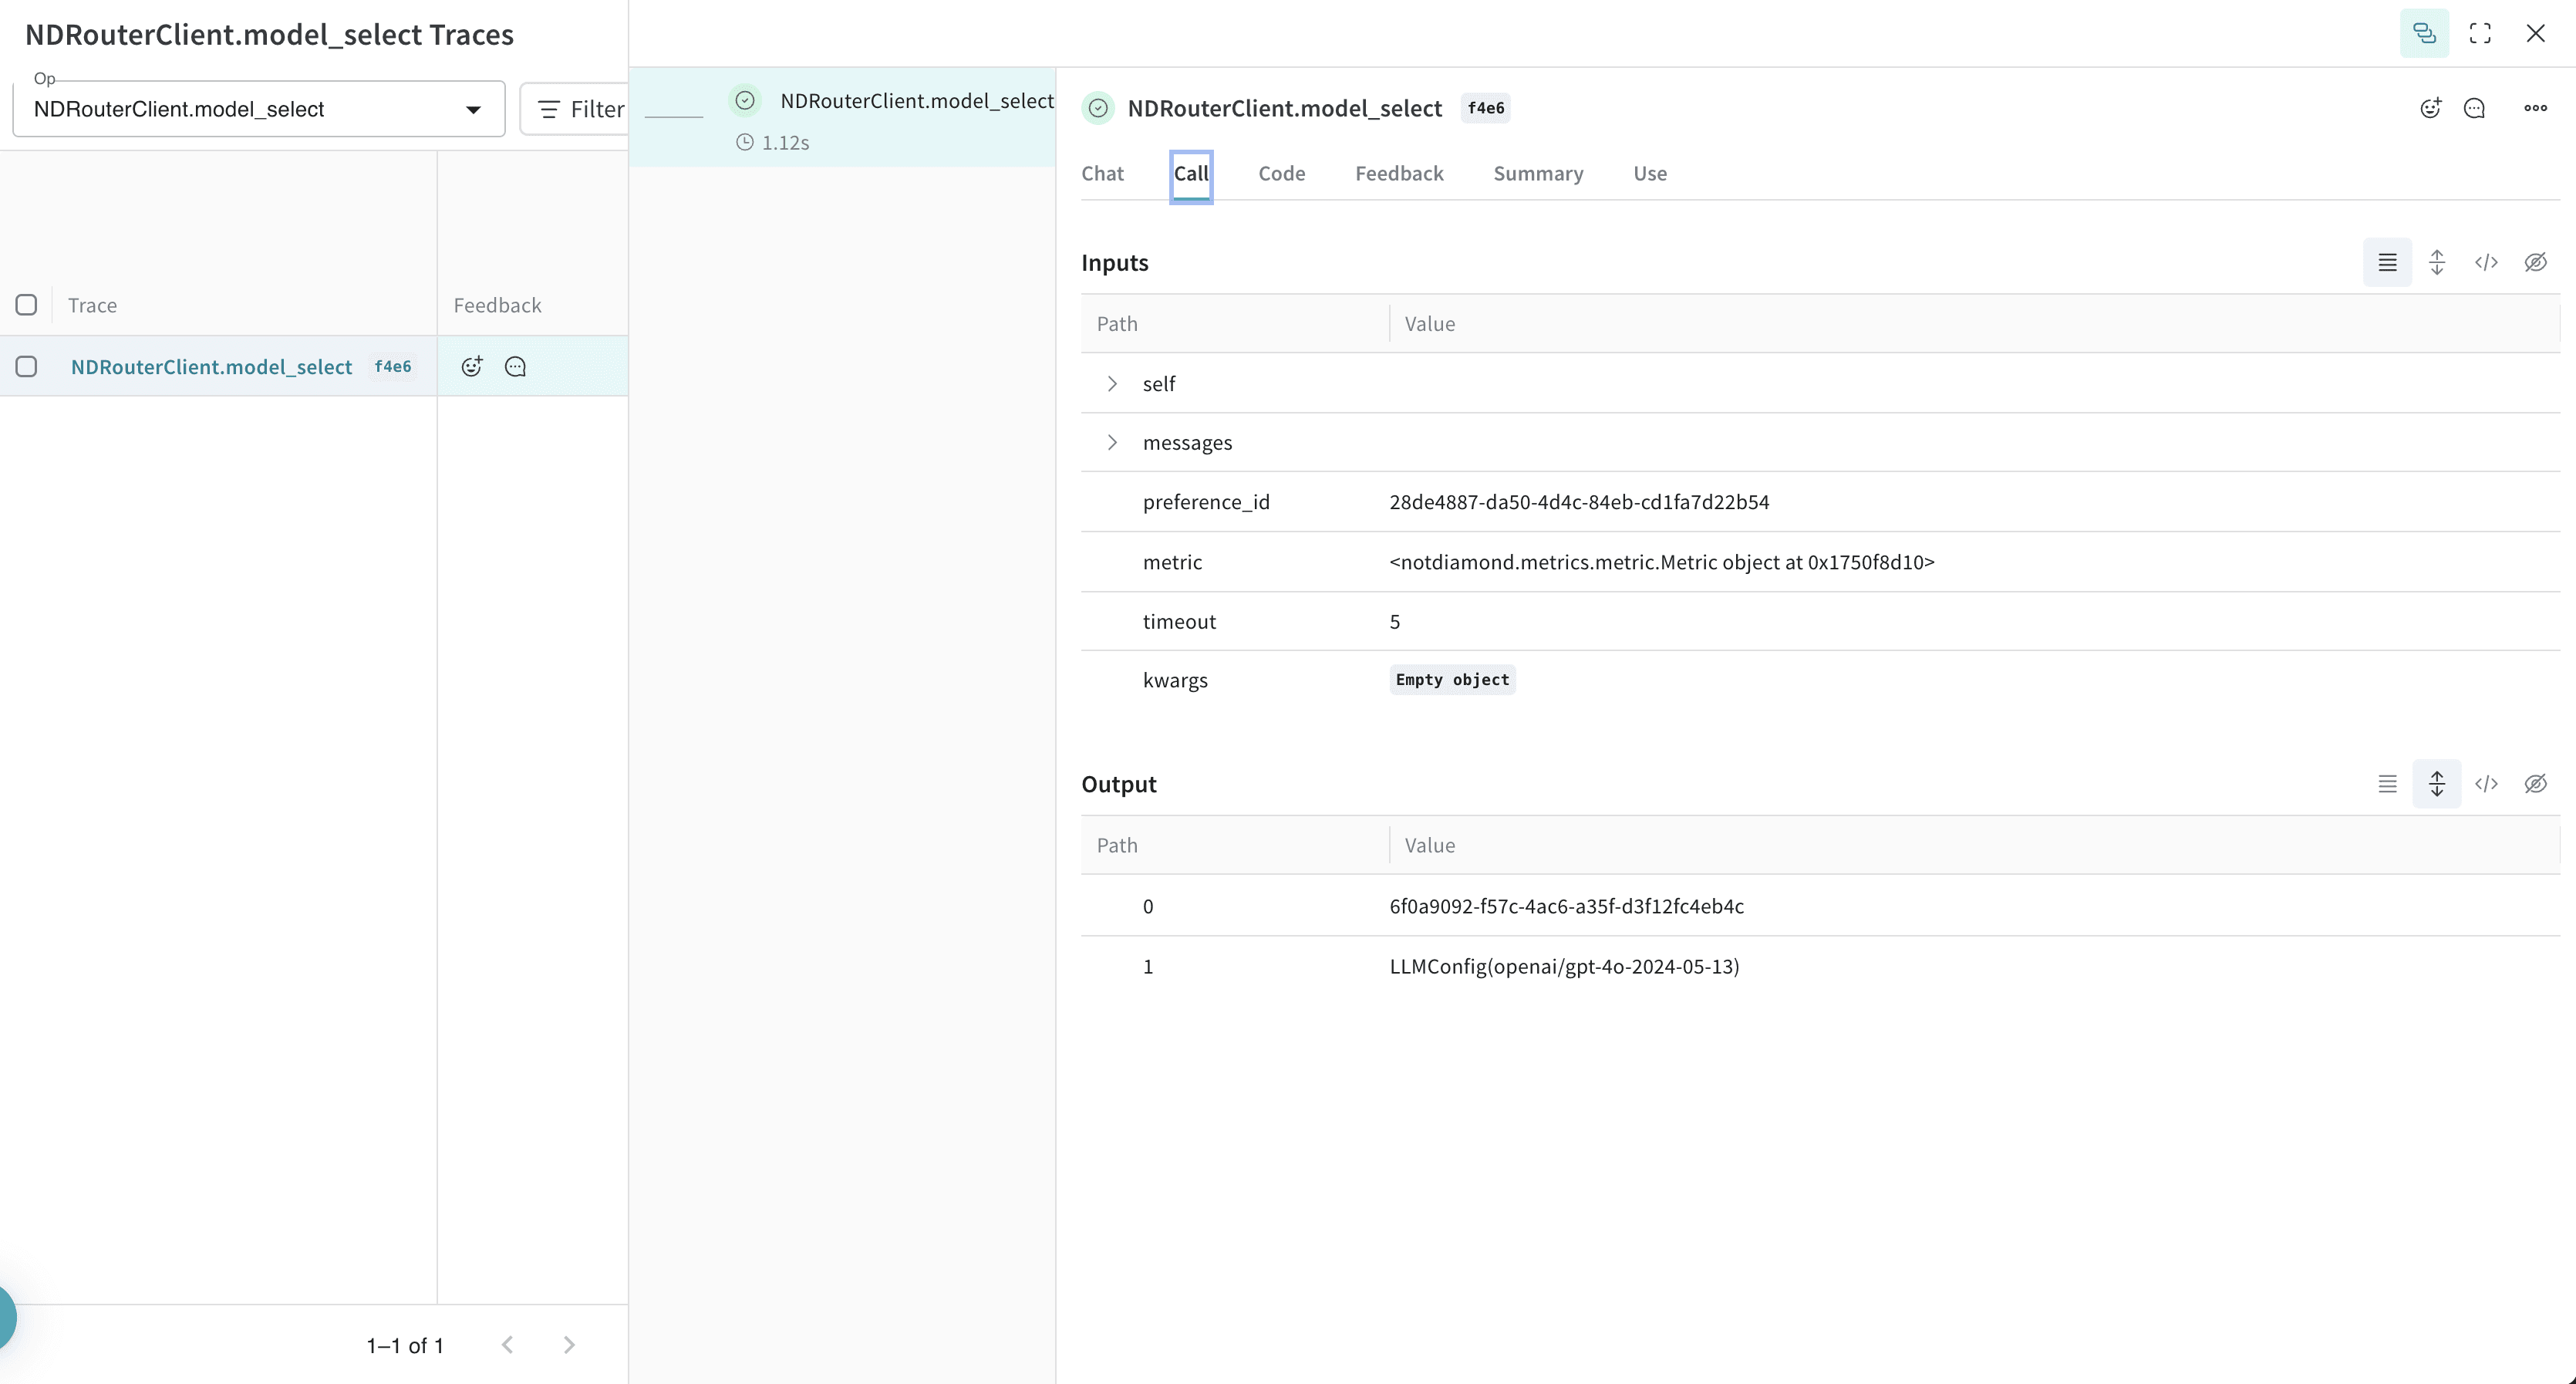
이 예제에서는 Not Diamond가 Weave 자동 트레이싱과 호환된다는 점도 활용했습니다. 결과는 Weights & Biases UI에서 확인할 수 있습니다.
맞춤형 라우터의 트레이닝이 완료되면 이 라우터로 프롬프트를 라우팅할 수 있습니다.
```python lines theme={"system"}
from notdiamond import NotDiamond
import weave
weave.init("notdiamond-quickstart")
llm_configs = [
"anthropic/claude-3-5-sonnet-20240620",
"openai/gpt-4o-2024-05-13",
"google/gemini-1.5-pro-latest",
"openai/gpt-4-turbo-2024-04-09",
"anthropic/claude-3-opus-20240229",
]
client = NotDiamond(api_key=api_key, llm_configs=llm_configs)
new_prompt = (
"""
You are a helpful coding assistant. Using the provided function signature, write the implementation for the function
in Python. Write only the function. Do not include any other text.
from typing import List
def has_close_elements(numbers: List[float], threshold: float) -> bool:
"""
""" Check if in given list of numbers, are any two numbers closer to each other than
given threshold.
>>> has_close_elements([1.0, 2.0, 3.0], 0.5)
False
>>> has_close_elements([1.0, 2.8, 3.0, 4.0, 5.0, 2.0], 0.3)
True
"""
"""
"""
)
session_id, routing_target_model = client.model_select(
messages=[{"role": "user", "content": new_prompt}],
preference_id=preference_id,
)
print(f"Session ID: {session_id}")
print(f"Target Model: {routing_target_model}")
```
이 예제에서는 Not Diamond가 Weave 자동 트레이싱과 호환된다는 점도 활용했습니다. 결과는 Weights & Biases UI에서 확인할 수 있습니다.
맞춤형 라우터 평가하기
이 섹션에서는 맞춤형 라우터가 가장 우수한 단일 모델보다 나은 성능을 내는지 측정하는 방법을 설명합니다.
맞춤형 라우터를 트레이닝한 후에는 다음 방법 중 하나로 성능을 평가할 수 있습니다.
* 트레이닝 프롬프트를 제출하여 표본 내(in-sample) 성능을 평가합니다.
* 새 프롬프트나 따로 떼어 둔(held-out) 프롬프트를 제출하여 표본 외(out-of-sample) 성능을 평가합니다.
다음 예시에서는 테스트 세트를 맞춤형 라우터에 제출하여 성능을 평가합니다.
```python lines theme={"system"}
from weave.integrations.notdiamond.custom_router import evaluate_router
eval_prompt_column = "prompt"
eval_response_column = "actual"
best_provider_model, nd_model = evaluate_router(
model_datasets=model_test,
prompt_column=eval_prompt_column,
response_column=eval_response_column,
api_key=api_key,
preference_id=preference_id,
)
python
@weave.op()
def is_correct(score: int, output: dict) -> dict:
# 이미 모델 응답이 있으므로 편법으로 score 값을 그대로 사용합니다
return {"correct": score}
best_provider_eval = weave.Evaluation(
dataset=best_provider_model.model_results.to_dict(orient="records"),
scorers=[is_correct],
)
await best_provider_eval.evaluate(best_provider_model)
nd_eval = weave.Evaluation(
dataset=nd_model.model_results.to_dict(orient="records"), scorers=[is_correct]
)
await nd_eval.evaluate(nd_model)
```
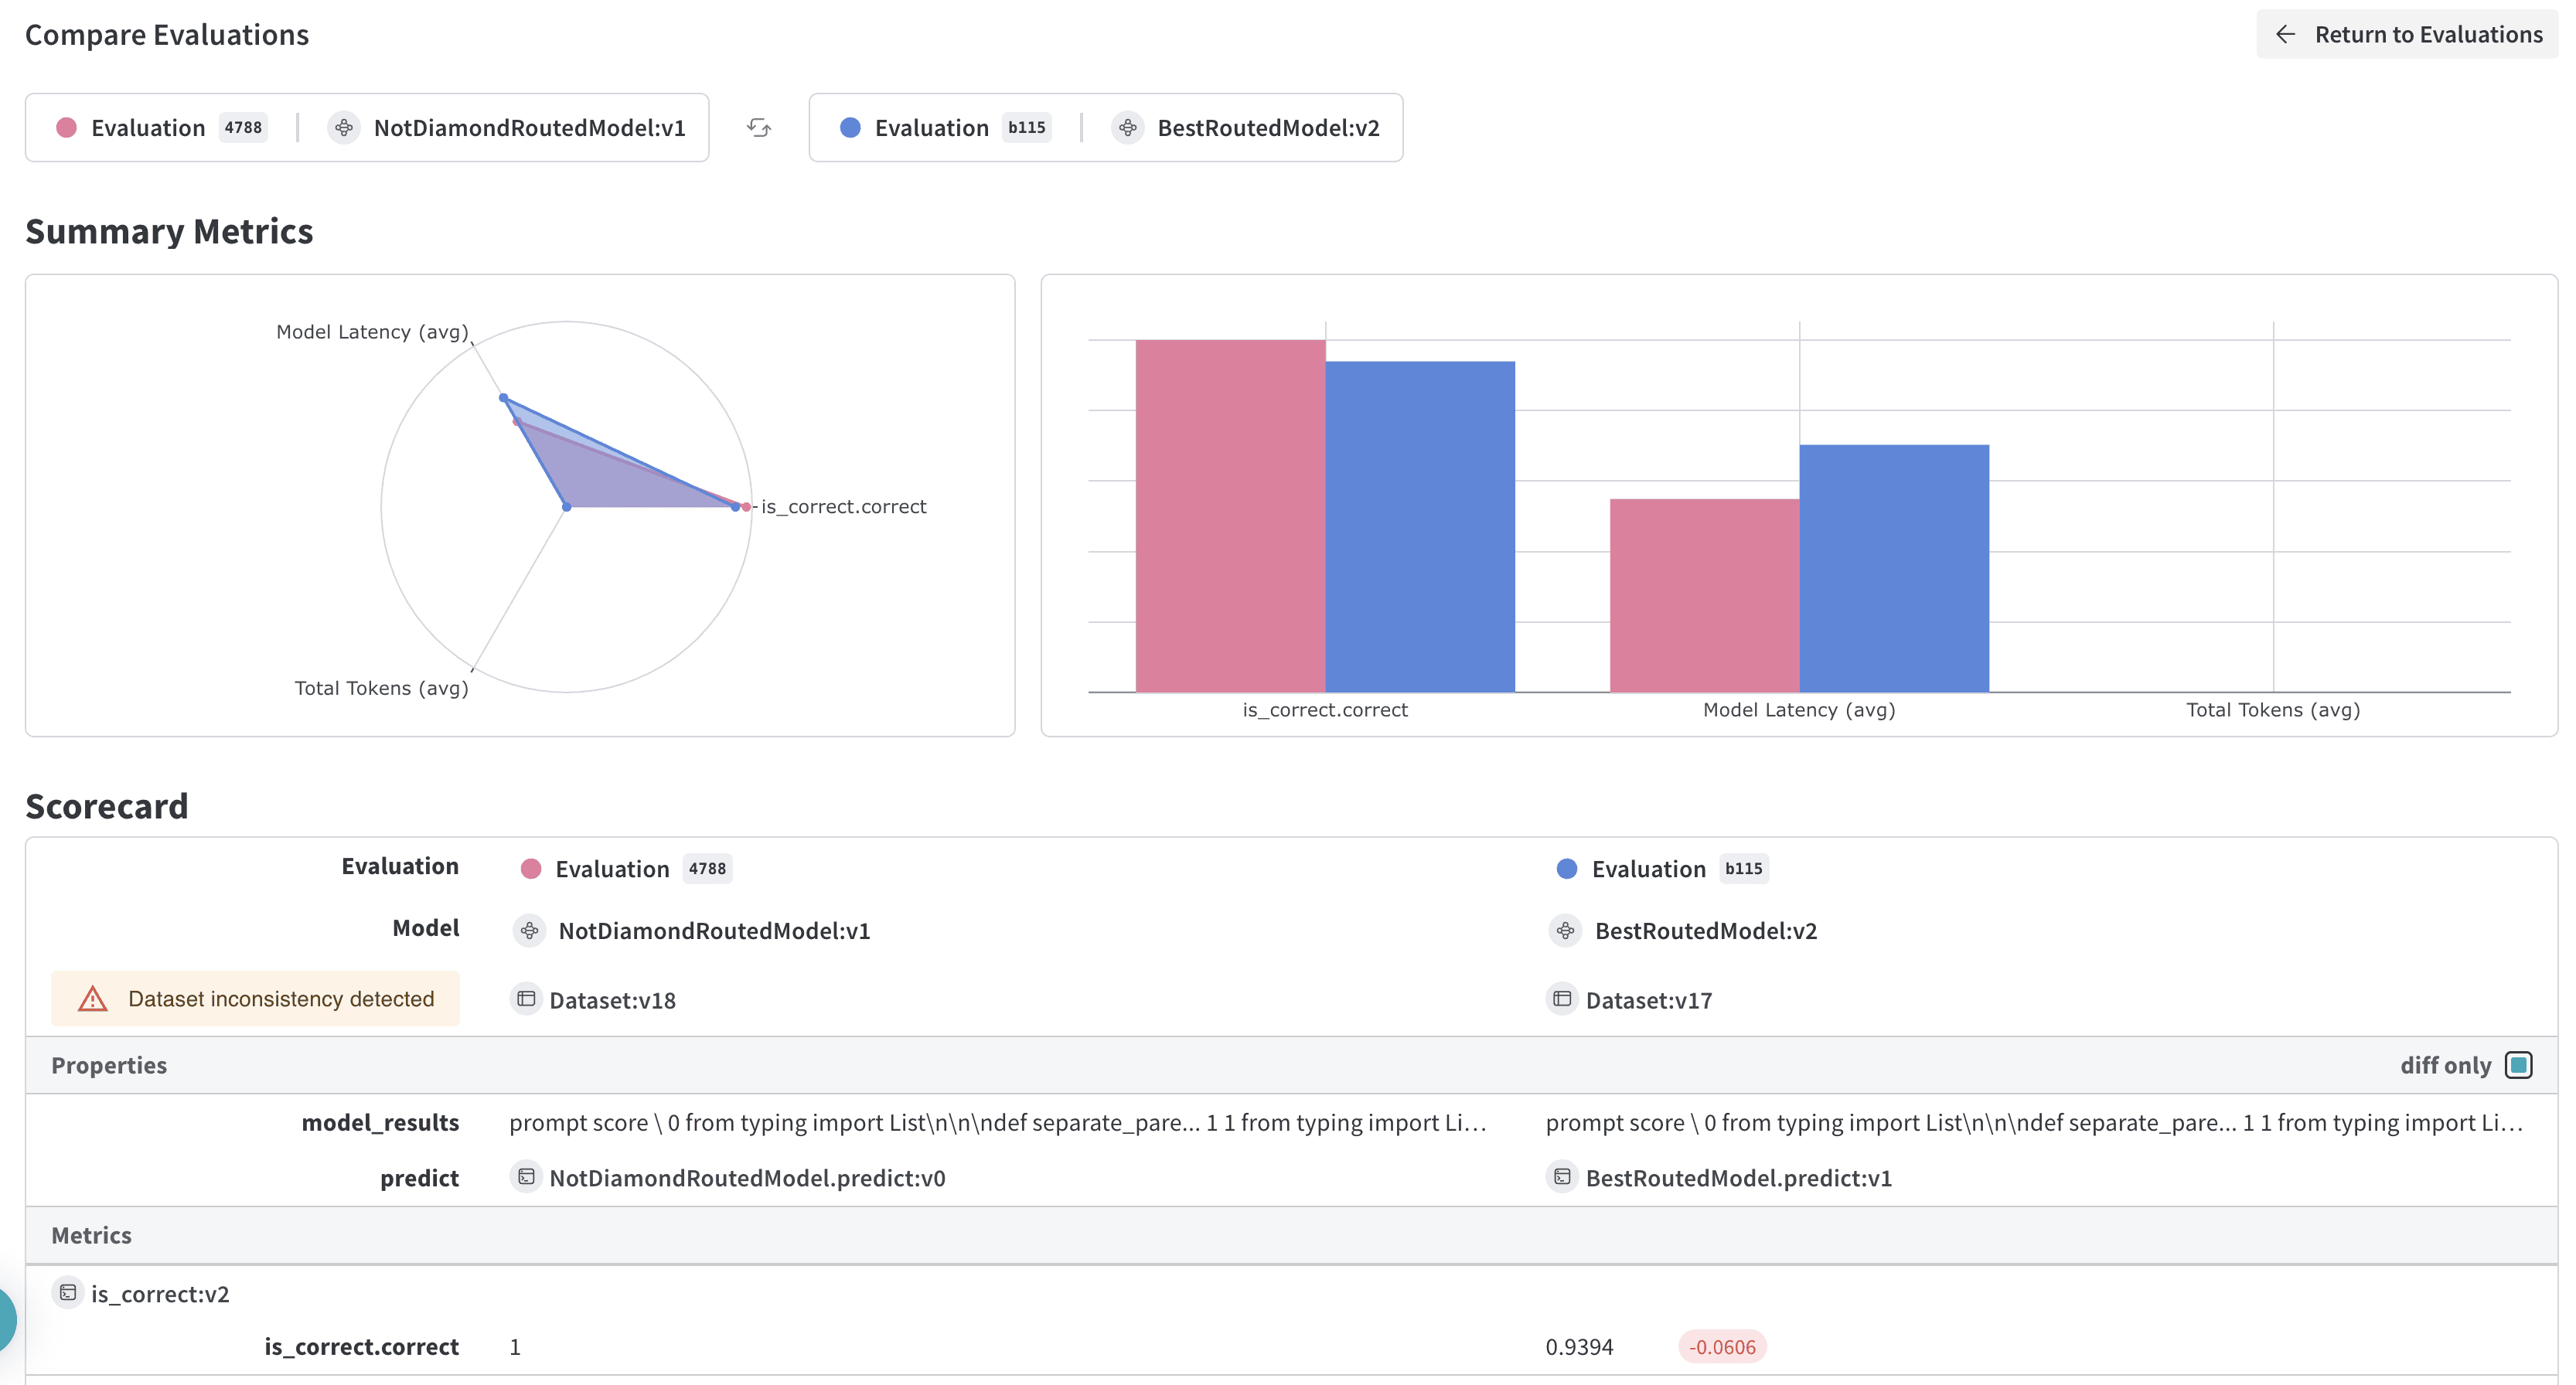
이 예시에서는 Not Diamond "메타 모델"이 여러 모델 사이에서 프롬프트를 라우팅합니다.
Weave로 맞춤형 라우터를 트레이닝하면 평가도 함께 실행되고, 그 결과가 Weights & Biases UI에 업로드됩니다. 맞춤형 라우터 프로세스가 완료되면 Weights & Biases UI에서 결과를 검토할 수 있습니다.
UI를 보면 Not Diamond "메타 모델"이 프롬프트에 정확하게 답변할 가능성이 더 높은 모델로 프롬프트를 라우팅하여, 가장 성능이 좋은 단일 모델보다 더 나은 성능을 내는 것을 확인할 수 있습니다.