> ## Documentation Index
> Fetch the complete documentation index at: https://docs.coreweave.com/llms.txt
> Use this file to discover all available pages before exploring further.
# W&B Weave와 W&B Tables를 사용하여 모델 평가하기
> W&B Weave와 Tables를 사용하여 머신러닝 모델을 평가하는 방법을 알아보세요.
Weave로 모델 평가하기
[W\&B Weave](/ko/products/wandb/weave)는 LLM과 GenAI 애플리케이션 평가를 위해 특별히 설계된 툴킷입니다. Scorer, 평가자, 상세 트레이싱 등 포괄적인 평가 기능을 제공하므로 모델 성능을 파악하고 개선할 수 있습니다. Weave는 W\&B Models와 통합되므로 모델 레지스트리에 저장된 모델을 평가할 수 있습니다.

모델 평가를 위한 주요 기능
* **Scorer 및 평가자**: 정확도, 관련성, 일관성 등을 위한 사전 구축 및 맞춤형 평가 메트릭
* **평가 데이터셋**: 체계적인 평가를 위한 그라운드 트루스가 포함된 구조화된 테스트 세트
* **모델 버전 관리**: 모델의 다양한 버전을 추적하고 비교
* **상세 트레이싱**: 완전한 입력/출력 트레이스로 모델 동작 디버그
* **비용 추적**: 평가 전반에 걸쳐 API 비용 및 토큰 사용량 모니터링
Getting Started: 레지스트리에서 모델 평가하기
W\&B Models 레지스트리에서 모델을 다운로드한 후 Weave로 평가하세요.
```python theme={"system"}
import weave
import wandb
from typing import Any
# Weave 초기화
weave.init("your-entity/your-project")
# 레지스트리에서 로드하는 ChatModel 정의
class ChatModel(weave.Model):
model_name: str
def model_post_init(self, __context):
# W&B Models 레지스트리에서 모델 다운로드
with wandb.init(project="your-project", job_type="model_download") as run:
artifact = run.use_artifact(self.model_name)
self.model_path = artifact.download()
# 여기서 모델 초기화
@weave.op()
async def predict(self, query: str) -> str:
# 모델 추론 로직
return self.model.generate(query)
# 평가 데이터셋 생성
dataset = weave.Dataset(name="eval_dataset", rows=[
{"input": "What is the capital of France?", "expected": "Paris"},
{"input": "What is 2+2?", "expected": "4"},
])
# Scorer 정의
@weave.op()
def exact_match_scorer(expected: str, output: str) -> dict:
return {"correct": expected.lower() == output.lower()}
# 평가 실행
model = ChatModel(model_name="wandb-entity/registry-name/model:version")
evaluation = weave.Evaluation(
dataset=dataset,
scorers=[exact_match_scorer]
)
results = await evaluation.evaluate(model)
```
Weave 평가를 W\&B Models와 통합하기
[Models and Weave Integration Demo](/ko/products/wandb/weave/cookbooks/Models_and_Weave_Integration_Demo)에서는 다음을 위한 완전한 워크플로를 보여줍니다:
1. **레지스트리에서 모델 로드**: W\&B Models 레지스트리에 저장된 fine-tuned 모델 다운로드
2. **평가 파이프라인 생성**: 맞춤형 Scorer로 종합적인 평가 구축
3. **W\&B에 결과 로깅**: 평가 메트릭을 모델 run에 연결
4. **평가된 모델 버전 관리**: 개선된 모델을 레지스트리에 다시 저장
Weave와 W\&B Models 모두에 평가 결과 로깅:
```python theme={"system"}
# W&B 추적 기능으로 평가 실행
with weave.attributes({"wandb-run-id": wandb.run.id}):
summary, call = await evaluation.evaluate.call(evaluation, model)
# W&B Models에 메트릭 로깅
wandb.run.log(summary)
wandb.run.config.update({
"weave_eval_url": f"https://wandb.ai/{entity}/{project}/r/call/{call.id}"
})
```
Weave 고급 기능
맞춤형 Scorer 및 평가자
사용 사례에 맞춘 정교한 평가 메트릭을 만드세요:
```python theme={"system"}
@weave.op()
def llm_judge_scorer(expected: str, output: str, judge_model) -> dict:
prompt = f"Is this answer correct? Expected: {expected}, Got: {output}"
judgment = await judge_model.predict(prompt)
return {"judge_score": judgment}
```
배치 평가
여러 모델 버전 또는 설정을 평가하세요:
```python theme={"system"}
models = [
ChatModel(model_name="model:v1"),
ChatModel(model_name="model:v2"),
]
for model in models:
results = await evaluation.evaluate(model)
print(f"{model.model_name}: {results}")
```
다음 단계
* [Weave 평가 튜토리얼 완료하기](/ko/products/wandb/weave/tutorial-eval)
* [Models와 Weave 인테그레이션 예시](/ko/products/wandb/weave/cookbooks/Models_and_Weave_Integration_Demo)
table로 모델 평가
W\&B Tables를 사용하여:
* **모델 예측 비교**: 동일한 테스트 세트에서 서로 다른 모델의 성능을 나란히 비교하여 확인
* **예측 변경 추적**: 트레이닝 에포크 또는 모델 버전에 걸쳐 예측이 어떻게 변화하는지 모니터링
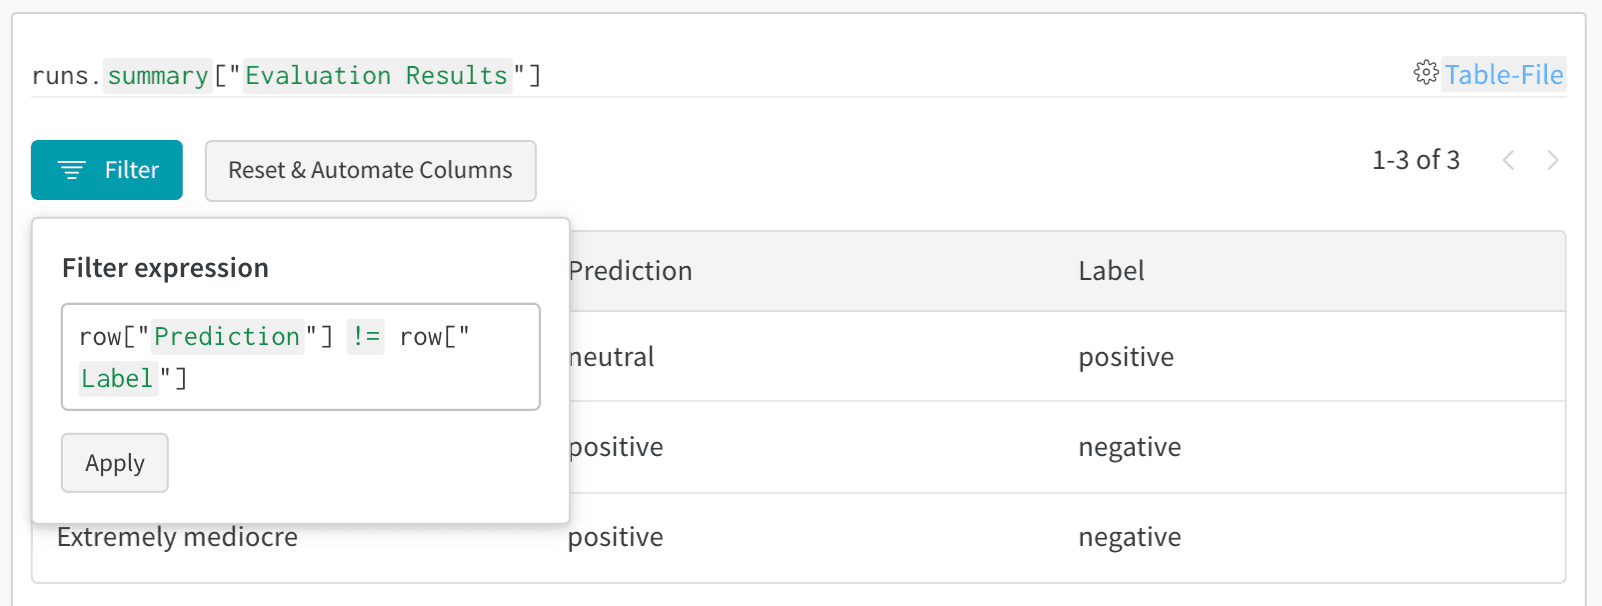
* **오류 분석**: Filter와 쿼리를 사용하여 일반적으로 잘못 분류된 예시와 오류 패턴 찾기
* **리치 미디어 시각화**: 예측 및 메트릭과 함께 이미지, 오디오, 텍스트 및 기타 미디어 유형 표시
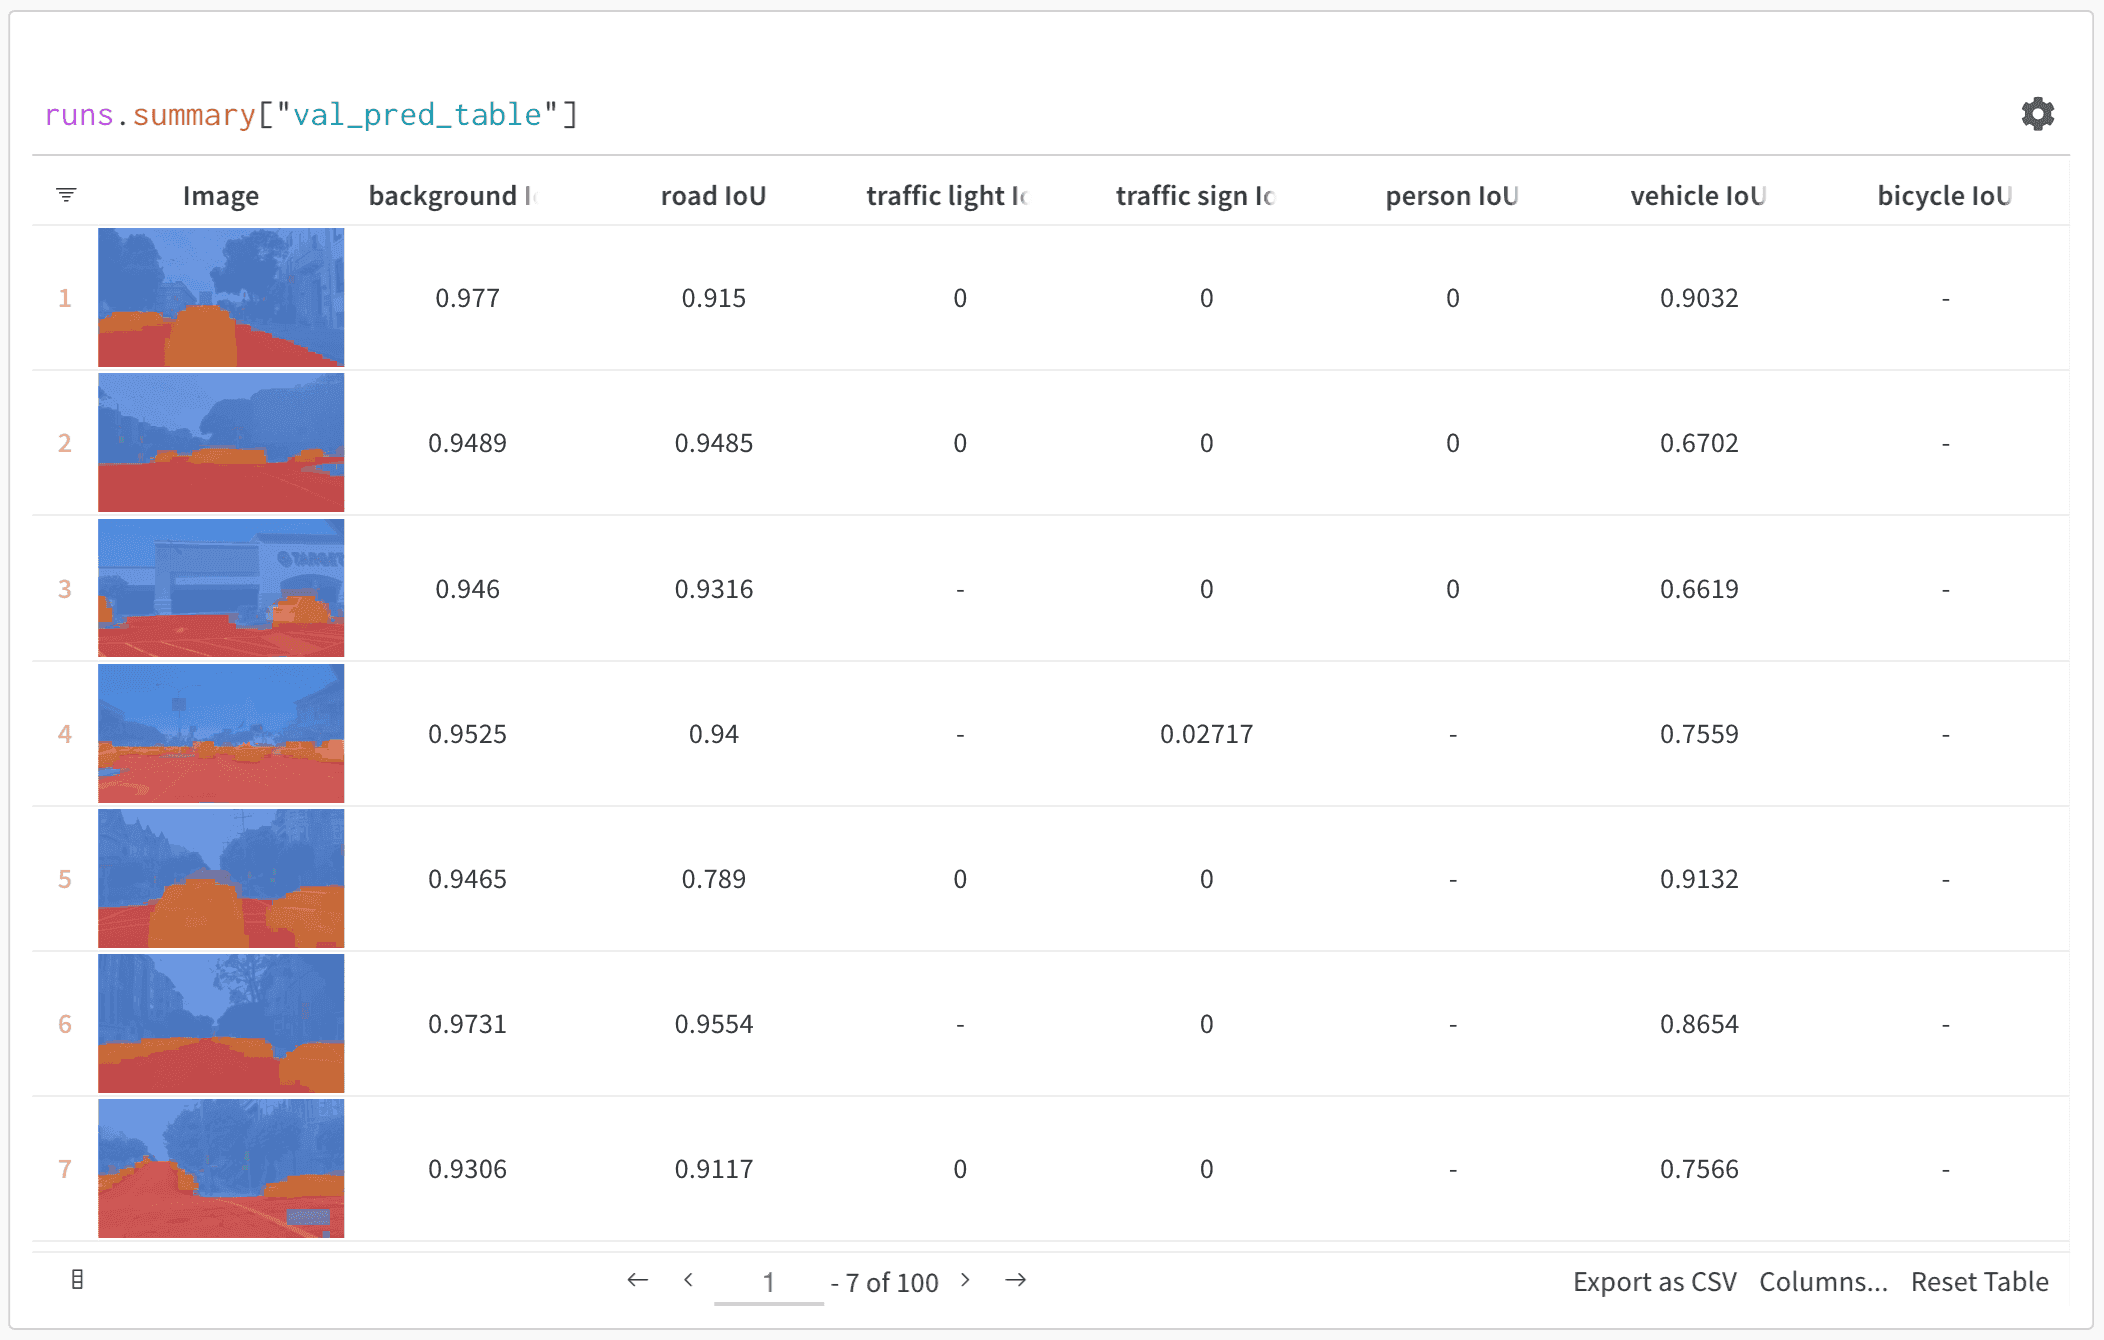
기본 예시: 평가 결과 로깅하기
```python theme={"system"}
import wandb
# run을 초기화합니다
run = wandb.init(project="model-evaluation")
# 평가 결과를 담은 table을 만듭니다
columns = ["id", "input", "ground_truth", "prediction", "confidence", "correct"]
eval_table = wandb.Table(columns=columns)
# 평가 데이터를 추가합니다
for idx, (input_data, label) in enumerate(test_dataset):
prediction = model(input_data)
confidence = prediction.max()
predicted_class = prediction.argmax()
eval_table.add_data(
idx,
wandb.Image(input_data), # 이미지 또는 기타 미디어를 로깅합니다
label,
predicted_class,
confidence,
label == predicted_class
)
# table을 로깅합니다
run.log({"evaluation_results": eval_table})
```
고급 table 워크플로
여러 모델 비교
여러 모델의 eval table을 동일한 키에 로깅하여 직접 비교하세요:
```python theme={"system"}
# 모델 A 평가
with wandb.init(project="model-comparison", name="model_a") as run:
eval_table_a = create_eval_table(model_a, test_data)
run.log({"test_predictions": eval_table_a})
# 모델 B 평가
with wandb.init(project="model-comparison", name="model_b") as run:
eval_table_b = create_eval_table(model_b, test_data)
run.log({"test_predictions": eval_table_b})
```
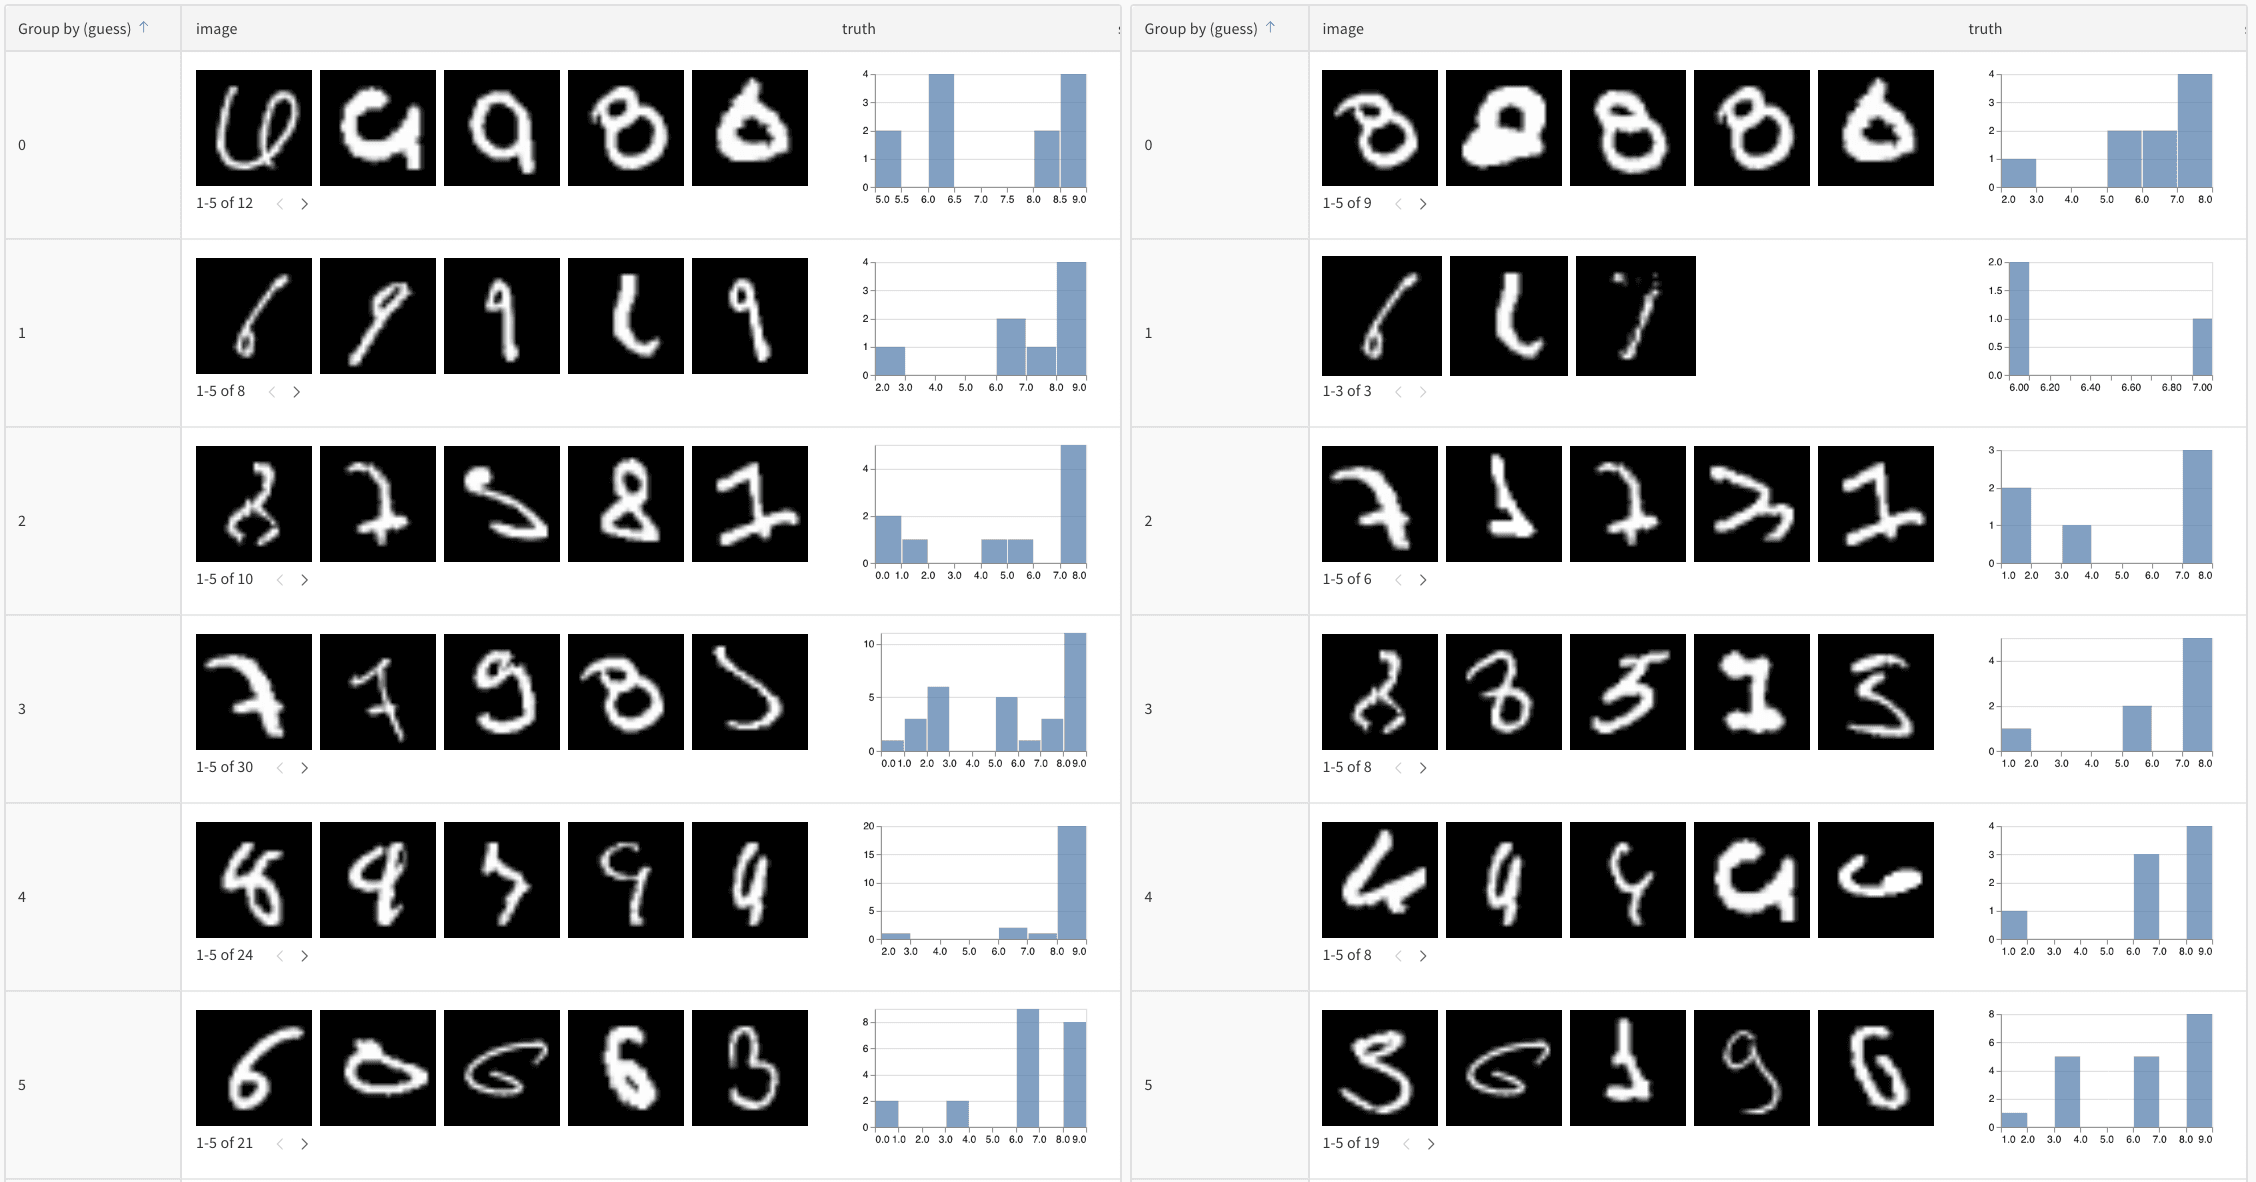
시간에 따른 예측 추적
트레이닝 에포크별로 table을 로깅하여 개선 추이를 시각화하세요:
```python theme={"system"}
for epoch in range(num_epochs):
train_model(model, train_data)
# 이 에포크의 예측을 평가하고 로깅하세요
eval_table = wandb.Table(columns=["image", "truth", "prediction"])
for image, label in test_subset:
pred = model(image)
eval_table.add_data(wandb.Image(image), label, pred.argmax())
wandb.log({f"predictions_epoch_{epoch}": eval_table})
```
W\&B UI에서의 대화형 분석
데이터를 로깅한 후 다음을 수행할 수 있습니다:
1. **결과 필터링**: 열 헤더를 클릭하여 예측 정확도, 신뢰도 임계값 또는 특정 클래스로 필터링하세요
2. **table 비교**: 여러 table 버전을 선택하여 나란히 비교를 확인하세요
3. **데이터 쿼리**: 쿼리 바를 사용하여 특정 패턴을 찾으세요 (예: `"correct" = false AND "confidence" > 0.8`)
4. **그룹화 및 집계**: 예측된 클래스로 그룹화하여 클래스별 정확도 메트릭을 확인하세요
예시: 정보를 보강한 table을 활용한 오류 분석
```python theme={"system"}
# 분석 열을 추가할 수 있는 변경 가능한 table을 생성합니다
eval_table = wandb.Table(
columns=["id", "image", "label", "prediction"],
log_mode="MUTABLE" # 나중에 열을 추가할 수 있습니다
)
# 초기 예측
for idx, (img, label) in enumerate(test_data):
pred = model(img)
eval_table.add_data(idx, wandb.Image(img), label, pred.argmax())
run.log({"eval_analysis": eval_table})
# 오류 분석을 위한 신뢰도 점수를 추가합니다
confidences = [model(img).max() for img, _ in test_data]
eval_table.add_column("confidence", confidences)
# 오류 유형을 추가합니다
error_types = classify_errors(eval_table.get_column("label"),
eval_table.get_column("prediction"))
eval_table.add_column("error_type", error_types)
run.log({"eval_analysis": eval_table})
```