> ## Documentation Index
> Fetch the complete documentation index at: https://docs.coreweave.com/llms.txt
> Use this file to discover all available pages before exploring further.
# NVIDIA NIM
> Weave を使用して、ChatNVIDIA ライブラリ経由の LLM Call をトレースおよびログします
`weave.init()` を呼び出すと、Weave は [ChatNVIDIA](https://python.langchain.com/docs/integrations/chat/nvidia_ai_endpoints/) ライブラリ経由の LLM Call を自動的にトラッキングしてログします。このガイドは ChatNVIDIA を使用する Python 開発者を対象に、トレースの取得、独自の関数の Op としてのラップ、Weave の `Model` クラスを使用した実験の整理について説明します。これらを活用することで、LLM アプリケーションのデバッグ、改善、比較をより効率的に行えます。
最新のチュートリアルについては、[Weights & Biases on NVIDIA](https://wandb.ai/site/partners/nvidia) をご覧ください。
トレース
開発中も本番環境でも、LLM アプリケーションのトレースを一元管理されたデータベースに保存しておくと、問題のデバッグに役立つだけでなく、アプリケーションの改善時に評価に使える難しいサンプルのデータセットを構築できます。以下のセクションでは、ChatNVIDIA の Call に対して自動トレースを有効にする方法を説明します。
Weave は [ChatNVIDIA Python ライブラリ](https://python.langchain.com/docs/integrations/chat/nvidia_ai_endpoints/)のトレースを自動的に取得できます。
任意のプロジェクト名を指定して `weave.init([PROJECT-NAME])` を呼び出すと、取得が開始されます。
```python lines {4} theme={"system"}
from langchain_nvidia_ai_endpoints import ChatNVIDIA
import weave
client = ChatNVIDIA(model="mistralai/mixtral-8x7b-instruct-v0.1", temperature=0.8, max_tokens=64, top_p=1)
weave.init('emoji-bot')
messages=[
{
"role": "system",
"content": "You are AGI. You will be provided with a message, and your task is to respond using emojis only."
}]
response = client.invoke(messages)
```
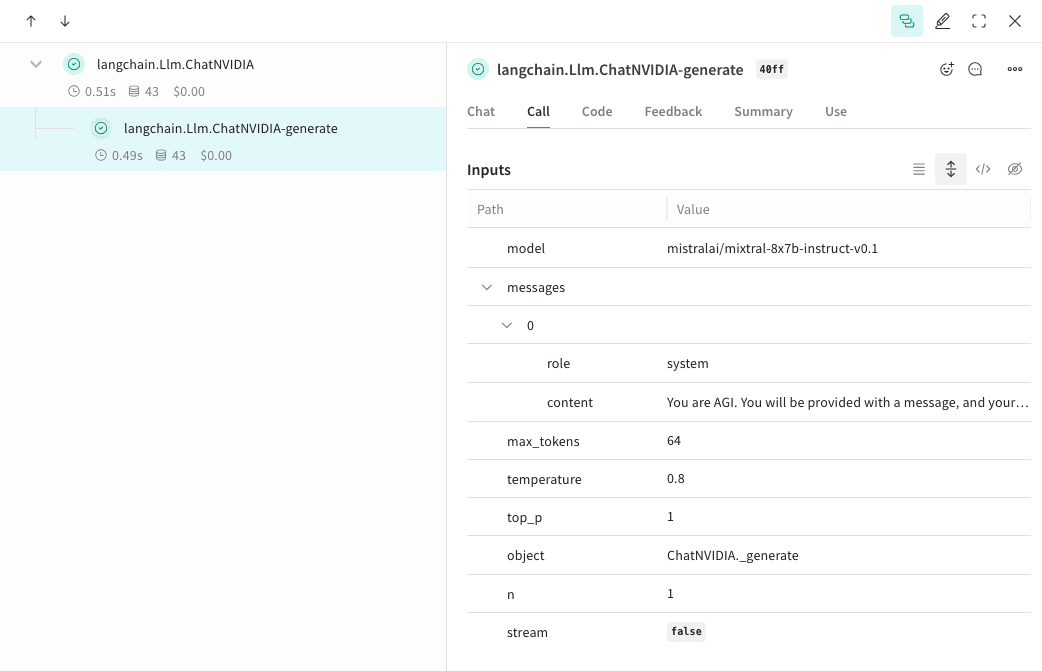
このコードを実行すると、Weave は指定したプロジェクト名で ChatNVIDIA の Call を取得します。取得した Call では、入力、出力、メタデータを確認できます。
```plaintext theme={"system"}
このライブラリは Python 専用のため、この機能は TypeScript ではまだ利用できません。
```
独自の Op をトラッキングする
関数を `@weave.op` でラップすると、入力、出力、アプリのロジックの取得が始まり、アプリ内のデータの流れをデバッグできるようになります。Op は深くネストでき、トラッキングしたい関数のツリーを構築できます。さらに、実験中はコードの自動バージョン管理も行われるため、Git にコミットしていないその場限りの変更も記録できます。
[`@weave.op`](/ja/products/wandb/weave/guides/tracking/ops) でデコレートした関数を作成し、その中で [ChatNVIDIA Python ライブラリ](https://python.langchain.com/docs/integrations/chat/nvidia_ai_endpoints/) を呼び出します。
次の例では、2 つの関数を op でラップしています。これにより、RAG アプリの取得ステップのような中間ステップが、アプリの動作にどう影響するかを確認できます。
```python lines {1,9,11,29,31,33} theme={"system"}
import weave
from langchain_nvidia_ai_endpoints import ChatNVIDIA
import requests, random
PROMPT="""Emulate the Pokedex from early Pokémon episodes. State the name of the Pokemon and then describe it.
Your tone is informative yet sassy, blending factual details with a touch of dry humor. Be concise, no more than 3 sentences. """
POKEMON = ['pikachu', 'charmander', 'squirtle', 'bulbasaur', 'jigglypuff', 'meowth', 'eevee']
client = ChatNVIDIA(model="mistralai/mixtral-8x7b-instruct-v0.1", temperature=0.7, max_tokens=100, top_p=1)
@weave.op
def get_pokemon_data(pokemon_name):
# アプリケーション内のステップです(RAG アプリの取得ステップに相当)
url = f"https://pokeapi.co/api/v2/pokemon/{pokemon_name}"
response = requests.get(url)
if response.status_code == 200:
data = response.json()
name = data["name"]
types = [t["type"]["name"] for t in data["types"]]
species_url = data["species"]["url"]
species_response = requests.get(species_url)
evolved_from = "Unknown"
if species_response.status_code == 200:
species_data = species_response.json()
if species_data["evolves_from_species"]:
evolved_from = species_data["evolves_from_species"]["name"]
return {"name": name, "types": types, "evolved_from": evolved_from}
else:
return None
@weave.op
def pokedex(name: str, prompt: str) -> str:
# 他の Op を呼び出すルート Op です
data = get_pokemon_data(name)
if not data: return "Error: Unable to fetch data"
messages=[
{"role": "system","content": prompt},
{"role": "user", "content": str(data)}
]
response = client.invoke(messages)
return response.content
weave.init('pokedex-nvidia')
# 特定のポケモンのデータを取得します
pokemon_data = pokedex(random.choice(POKEMON), PROMPT)
```
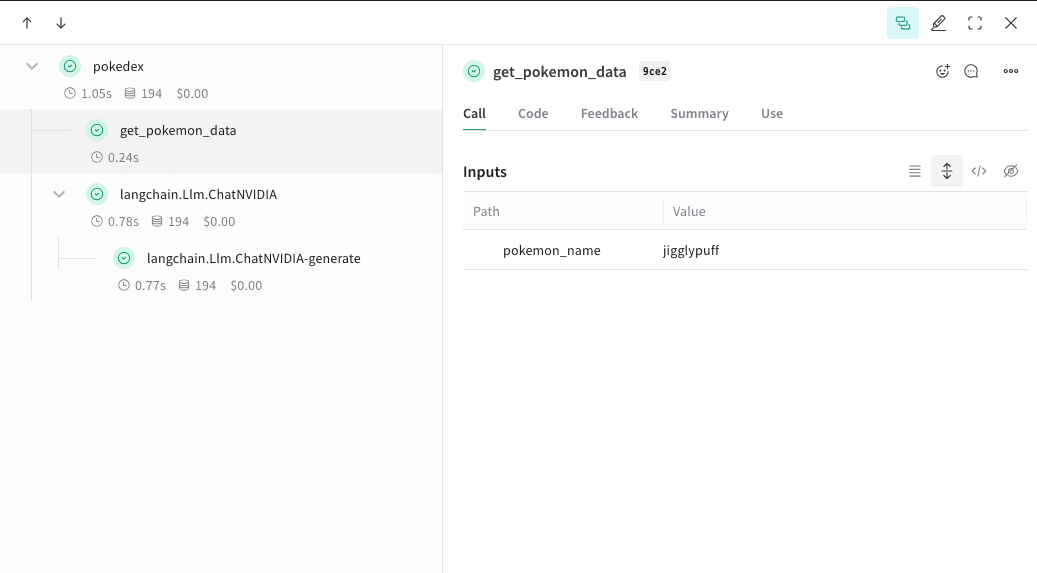
Weave にアクセスし、UI で `get_pokemon_data` をクリックすると、そのステップの入力と出力を確認できます。
```plaintext theme={"system"}
このライブラリは Python 専用のため、この機能は TypeScript ではまだ利用できません。
```
実験を効率化するために `Model` を作成する
構成要素が多いと、実験の整理は難しくなります。[`Model`](/ja/products/wandb/weave/guides/core-types/models) クラスを使用すると、システムプロンプトや使用しているモデルなど、アプリの実験に関する詳細を取得して整理できます。これにより、アプリのさまざまな反復処理を整理し、比較しやすくなります。
[`Model`](/ja/products/wandb/weave/guides/core-types/models) は、コードのバージョン管理や入力と出力の取得に加えて、アプリケーションの動作を制御する構造化されたパラメーターも取得します。そのため、どのパラメーターが最も効果的だったかを簡単に検索できます。また、Weave モデルは `serve` や [`Evaluation`](/ja/products/wandb/weave/guides/core-types/evaluations) と組み合わせて使用することもできます。
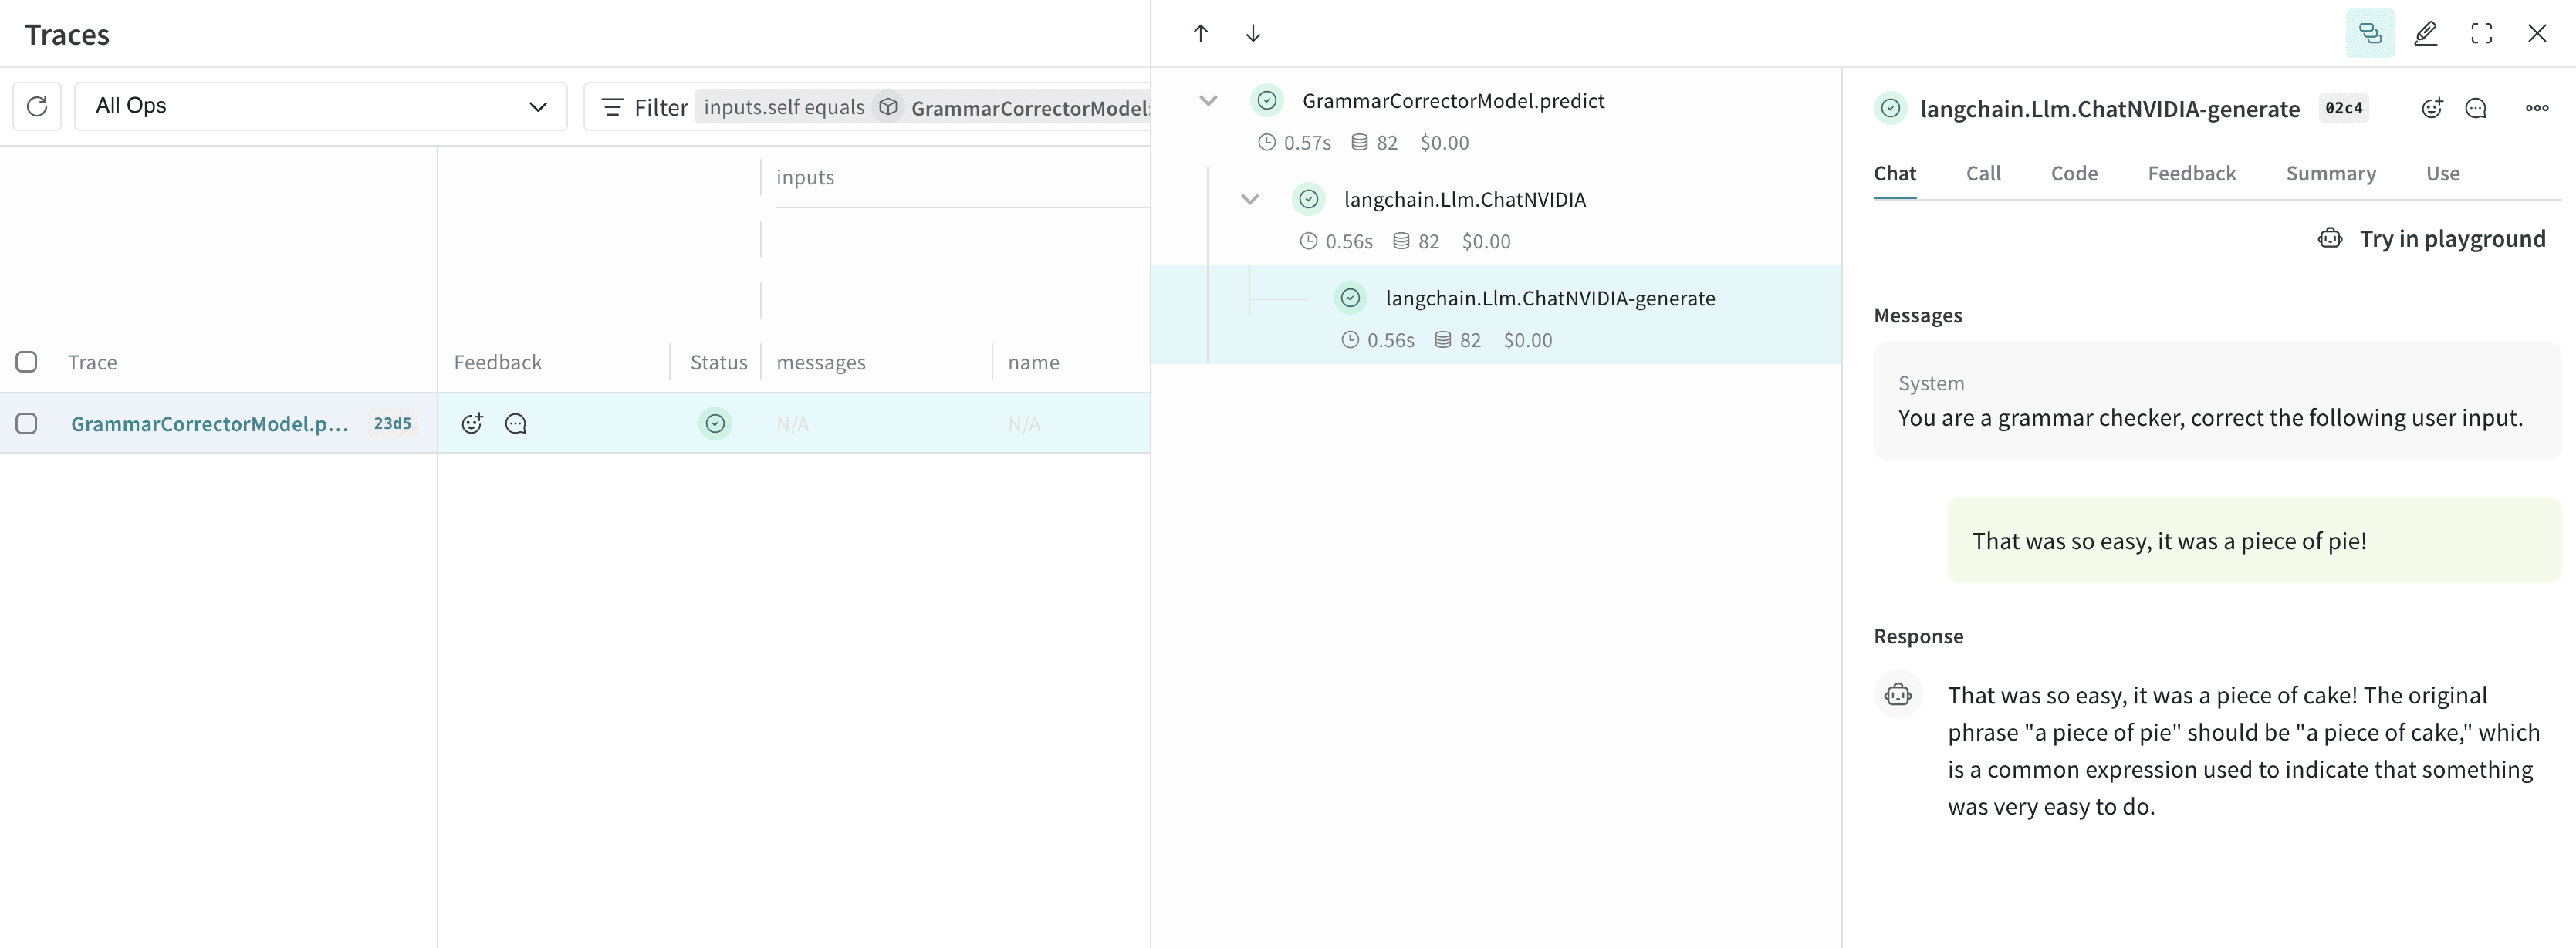
次の例では、`model` と `system_message` を変更して実験できます。どちらかを変更するたびに、`GrammarCorrectorModel` の新しい *バージョン* が作成されます。
```python lines theme={"system"}
import weave
from langchain_nvidia_ai_endpoints import ChatNVIDIA
weave.init('grammar-nvidia')
class GrammarCorrectorModel(weave.Model): # `weave.Model` に変更
system_message: str
@weave.op()
def predict(self, user_input): # `predict` に変更
client = ChatNVIDIA(model="mistralai/mixtral-8x7b-instruct-v0.1", temperature=0, max_tokens=100, top_p=1)
messages=[
{
"role": "system",
"content": self.system_message
},
{
"role": "user",
"content": user_input
}
]
response = client.invoke(messages)
return response.content
corrector = GrammarCorrectorModel(
system_message = "You are a grammar checker, correct the following user input.")
result = corrector.predict("That was so easy, it was a piece of pie!")
print(result)
```
```plaintext theme={"system"}
このライブラリは Python でのみ提供されているため、この機能は TypeScript ではまだ利用できません。
```
使用に関する情報
以下では、ChatNVIDIA インテグレーションがサポートする機能について説明します。
ChatNVIDIA インテグレーションは、`invoke`、`stream`、およびそれらの非同期版をサポートしています。ツールの使用もサポートしています。
ChatNVIDIA はさまざまなタイプのモデルでの使用を想定しているため、関数呼び出しはサポートしていません。