> ## Documentation Index
> Fetch the complete documentation index at: https://docs.coreweave.com/llms.txt
> Use this file to discover all available pages before exploring further.
# Google
> Weave を使用して Google GenAI のモデルの Call をトレースし、ログします
 [LLM プレイグラウンド](/ja/products/wandb/weave/guides/tools/playground)を使用すると、セットアップなしで Weave 上の Google AI モデルを試すことができます。
このページでは、W\&B Weave を Google Vertex AI API および Google Gemini API と組み合わせて使用し、Google GenAI アプリケーションの評価、監視、反復的な改善を行う方法について説明します。
Weave は、以下のトレースを自動的に取得します。
* [Google GenAI SDK](https://github.com/googleapis/python-genai):Python SDK、Node.js SDK、Go SDK、および REST から利用できます。
* [Google Vertex AI API](https://cloud.google.com/vertex-ai/docs):Google の Gemini モデルおよび[パートナーモデル](https://cloud.google.com/vertex-ai/generative-ai/docs/partner-models/use-partner-models)を利用できます。
Weave は、非推奨となった [Google AI Python SDK for the Gemini API](https://github.com/google-gemini/deprecated-generative-ai-python) もサポートしています。ただし、このサポート自体も非推奨であり、将来のバージョンで削除される予定です。
[LLM プレイグラウンド](/ja/products/wandb/weave/guides/tools/playground)を使用すると、セットアップなしで Weave 上の Google AI モデルを試すことができます。
このページでは、W\&B Weave を Google Vertex AI API および Google Gemini API と組み合わせて使用し、Google GenAI アプリケーションの評価、監視、反復的な改善を行う方法について説明します。
Weave は、以下のトレースを自動的に取得します。
* [Google GenAI SDK](https://github.com/googleapis/python-genai):Python SDK、Node.js SDK、Go SDK、および REST から利用できます。
* [Google Vertex AI API](https://cloud.google.com/vertex-ai/docs):Google の Gemini モデルおよび[パートナーモデル](https://cloud.google.com/vertex-ai/generative-ai/docs/partner-models/use-partner-models)を利用できます。
Weave は、非推奨となった [Google AI Python SDK for the Gemini API](https://github.com/google-gemini/deprecated-generative-ai-python) もサポートしています。ただし、このサポート自体も非推奨であり、将来のバージョンで削除される予定です。
はじめに
以下のサンプルでは、サポートされる各 SDK でトレースを有効にする方法を示します。どちらの場合も、Weave 固有の手順として必要なのは `weave.init` の呼び出しだけです。既存の Google GenAI や Vertex AI のコードを変更する必要はありません。
Weave は [Google GenAI SDK](https://github.com/googleapis/python-genai) のトレースを自動的に取得します。トラッキングを開始するには、`weave.init(project_name="[YOUR-WANDB-PROJECT-NAME]")` を呼び出し、あとは通常どおりライブラリを使用します。
```python lines theme={"system"}
import os
from google import genai
import weave
weave.init(project_name="google-genai")
google_client = genai.Client(api_key=os.getenv("GOOGLE_GENAI_KEY"))
response = google_client.models.generate_content(
model="gemini-2.0-flash",
contents="What's the capital of France?",
)
```
[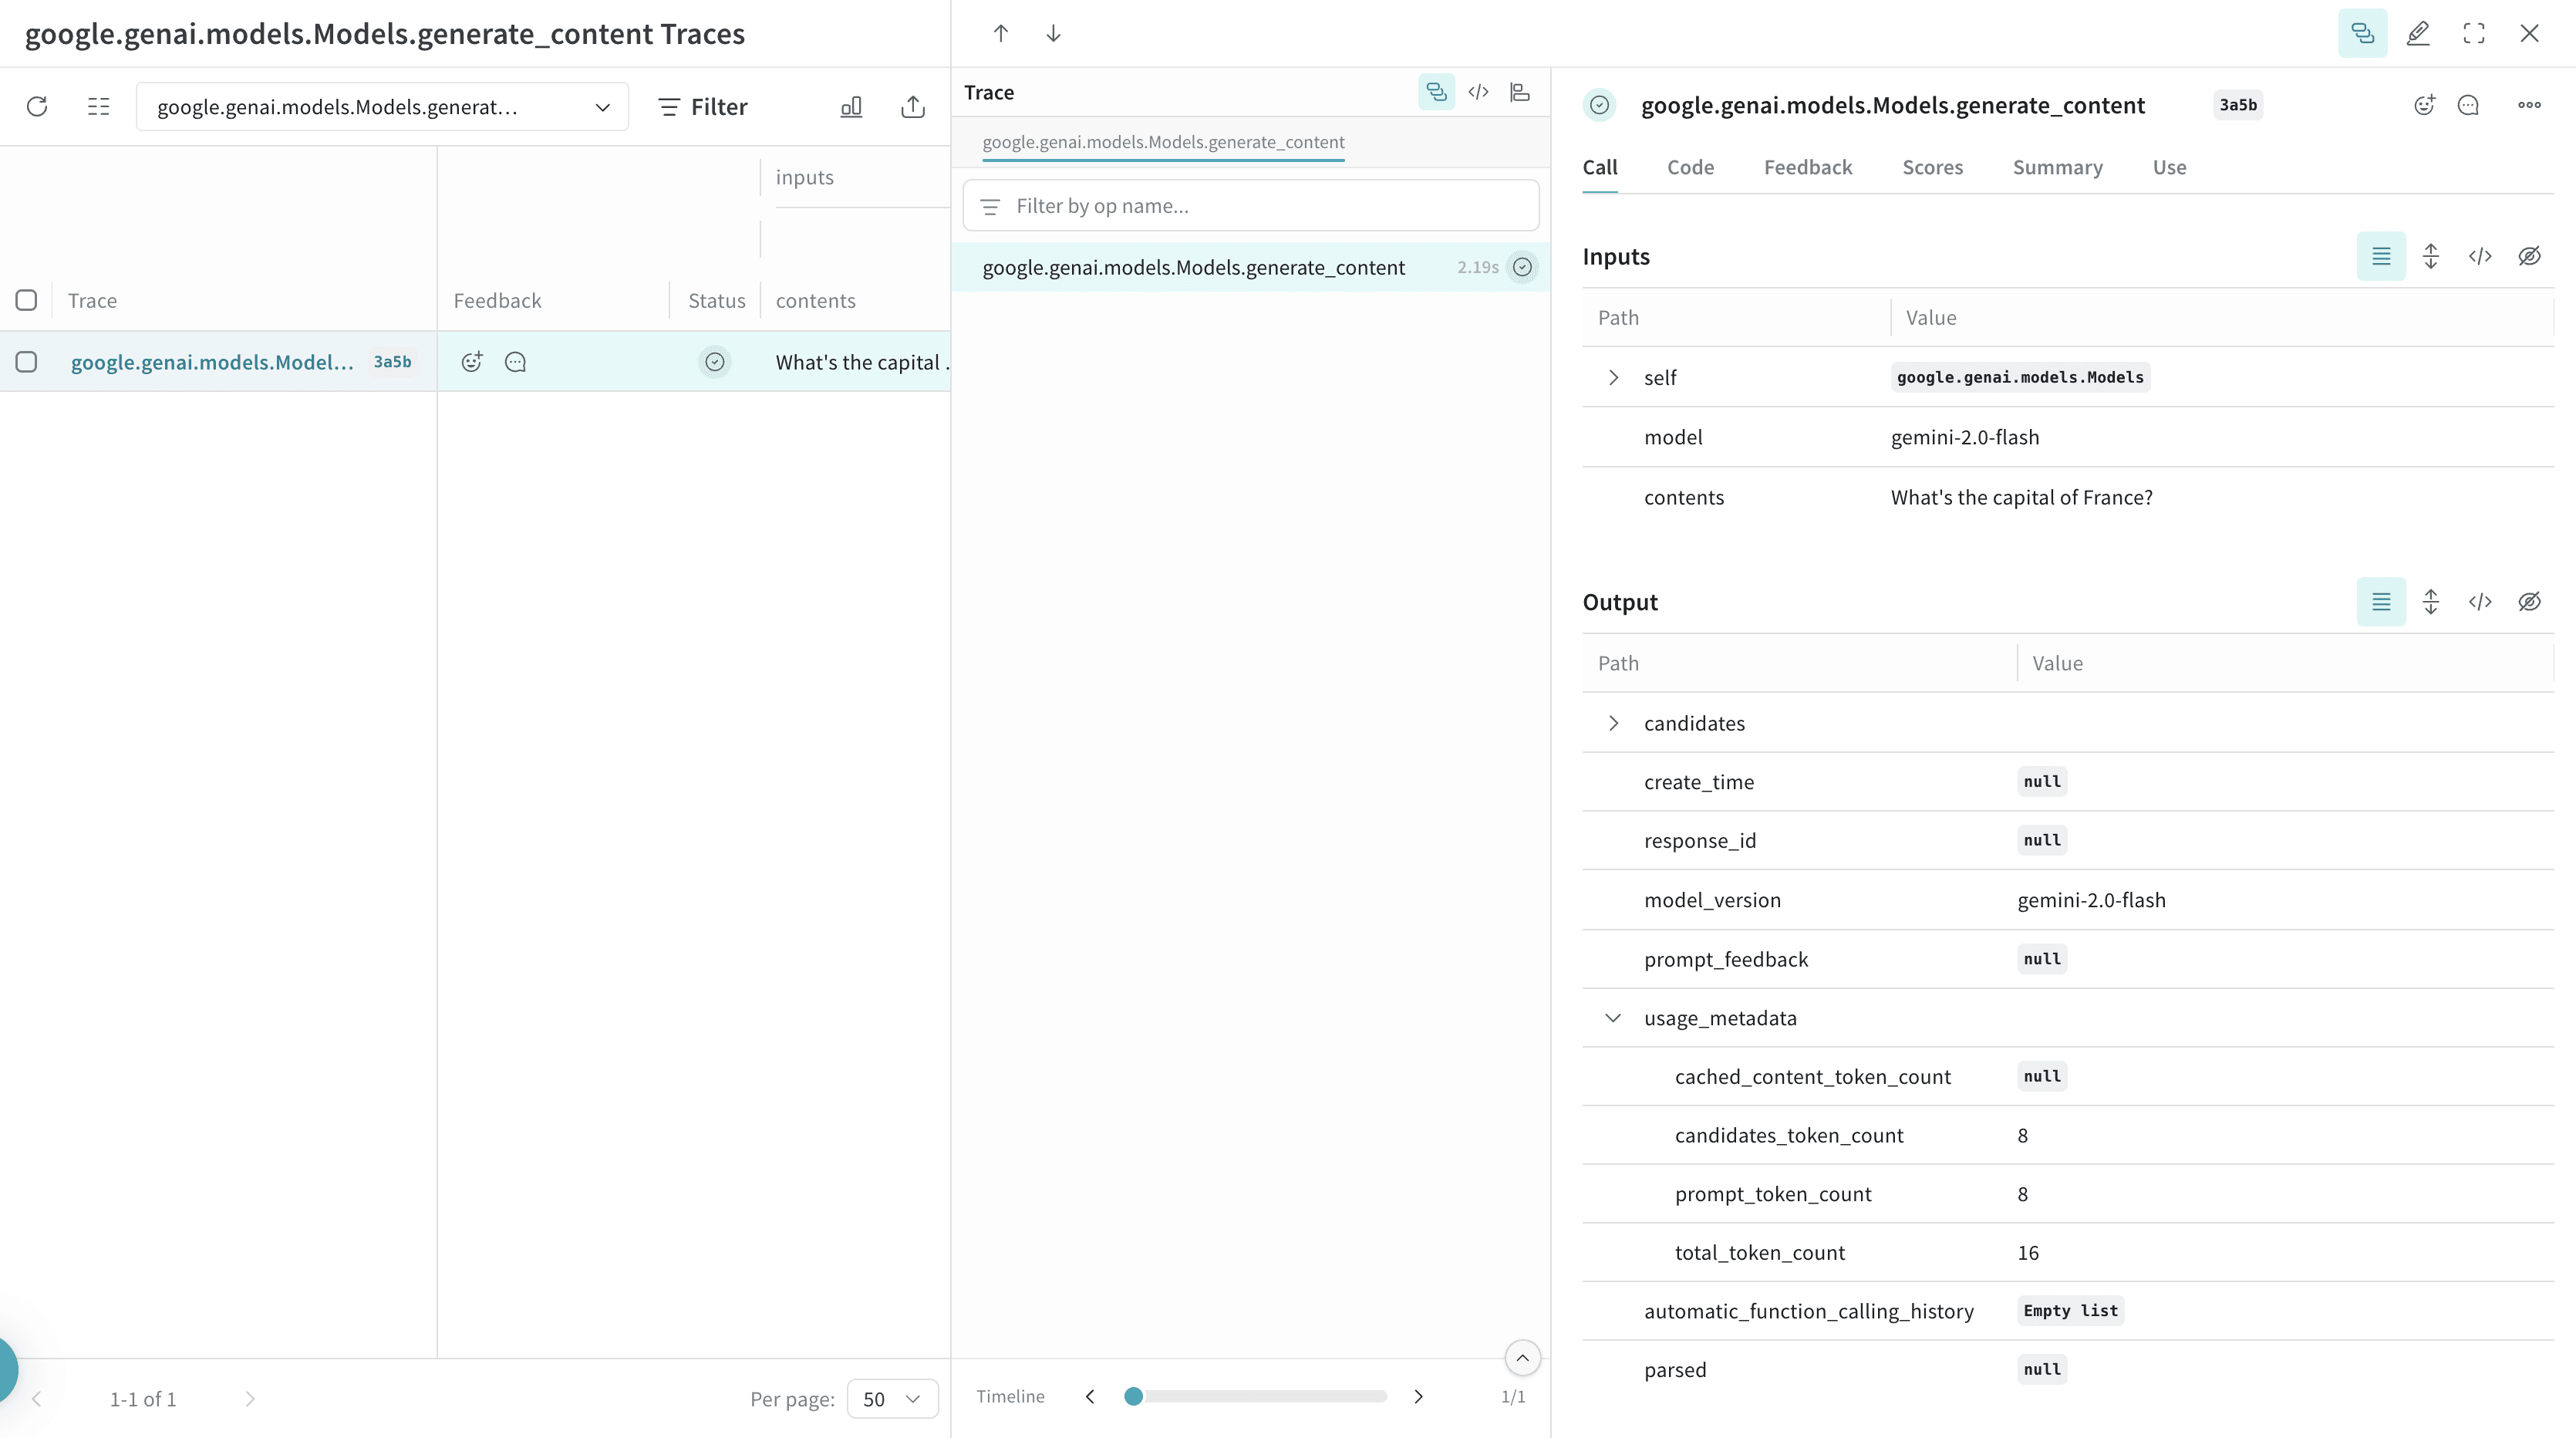 ](https://forge.coreweave.com/wandb/geekyrakshit/google-genai/weave/traces)
Weave は [Vertex API](https://github.com/googleapis/python-aiplatform/tree/main/vertexai/generative_models) のトレースも自動的に取得します。トラッキングを開始するには、`weave.init(project_name="[YOUR-WANDB-PROJECT-NAME]")` を呼び出してから、通常どおりライブラリを使用してください。
```python lines theme={"system"}
import vertexai
import weave
from vertexai.generative_models import GenerativeModel
weave.init(project_name="vertex-ai-test")
vertexai.init(project="[YOUR-VERTEX-AI-PROJECT-NAME]", location="[YOUR-VERTEX-AI-PROJECT-LOCATION]")
model = GenerativeModel("gemini-1.5-flash-002")
response = model.generate_content(
"What's a good name for a flower shop specialising in selling dried flower bouquets?"
)
```
](https://forge.coreweave.com/wandb/geekyrakshit/google-genai/weave/traces)
Weave は [Vertex API](https://github.com/googleapis/python-aiplatform/tree/main/vertexai/generative_models) のトレースも自動的に取得します。トラッキングを開始するには、`weave.init(project_name="[YOUR-WANDB-PROJECT-NAME]")` を呼び出してから、通常どおりライブラリを使用してください。
```python lines theme={"system"}
import vertexai
import weave
from vertexai.generative_models import GenerativeModel
weave.init(project_name="vertex-ai-test")
vertexai.init(project="[YOUR-VERTEX-AI-PROJECT-NAME]", location="[YOUR-VERTEX-AI-PROJECT-LOCATION]")
model = GenerativeModel("gemini-1.5-flash-002")
response = model.generate_content(
"What's a good name for a flower shop specialising in selling dried flower bouquets?"
)
```
独自の op をトラッキングする
関数を `@weave.op` でラップすると、入力、出力、アプリのロジックの取得が始まり、アプリ内のデータの流れをデバッグできるようになります。op は深くネストでき、トラッキングしたい関数をツリー状に構成できます。さらに、実験中のコードも自動的にバージョン管理されるようになるため、git にまだコミットしていないアドホックな変更も取得できます。
[`@weave.op`](/ja/products/wandb/weave/guides/tracking/ops) でデコレートした関数を作成します。
次の例では、関数 `recommend_places_to_visit` を `@weave.op` でラップしています。この関数は、指定した都市のおすすめの観光スポットを提案します。
```python lines theme={"system"}
import os
from google import genai
import weave
weave.init(project_name="google-genai")
google_client = genai.Client(api_key=os.getenv("GOOGLE_GENAI_KEY"))
@weave.op()
def recommend_places_to_visit(city: str, model: str = "gemini-1.5-flash"):
response = google_client.models.generate_content(
model=model,
contents="You are a helpful assistant meant to suggest all budget-friendly places to visit in a city",
)
return response.text
recommend_places_to_visit("New York")
recommend_places_to_visit("Paris")
recommend_places_to_visit("Kolkata")
```
[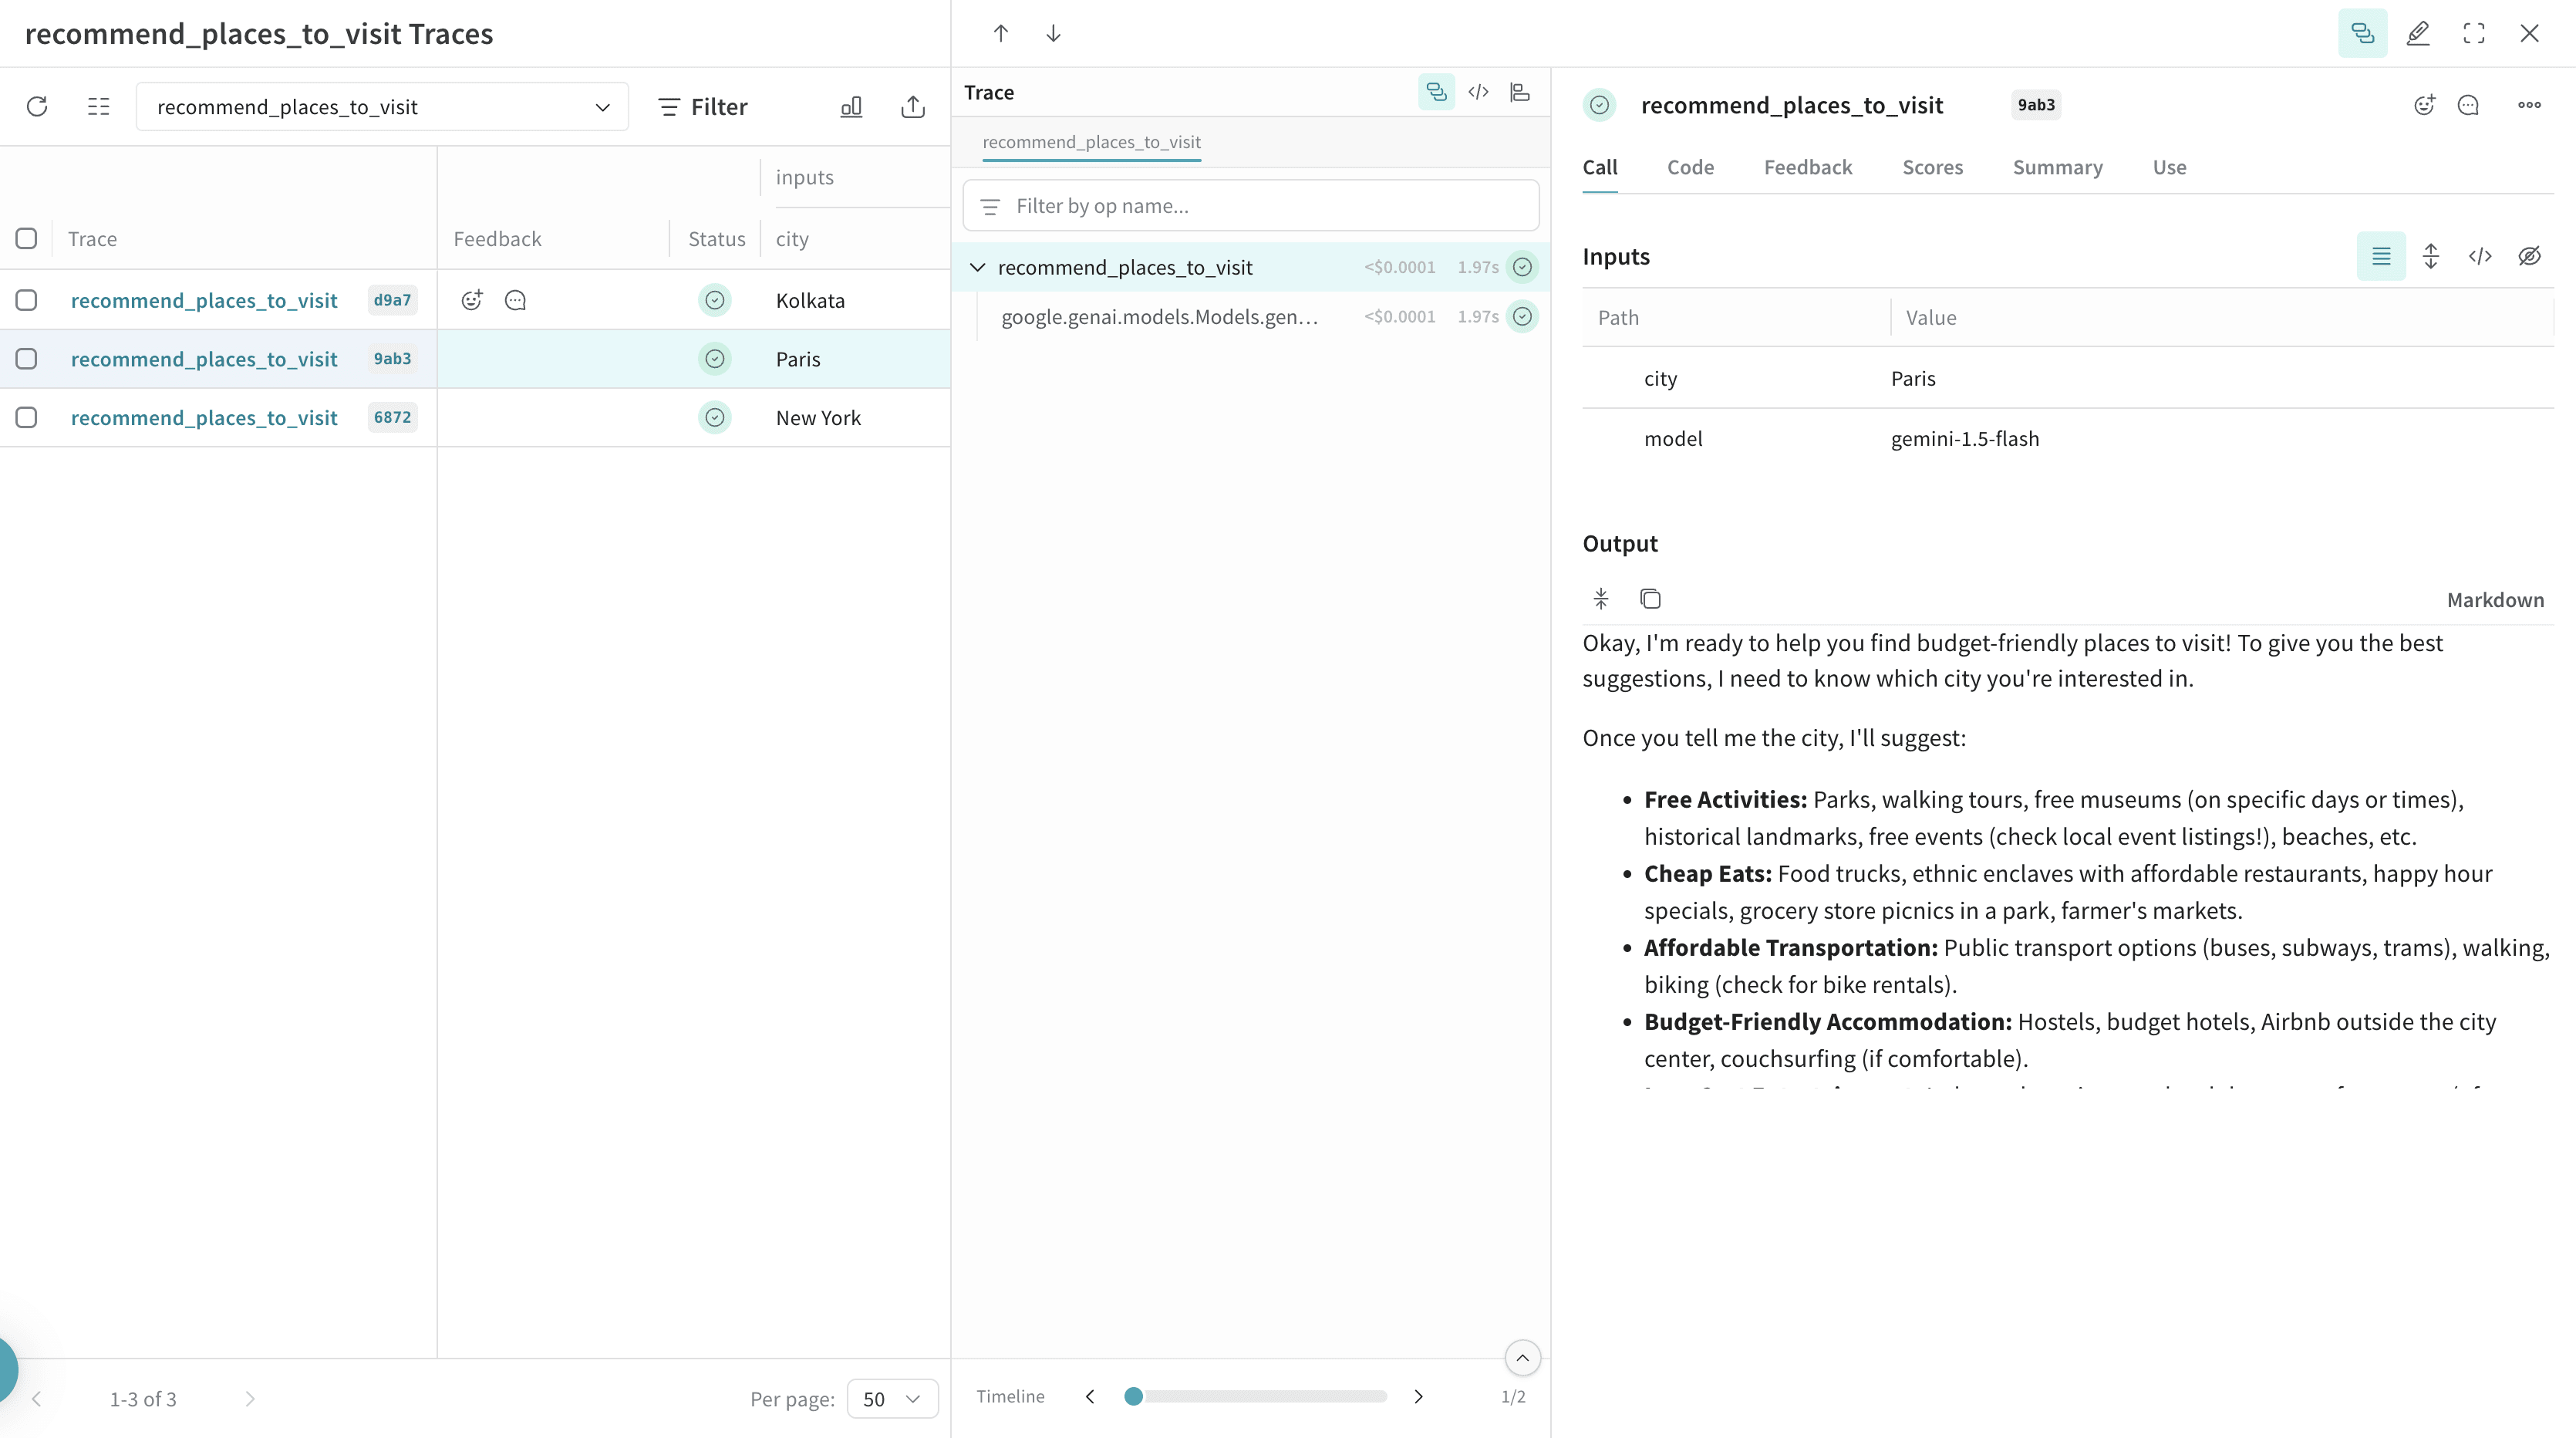 ](https://forge.coreweave.com/wandb/geekyrakshit/google-genai/weave/traces)
実験を容易にするために `Model` を作成する
構成要素が多いと、実験の整理は難しくなります。[`Model`](/ja/products/wandb/weave/guides/core-types/models) クラスを使用すると、システムプロンプトや使用しているモデルなど、アプリの実験に関する詳細を取得して整理できます。これにより、アプリのさまざまな反復処理を整理して比較しやすくなります。
[`Model`](/ja/products/wandb/weave/guides/core-types/models) は、コードのバージョン管理や入力/出力の取得に加えて、アプリケーションの動作を制御する構造化されたパラメーターも取得します。そのため、どのパラメーターが最も効果的だったかを検索しやすくなります。また、Weave モデルは `serve` や [`Evaluation`](/ja/products/wandb/weave/guides/core-types/evaluations) と組み合わせて使用することもできます。
次の例では、`CityVisitRecommender` を使って実験できます。これらのいずれかを変更するたびに、`CityVisitRecommender` の新しい*バージョン*が作成されます。試した設定ごとにバージョン管理された記録が残るため、後から比較や評価を行えます。
```python lines theme={"system"}
import os
from google import genai
import weave
weave.init(project_name="google-genai")
google_client = genai.Client(api_key=os.getenv("GOOGLE_GENAI_KEY"))
class CityVisitRecommender(weave.Model):
model: str
@weave.op()
def predict(self, city: str) -> str:
response = google_client.models.generate_content(
model=self.model,
contents="You are a helpful assistant meant to suggest all budget-friendly places to visit in a city",
)
return response.text
city_recommender = CityVisitRecommender(model="gemini-1.5-flash")
print(city_recommender.predict("New York"))
print(city_recommender.predict("San Francisco"))
print(city_recommender.predict("Los Angeles"))
```