Use Visual Studio Code Tunnels for Development on Slurm
Using VS Code with SUNK to develop code on Compute nodes
With SUNK, development on Slurm Compute nodes can be conveniently handled by the Tunnel functionality in Visual Studio Code (VS Code).
With this method, you can connect to any Slurm-allocated Compute nodes using a VS Code Remote Tunnel, which you can manage through VS Code or the code Command Line Interface (CLI) on your workstation.
This guide will walk through the steps required to set up a VS Code Tunnel to connect to your Slurm Compute nodes.
Prerequisites
To follow along with this guide, you need:
- An active CoreWeave account and an existing Slurm cluster
- A GitHub or Microsoft account to connect to VSCode Tunnel.
- If you would like to connect to the Compute node from a remote workstation, you will need the Microsoft Remote Tunnels extension installed and enabled in VS Code.
VS Code CLI
Download and install the VS Code CLI
The commands in the following examples demonstrate the process for a GPU node with an Intel processor.
-
Navigate to the Visual Studio Code Downloads page and select the appropriate option for your architecture. To download the
codeCLI as a standalone without the VS Code UI, select from the files on the line labeled CLI.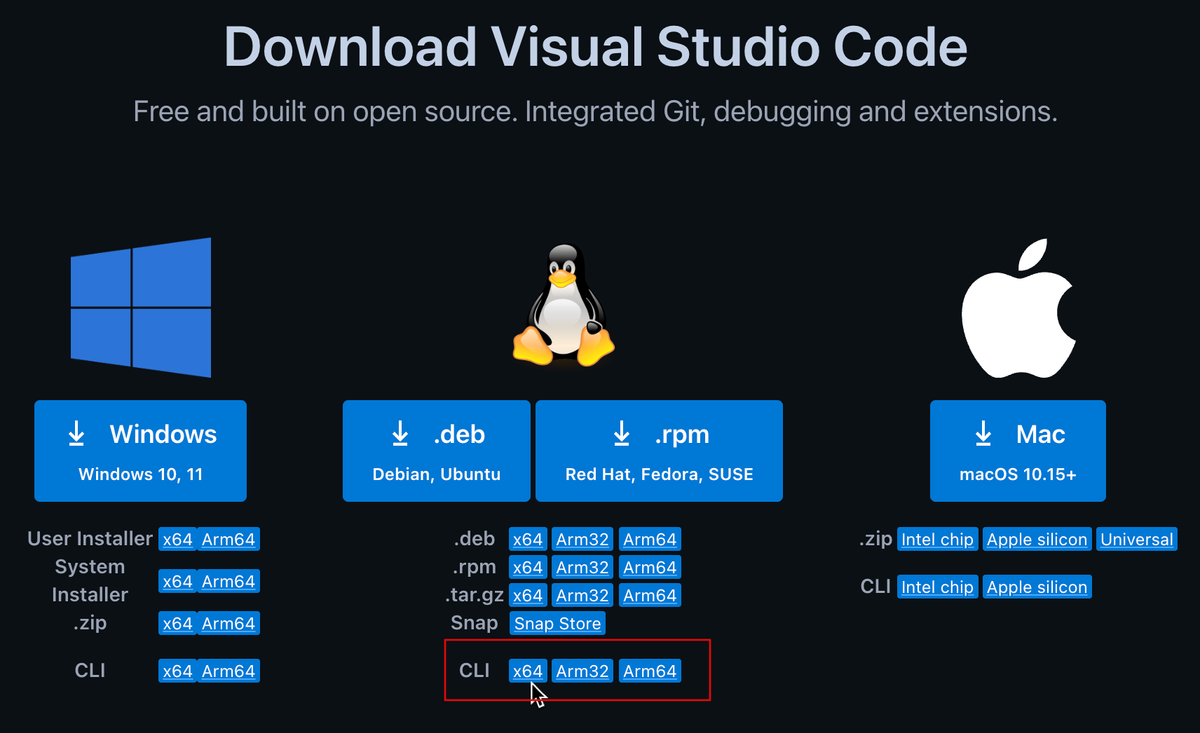
-
Click the
x64download link for CLI in the Linux section. The file will download to your local workstation's download directory, but this copy can be ignored or deleted. -
Click the direct download link in the banner at the top of the screen and copy the URL. This is the URL you will paste into the
curlcommand below.
-
Navigate to your desired location in your cluster's shared storage, such as the home directory or
/mnt/data.Example$cd /mnt/data -
Download the file with
curlusing the URL obtained from the direct download link in Step 3.Example$curl -Lk 'https://code.visualstudio.com/sha/download?build=stable&os=cli-alpine-x64' --output vscode_cli.tar.gz -
Make a
/bindirectory in your$HOMEfolder, if it does not already exist.Example$mkdir -p $HOME/bin -
Unpack the file into the
$HOME/bindirectory.Example$tar -x --file=vscode_cli.tar.gz --directory=$HOME/bin -
Export
$HOME/binto your$PATH. This ensures that thecodeexecutable is in your system path every time you log in.Example$echo "export PATH=$PATH:$HOME/bin" >> ~/.bashrc
Connect to the Compute node with a Tunnel
The Login node should only be used to gain access to the cluster, not to run Slurm commands. Always run resource-intensive commands on the Compute node.
-
Log in to your Slurm cluster's Login node.
-
Use
srunto create an interactive session to a Compute node of your choice. The example below specifies one node in the h100 partition and launches bash.Example$srun -p h100 -N 1 --pty bash -i-p h100specifies theh100partition.-N 1specifies one node as the target.--pty bash -ilaunches bash with an interactive session on the specified Slurm node.
-
Create the tunnel on the Compute node. Authenticate with your choice of GitHub or Microsoft, and provide a name for the machine. The default name is the name of the Compute node.
Example$code tunnel
VS Code in browser
After running the code tunnel command demonstrated above, the CLI will return a URL to the remote machine, similar to the following:
Open this link in your browserhttps://vscode.dev/tunnel/slurm-h100-209-189
Click this URL to open VS Code in a client of your choice.
VS Code Desktop
After creating the tunnel with the code tunnel command, you can connect to it with VS Code from your local machine for ease of development. The Desktop version of VS Code requires the Microsoft Remote - Tunnels extension for VS Code to use this functionality.
You may interact with the Remote-Tunnels functionality through either the Remote Explorer tab or the Command Palette, to your preference.
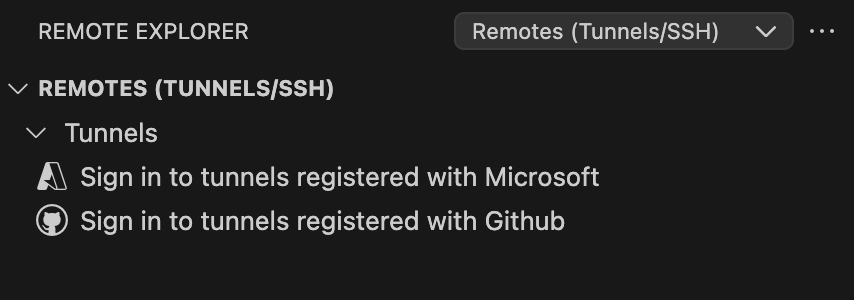
Remote Explorer
You can view and connect to tunnels with the Remote Explorer in VS Code.
-
Click the Remote Explorer icon on the VS Code Activity Bar.

-
When prompted, specify whether you used GitHub or Microsoft to authenticate.
-
After authenticating with the appropriate service, select the node you wish to connect to.
Command Palette
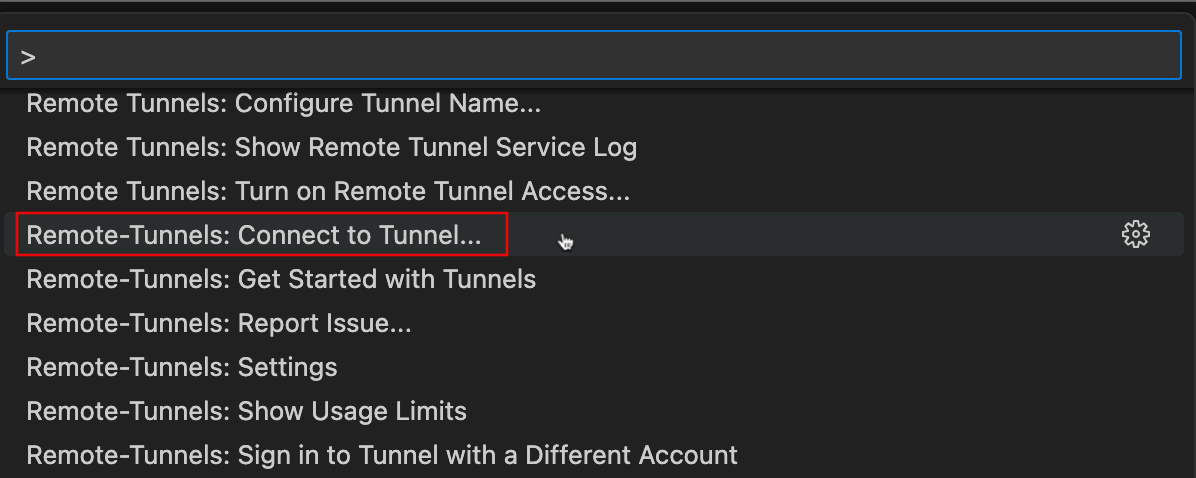
Access the Remote Tunnels functionality with VS Code's Command Palette.
-
Open the Command Palette with
Ctrl-Shift-Pfor Windows and Linux, orShift-Command-Pon Mac OS. -
Click Remote-Tunnels: Connect to Tunnel in the Command Palette.
-
When prompted, specify whether you used GitHub or Microsoft to authenticate.

-
After authenticating with the appropriate service, select the node you wish to connect to.