Deploy an open-source LLM on CKS
Learn how to deploy an open source LLM on CKS
This comprehensive guide explains how to deploy the Llama 3.1 8B Instruct open-source LLM from Meta on CKS, which covers the following steps:
- Create a cluster in CKS
- Create a Node pool
- Interact with clusters and Pods using
kubectl - Deploy and interact with an LLM using Open WebUI
Before you begin
Before completing the steps in this guide, confirm that you have the following:
kubectlis installed on your machine.kubectlis the command-line tool for interacting with Kubernetes clusters. If needed, see the kubectl installation instructions.- Access to the CoreWeave Cloud Console. For more information, see Activate and sign in to your CoreWeave Organization.
- A Hugging Face access token. See the Hugging Face instructions at User access tokens. Be sure to copy and store the token in a secure location. You will need it later in this guide.
- Access to the
Llama-3.1-8B-Instructmodel at Hugging Face. Go to meta-llama/Llama-3.1-8B-Instruct and request access. Note that approval for restricted models can take a few hours or longer.
-
Using resources, such as compute, incurs charges. Monitor your resource usage to avoid unexpected charges.
-
CoreWeave is not responsible for the security of the Llama model provided by Hugging Face or the Open Web UI container image.
Create a CKS cluster and Node Pool
CKS clusters and Node Pools are the core infrastructure for running and managing workloads. To create a cluster and Node Pool, complete the following steps:
-
Log in to the Cloud Console and navigate to the Clusters page.
-
Click the Create Cluster button.
-
In the Create a Cluster dialog, give the cluster a name, select the latest Kubernetes version, and verify the box is checked for "Enable access to the Kubernetes API via the Internet". Click Next.
-
Create the cluster where you have GPU quota available. Verify the box is checked for "Create a default VPC," and then click Next.
-
Leave the authentication boxes unchecked and click Next.
-
On the deploy page, click Submit.
-
On the Success! dialog box, click Create a Node Pool.
-
Verify the cluster you just created is selected, and do the following:
- Name the Node Pool
- Pick a GPU instance
- Set Target Nodes to
1 - Leave all other fields empty
- Click Submit
Note that creating Node Pools can be delayed while the cluster is being created. Then, Node Pool provisioning can take up to 30 minutes. Once the Node Pool status is Healthy, continue to the steps below.
Generate a CoreWeave access token
Access tokens let you authenticate to your Kubernetes resources through kubectl.
To create an access token, complete the following steps:
- In the Cloud Console, navigate to the Tokens page and click the Create Token button.
- Enter a name and expiration and then click Create.
- In the Create API Token dialog, select the cluster you just created from the "Select current-context" dropdown menu, and then click Download.
Use kubectl with your cluster
To communicate with your cluster using kubectl, complete the following steps:
-
Make a
KUBECONFIGenvironment variable that points to thekubeconfigfile you just downloaded, for example:$export KUBECONFIG=~/Downloads/<CWKubeconfig_file_name> -
Confirm you can connect to the cluster with the following command:
$kubectl cluster-infoYou should see cluster information like the following:
Kubernetes Control Plane is running at https://****.k8s.us-east-02a.coreweave.comCoreDNS is running at https://****.k8s.us-east-02a.coreweave.com/api/v1/namespaces/kube-system/services/coredns:dns/proxynode-local-dns is running at https://****.k8s.us-east-02a.coreweave.com/api/v1/namespaces/kube-system/services/node-local-dns:dns/proxy
Create a Hugging Face secret
For CKS to download the llama-3.1-8B-Instruct model from Hugging Face, you need to create a Kubernetes secret for authentication. Complete the following steps to create a Kubernetes secret for your Hugging Face access tokens:
-
Run the following command to create a Hugging Face secret:
$kubectl create secret generic hf-token-secret --from-literal=api_token=<Hugging Face token><Hugging Face token>: This is the token Hugging Face provides you. For more information about creating a Hugging Face token, see User access tokens.
Download and apply a YAML configuration file
Kubernetes uses YAML files to configure resources. To deploy the Llama-3.1-8B-Instruct model using our example YAML file, complete the following steps:
-
Use
kubectlto apply the file by running the following command:CautionBefore running the command, confirm you have been granted access to the
Llama-3.1-8Bmodel. Visit themeta-llama/Llama-3.1-8B-Instructpage to verify you have access.$kubectl apply -f https://docs.coreweave.com/examples/llm-on-cks-example.yaml -
Confirm Kubernetes deployed the resources by running the following commands:
$kubectl get podsVerify all Pods are ready and running. The output should look like the following:
NAME READY STATUS RESTARTS AGEllama-3-1-8b-deployment-77f4559f9f-wdvpj 1/1 Running 0 2m53sopen-webui-5b464664d8-942cg 1/1 Running 0 2m53s -
Verify the services are working by running the following commands:
$kubectl logs <llama-pod-name>-
<llama-pod-name>: The Pod name beginning withllama-*that was returned bykubectl get pods. -
In the logs, you should see the following line:
INFO: Application startup complete.
-
Get Open WebUI endpoint
To get the Open WebUI HTTP endpoint, complete the following steps:
-
Run the following command to get the external IP exposed by the service:
$kubectl get servicesYou should see the service name and an external IP address and port like the following:
NAME TYPE CLUSTER-IP EXTERNAL-IP PORT(S) AGEopen-webui-svc LoadBalancer 10.16.1.142 198.51.100.1 80:32141/TCP 6m21s -
Navigate to the Open WebUI endpoint using your external IP and port number found in the previous command. For example,
http://198.51.100.1:80.
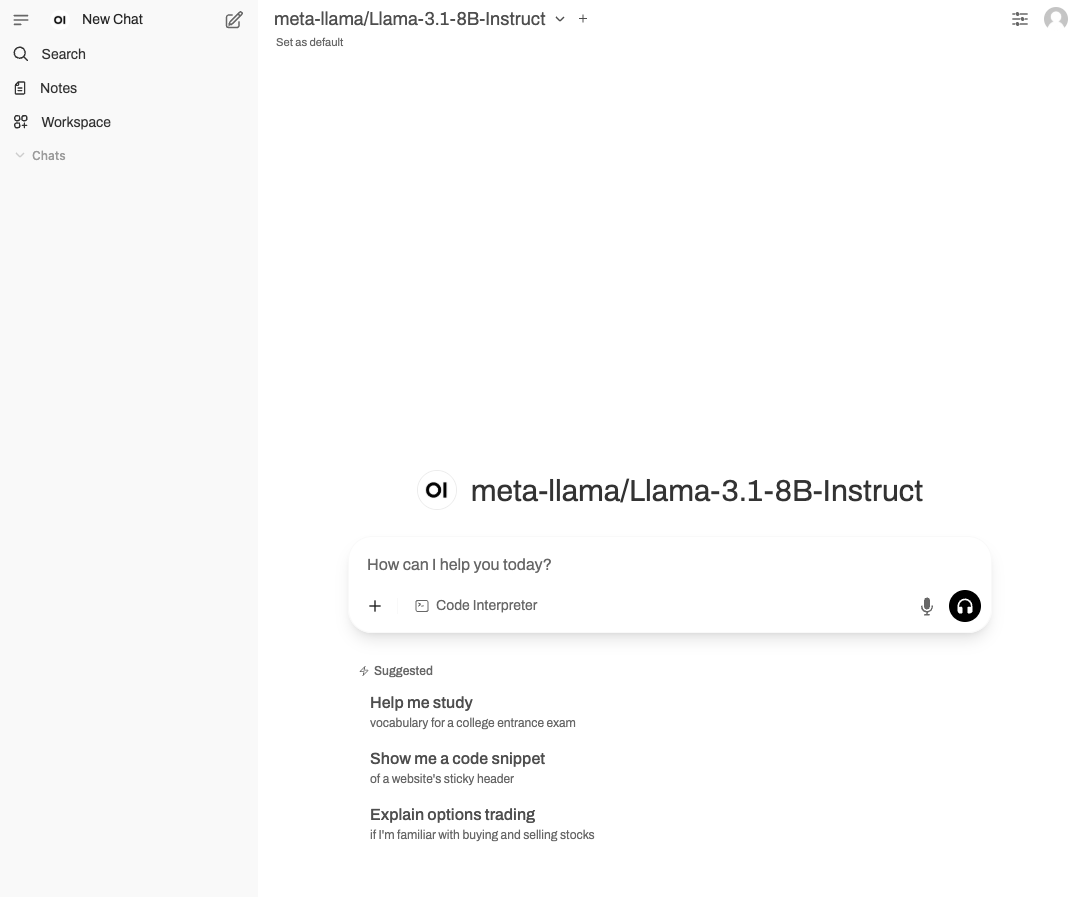
You should now see the see the Open WebUI site:

Next steps
Congratulations! You have just deployed an LLM on CKS.
- For more information about CKS clusters, see Introduction to clusters.
- For more information about Node Pools, see Introduction to Node Pools.