Install Determined AI
How to install via the Applications Catalog on CoreWeave Cloud
Determined AI is an open-source deep learning training platform that makes building models fast and easy. Determined AI can now be deployed directly onto CoreWeave Cloud by deploying the application from the application Catalog.
To install Determined AI onto CoreWeave Cloud, perform the following steps.
Prerequisites
It is recommended that prior to installation and setup of Determined AI itself, the following steps are completed.
- Configure your CoreWeave credentials
- Create a shared filesystem volume for weights and training data
- Install FileBrowser for filesystem navigation via a Web interface
- Create an Object Storage bucket for model checkpoint storage
Once the above have been completed, then the Determined AI application may be installed.
Configure your CoreWeave credentials
This guide presumes that you have an active CoreWeave Cloud account, and have obtained and locally configured your CoreWeave access credentials.
Create a shared filesystem volume
Create a shared filesystem volume by navigating to Storage Volumes in the Cloud UI. This model will be used to store weights and training data for fine-tuning.
CoreWeave's shared filesystem volumes can also be accessed by many Nodes simultaneously, allowing massive amounts of compute power to access the same dataset.
.d3ceca2.1200.png)
For this tutorial, the following values are used when creating the storage volume. If needed, it is easy to increase the size of a storage volume later.
| Field name | Demo value |
|---|---|
| Volume Name | finetune-gpt-neox |
| Region | LAS1 |
| Disk Class | HDD |
| Storage Type | Shared Filesystem |
| Size (Gi) | 1,000 |
| Labels | None |
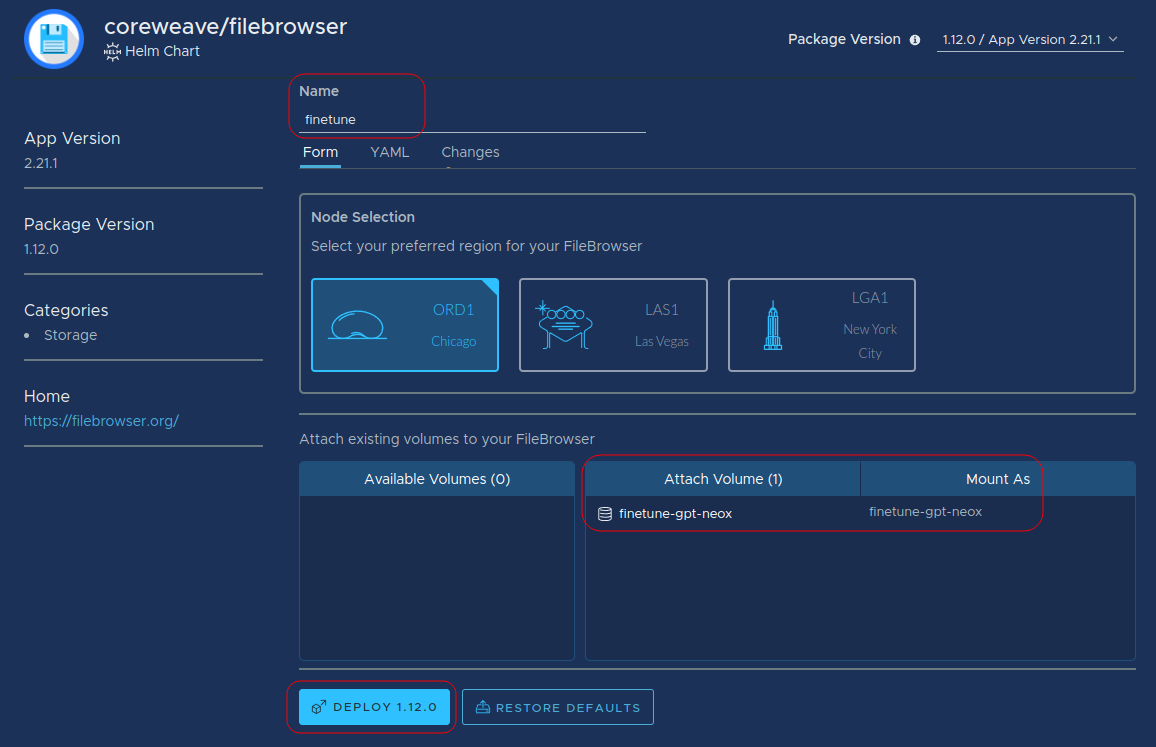
Install FileBrowser
The FileBrowser application allows files to be transferred to and from shared filesystem volumes through a Web interface. While installing FileBrowser is optional, it is recommended to make navigating the filesystem easier. It is alternatively possible to use a Virtual Server or Kubernetes Pod to interact with the shared filesystem volume through SSH or another mechanism. Such configuration is beyond the scope of this tutorial.
For complete instructions on installing and configuring FileBrowser, see the FileBrowser installation guide.
While configuring the FileBrowser application, ensure the new filesystem storage volume has been attached to the FileBrowser application as shown below, then click the Deploy button.
Create an Object Storage bucket
Most Determined AI applications require Object Storage buckets to store model checkpoints, while a few - such as Jupyter Notebooks - can run without a bucket.
Unless you are sure your application will not require one, it is recommended to create an Object Storage bucket. Make note of the Access Key and Secret Key values, provided in the generated configuration file.
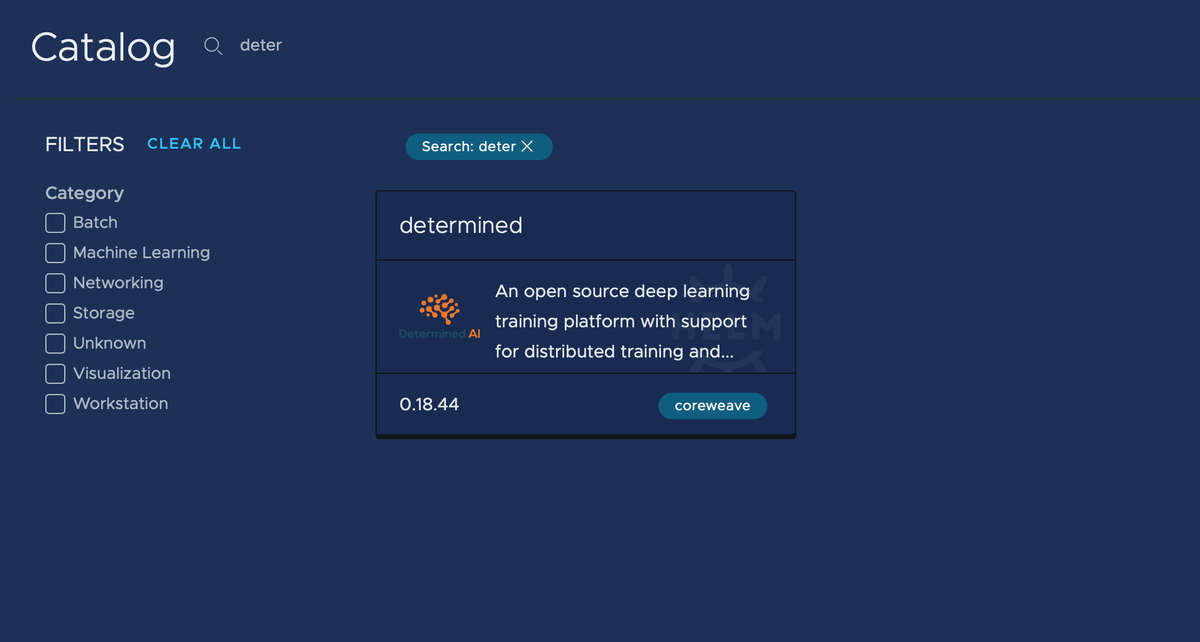
Install Determined AI
Once the previous steps have been completed, navigate to the Application Catalog, then search for determined to locate the Determined AI (determined) application. Click on its resulting card to configure its installation, then click Deploy.
The configuration screen will prompt for a name. Give the application a memorable name.
Resource Pools
On CoreWeave Cloud, Resource Pools are groups of hardware selections plus memory requests and limits that make it simple to select resource groups for Determined AI deployments.
The Resource Pool configuration field corresponds to the resource_pool field in the Determined AI Kubernetes Deployment.
This allows for users to avoid needing to patch each experiment with a spec or to request resources on CoreWeave infrastructure. This setting may be overridden within the Deployment if needed.
This requires explicitly setting the following fields in your experiment configuration:
resources:resource_pool: <GPU_RESOURCE_POOL>
Example:
name: fashion_mnist_tf_keras_constresources:resource_pool: A40hyperparameters:global_batch_size: 32dense1: 128records_per_epoch: 60000searcher:name: singlemetric: val_accuracysmaller_is_better: falsemax_length:epochs: 5entrypoint: model_def:FashionMNISTTrial
At this time, the following Resource Pools correspond to the GPU types and amounts each of which have 8 GPUS per node.
For more information on Node Types, see Node Types.
| Resource Pool name | Hardware type | CPU amount | Memory |
|---|---|---|---|
A40 | NVIDIA A40 | 64 | 512 Gi |
RTX_A5000 | RTX A5000 | 32 | 200 Gi |
RTX_A6000 | RTX A6000 | 32 | 200 Gi |
A100_NVLINK | A100 HGX | 96 | 768 GI |
A100_NVLINK_80GB | A100 HGX | 96 | 768 Gi |
H100_NVLINK_80GB | H100 HGX | 96 | 768 Gi |
This tutorial uses the Resource Pool A40.
.fdb6228.1200.png)
Configure Determined AI
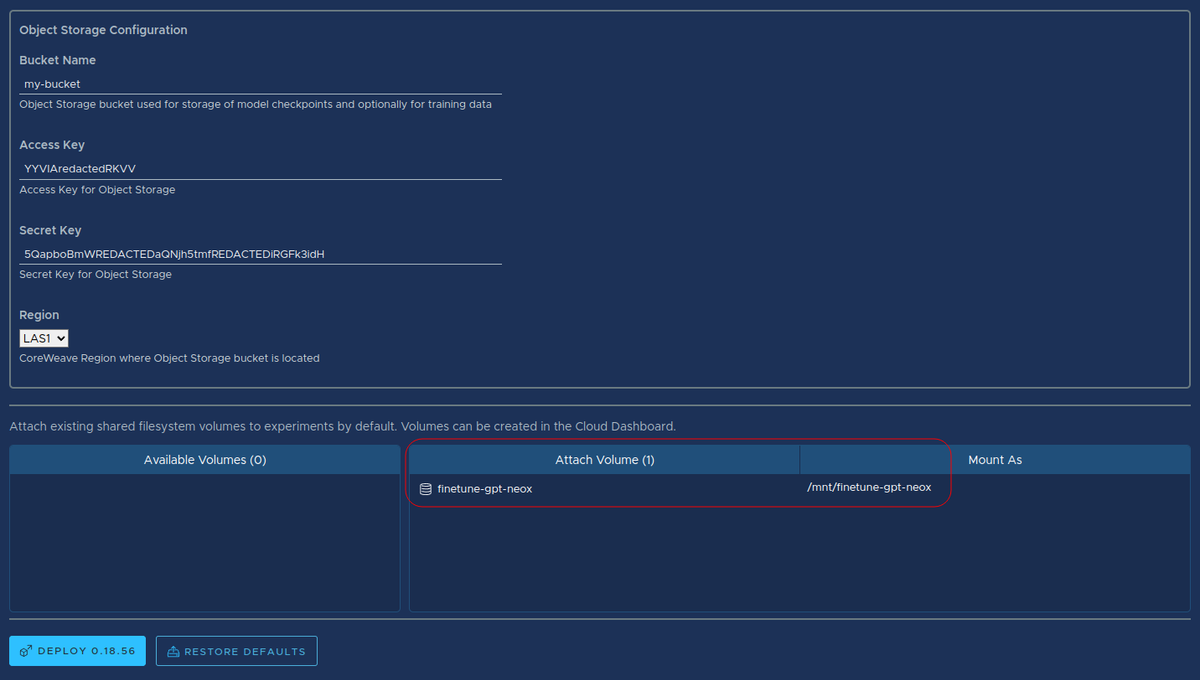
In the Object Storage Configuration section, set your Object Storage bucket values, including theACCESS_KEY and SECRET_KEY as obtained above. Object storage is required if your experiment will be storing model checkpoints.
Some values, such as a link to the cluster, may be important for certain applications. Those details can be found in the post-deployment notes after the application is running. If you need to access these notes again, navigate to the Applications tab, then click the Determined application tile.
At the bottom of the configuration screen, ensure that the newly-created filesystem volume is attached as shown below.
It is highly recommended to set the Data Center Region of the application to be the same as that in which the shared filesystem volume was deployed.
Finally, click Deploy to launch the application.
Access Determined AI
After the application is in a Ready state, navigate to the Ingress URL provided in the post-launch notes and use the login information provided.
The client is configured to communicate with the server via the environment variable $DET_MASTER.
 (6).cfb0a72.1200.png)
At the Determined AI home screen, you can launch a JupyterLab and subsequent Jupyter Notebooks, or perform model fine-tuning with GPT DeepSpeed, GPT-NeoX, or Hugging Face.
The default username for the Determined application is admin, and there is no default password set. Make sure to add a password after logging into the application for the first time.
 (1) (1).6b36503.1200.png)
Additional reading
For more information about Determined AI, see: