Fine-tune Stable Diffusion for Textual Inversion with Determined AI
This guide, based on Determined AI's article Personalizing Stable Diffusion with Determined, explains how fine-tune a Stable Diffusion model on CoreWeave Cloud to do Textual Inversion, generating personalized images.
Stable Diffusion is the latest deep learning model to generate brilliant, eye-catching art based on simple input text. Built upon the ideas behind models such as DALL·E 2, Imagen, and LDM, Stable Diffusion is the first architecture in this class which is small enough to run on typical consumer-grade GPUs.
Prerequisites
This guide assumes that the following are completed in advance.
- You have set up your CoreWeave Kubernetes environment locally
gitis locally installed- Determined AI is installed in your namespace
Configure the experiment
In a text editor, open the files in /examples/diffusion/textual_inversion_stable_diffusion/. Change the values in finetune_const.yaml config file, as needed.
environment:environment_variables:- HF_AUTH_TOKEN=YOUR_HF_AUTH_TOKEN_HEREhyperparameters:concepts:learnable_properties:- objectconcept_strs:- det-logoinitializer_strs:- brain logo, sharp lines, connected circles, concept artimg_dirs:- det_logos
These values may be broken down as follows:
| Value name | Description |
|---|---|
YOUR_HF_AUTH_TOKEN_HERE | Your Hugging Face User Access Token |
learnable_properties | Either object or style, depending on whether you want to capture the object itself, or only its style |
More than one concept at a time may be fine-tuned by appending relevant information to the lists:
concept_strs- the string used to refer to new concept in promptsinitializer_strs- a short phrase which roughly describes the concept of interest and provides a warm-start for fine-tuning
Clone the repository
To fine-tune images, first clone the Determined repository.
Acquire a Hugging Face User Access Token
Create a Hugging Face account if necessary, then generate a User Access Token. Accept the Stable Diffusion license at CompVis/stable-diffusion-v1-4 by clicking "Access repository".
Place images
In a new directory at the root of the repository, place the training images.
Submit the experiment
Submit the fine-tuning experiment by navigating to the root of the repository, then create the experiment by running det e create:
$det e create finetune_const.yaml
To quickly test your configuration, add the HF_AUTH_TOKEN value. Leave all other values at their defaults, then submit the experiment without any further changes. A fine-tuning experiment using the Determined AI logo is set up in the repository by default.
After launching the experiment, navigate to the Web UI. Click the Logs tab to view training progress.
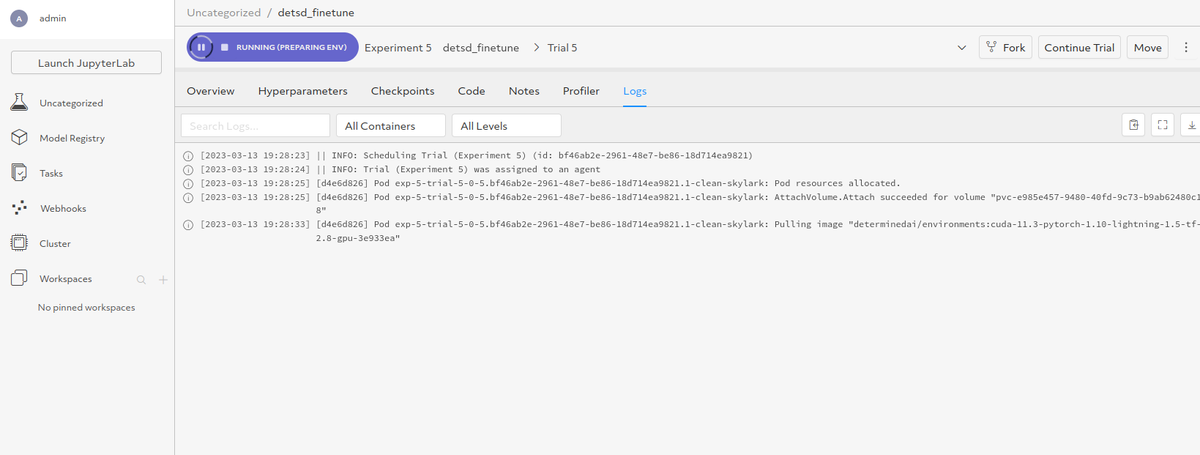
When the experiment completes, the checkpoints are exported to Object Storage (shown as s3).
.a0b9da5.1200.png)
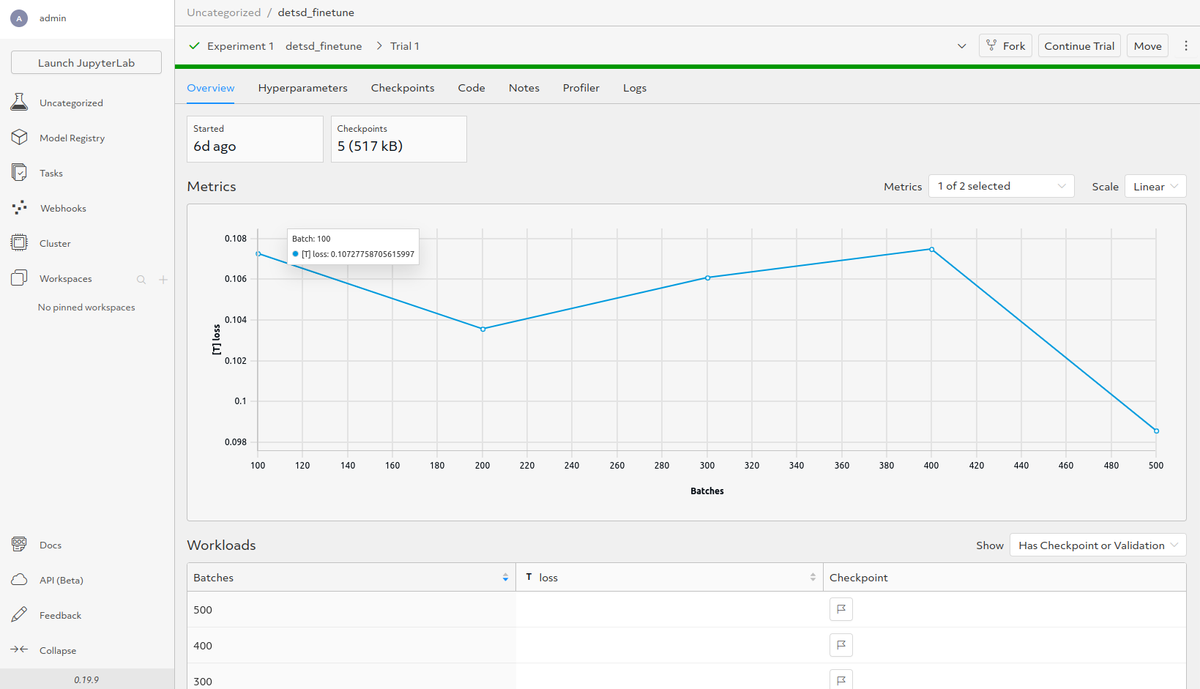
You can view Loss on the Overview tab. Here, you can choose Fork or Continue Trial if required to get better results.
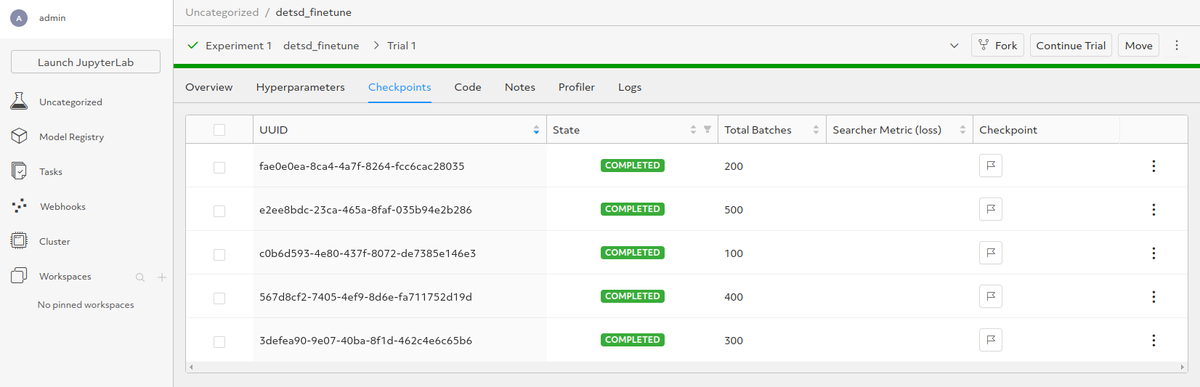
Use the Checkpoints tab to view them.
Use the Hyperparameters tab to see the values passed to the experiment.
.ee0da3e.1200.png)
You can visualize the results via TensorBoard.
.3c184f9.1200.png)
Generate Images
After the fine-tuning experiment is complete, you can generate art with the newly-trained concept using Jupyter notebook or with large-scale generation through a Determined experiment. The former is useful for quick interactive experimentation, while the latter is useful for pure performance.
The Jupyter notebook workflow only requires three steps:
- Copy the User Access Token into the
detsd-notebook.yamlconfig file, similar to the step in the previous section. - Get the
uuidof the desired Checkpoint by navigating to the Experiment page in the Web UI and either clicking on the Checkpoint's flag icon or inspecting the Checkpoints tab. - Launch the
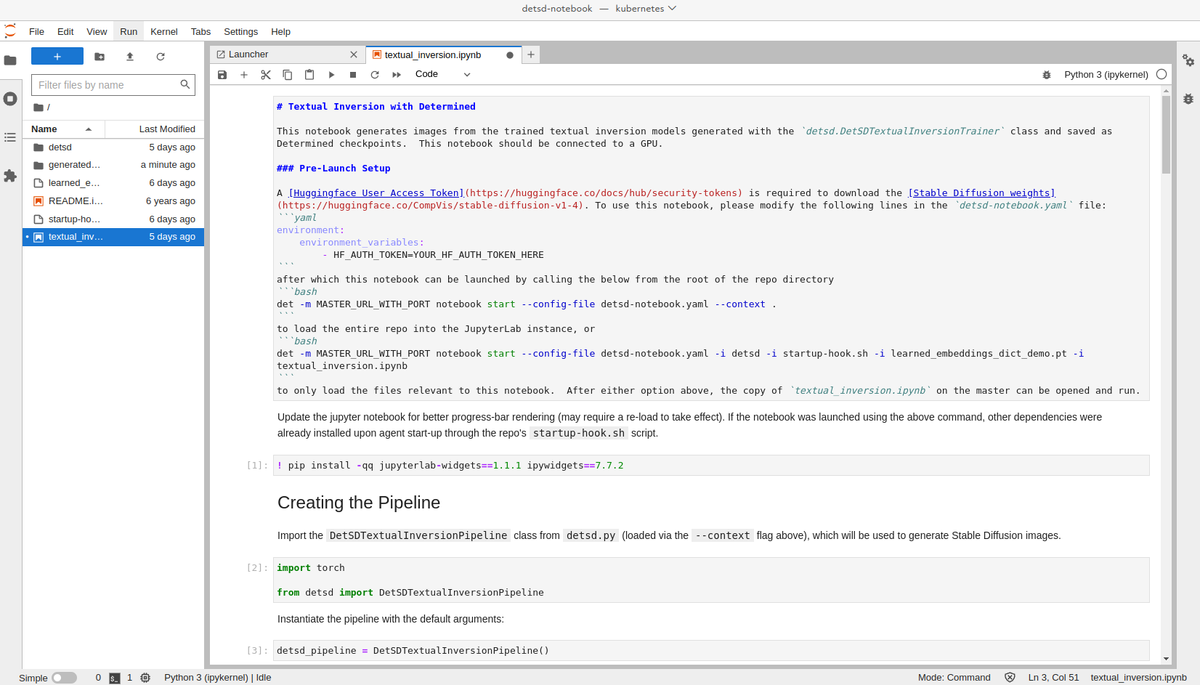
textual_inversion.ipynbnotebook and copy the Checkpointuuidinto theuuidslist in the appropriate cell. You can also do this by executing the following command in the root of the repository:
$det notebook start --config-file detsd-notebook.yaml --context .
The --context . argument loads the full contents of the repository into the JupyterLab instance, including the textual_inversion.ipynb repo itself and various supporting files.
In particular, these include a demonstration concept stored in learned_embeddings_dict_demo.pt which was extensively trained on Determined AI logos, which you can use instead of, or in addition to, one specified by uuid.
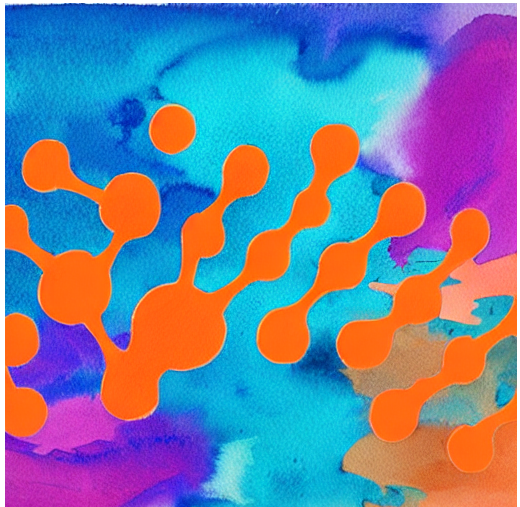
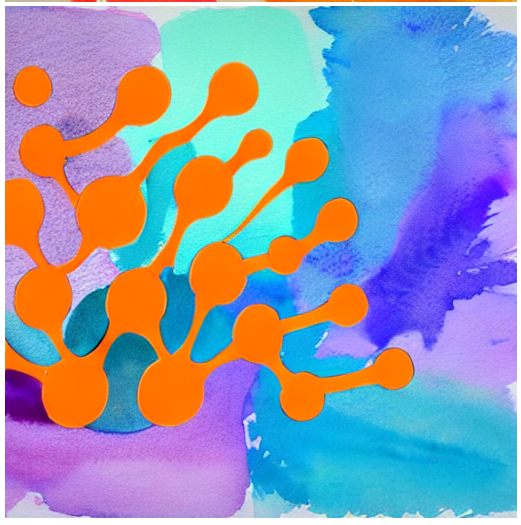
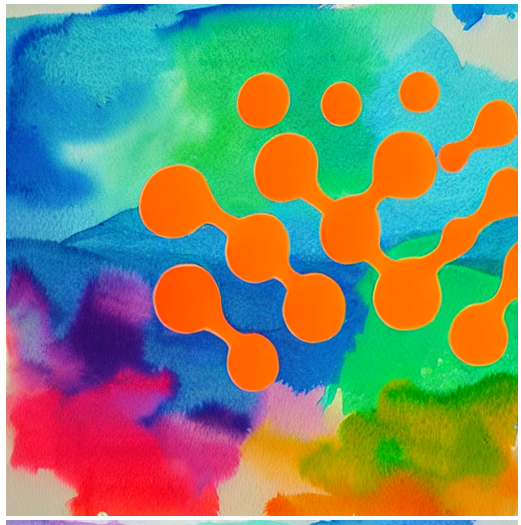
After you've prepared the textual_inversion.ipynb notebook, it can be run from top to bottom and the generated images will appear at the end.

Here are some example images generated from the fine-tuning experiment:
After you've found promising prompts and parameter settings with Jupyter notebook, images can be generated at scale by submitting a full-fledged experiment.
The generate_grid.yaml file loads pretrained concepts by uuid or local path and controls the generation process by specifying the prompts and parameter settings to scan over. All generated images are logged to Tensorboard for easy access, as shown previously.
By default, you can submit a two-GPU experiment that creates nearly 500 total images with the pre-trained demonstration in learned_embeddings_dict_demo.pt by inserting your authorization token, without other changes, then executing:
$det e create generate_grid.yaml .
References
To learn more, see these resources: