Custom Containers
Deploy containerized applications onto CoreWeave Cloud
This guide walks through the steps necessary to deploy a basic containerized application onto CoreWeave Cloud. The configurations used in the following example are intentionally kept simple, although many additional configuration options are available.
Prerequisites
This guide presumes that the user has:
- An active CoreWeave Cloud Account
- Configured and installed a kubeconfig file for use with CoreWeave Kubernetes
- An application that has already successfully been containerized using Docker or a similar container runtime
If you have not already completed these steps, first visit Cloud Account and Access.
For an even more pared down example of Deployments, refer to Kubernetes' official example, Run a Stateless Application Using a Deployment.
Overview
The basic steps to deploying your own custom containerized application onto CoreWeave Cloud are as follows:
- Prepare the container registry
- Create a storage volume for the application (optional)
- Build the application's Deployment manifest
- Apply the Deployment
Prepare the container registry
To deploy a locally built, containerized application, the container image must first be pushed to a container image repository.
CoreWeave provides an easy way to deploy a Docker Registry instance into your namespace for this purpose. Simply install the Docker Registry application from the applications Catalog on the Cloud UI. Once deployed, the Docker Registry instance may be configured for access both within and outside of the CoreWeave environment.
All requests to the Docker Registry instance are authenticated. Credentials are automatically provisioned in an imagePullSecret in the namespace, which contains the credentials that are either manually configured during setup or automatically generated for you.
Public repositories are not currently supported by Docker Registry on CoreWeave Cloud.
The Service Account used by default may optionally be patched to use this pull secret, so that Pods deployed in the namespace will always have access to the registry. Alternatively, you may opt to create a separate Service Account during the application deployment process, which can then be used on a specific Pod in order to allow pulling from the container registry without specifying an imagePullSecret.
For more information on Docker Registry, see the official Docker documentation.
Storage backends
The Docker Registry instance requires a storage backend. CoreWeave's S3-compatible Object Storage or a persistent volume may be used as backends.
Install Docker Registry into your CoreWeave namespace
To install the Docker Registry application, first log in to your CoreWeave Cloud account, then navigate to the Applications Catalog.
From the Catalog homepage, search for docker. Then, select the version of the Docker Registry application that you'd like to deploy.
 (4).d48994c.1200.png)
Clicking on the application's card will open its deployment page, which contains further information about the application itself. Click the Deploy button to navigate to the application's configuration screen, which is used to configure the instance.
Finally, click the Deploy button in the bottom right-hand corner of the screen to launch the instance. Once the application is deployed to the set specifications, you will be redirected to the application's status page.
From this page, the Application Secrets can be accessed from the section at the top right-hand section of the screen. Clicking the eye icon beside each field will reveal the field's contents in plain text. This Secrets area also contains the registry password. This is either the value of the password set explicitly in the configuration screen, or it is a newly created, randomly-generated password.
 (2).f279bbd.1200.png)
Alternatively, use kubectl to retrieve the registry credentials via the command line:
$kubectl get --namespace <NAMESPACE> secret test-docker-registry-secret -o=go-template='{{ printf "username: %s\npassword: %s" (.data.username | base64decode) (.data.password | base64decode) }}'
The installation notes on the application's deployment screen provides all of the following commands, with your namespace and URL set in place.
Next, log in to your Docker Registry instance. First export REGISTRY_USERNAME to the username acquired using kubectl get secret:
$export REGISTRY_USERNAME=$(kubectl get secret test-docker-registry-secret -o=go-template='{{ .data.username | base64decode }}')
Then, use docker login while sourcing your credentials with kubectl:
$kubectl get --namespace <NAMESPACE> secret test-docker-registry-secret \-o=go-template='{{ .data.password | base64decode }}' \| docker login <PROVIDED URL> -u $REGISTRY_USERNAME --password-stdin
If you are not using Kubectl, you may use docker login normally by using docker login, then entering the registry password when prompted:
$docker login <REGISTRY NAME>.<COREWEAVE URL> -u docker
🎉 Congratulations! You can now build and push images to your Docker Registry instance hosted on CoreWeave Cloud!
Build the container
The next step is to build and push the new container. In this example, we'll assume that the Dockerfile is located in the current working directory.
Build and tag the image using docker build:
$docker build -t <URL>/<APP NAME>:<TAG VERSION> .
Then, push the newly built image to the newly created container image registry using docker push, passing in the given URL of the new registry and the application's name and tag:
$docker push <URL>/<APP NAME>:<TAG VERSION>
Never use latest as a tag; always push images to a new tag. Due to aggressive caching for faster repeat spin-up times, re-using the same tag can lead to some of your Pods running an out-of-date version of your code.
Create a storage volume (optional)
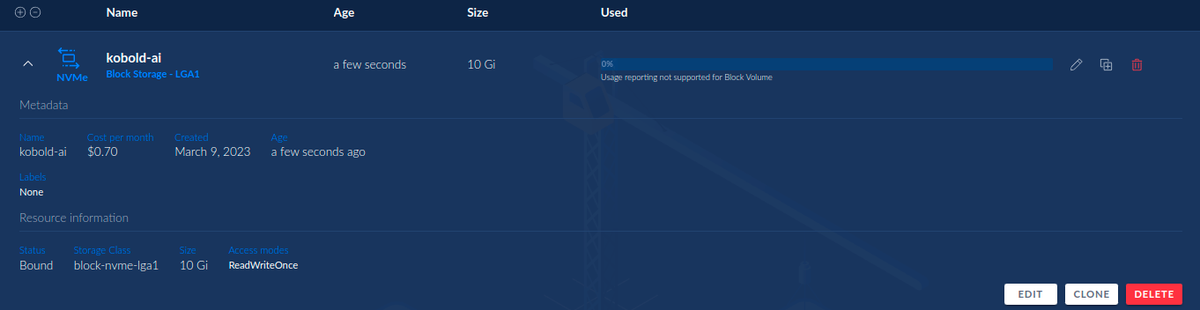
For the purposes of this example walkthrough, the application requires backend storage. Create a storage volume from the Cloud UI, and give it a name that will be easy to associate with the application later.
Workloads must run in the same data center region as the storage block they are accessing. The topology.kubernetes.io/region affinity can be used to explicitly set workloads to schedule to a selected region.
If your application requires a lot of storage, it is recommended to configure a PVC with at least 1TB of space.
In this example, the application will benefit from having a file browser, so we'll install the FileBrowser application from the Applications Catalog, and configure it with an equally recognizable name:
 (4).c6d3281.1200.png)
Build the Deployment manifest
Containerized applications are deployed onto CoreWeave Cloud using Kubernetes Deployment manifests. Every detail of how the application's container will be deployed into Kubernetes - including which storage volumes to attach, and what resources are to be allocated for the application's use - is declared in the application's manifest.
Each Deployment consists of an .apiVersion section, a .kind section, a .metadata section, and a .spec section. Actual container specifications are defined in the .spec section.
The example manifest below demonstrates how our example Kobold AI application will be deployed into CoreWeave Kubernetes:
Deployment manifests are a fundamental component of Kubernetes. Refer to the official documentation on Deployments for more information on how to compose Deployments.
Example manifest
The following is a complete example manifest deploying an instance of Kobold AI. The construction of this manifest is broken down below.
Click to expand - kobold-ai.yaml
apiVersion: apps/v1kind: Deploymentmetadata:name: koboldai-testspec:strategy:type: Recreatereplicas: 1selector:matchLabels:app.kubernetes.io/name: koboldai-testtemplate:metadata:labels:app.kubernetes.io/name: koboldai-testspec:containers:- name: koboldaiimage: <MY URL>:koboldai/koboldai:3resources:limits:cpu: 8memory: 64Ginvidia.com/gpu: 1volumeMounts:- name: kobold-ai-datamountPath: /kobold-ai-datavolumes:- name: kobold-ai-datapersistentVolumeClaim:claimName: "kobold-ai-data"affinity:nodeAffinity:requiredDuringSchedulingIgnoredDuringExecution:nodeSelectorTerms:- matchExpressions:- key: gpu.nvidia.com/classoperator: Invalues:- A40affinity:nodeAffinity:requiredDuringSchedulingIgnoredDuringExecution:nodeSelectorTerms:- matchExpressions:- key: topology.kubernetes.io/regionoperator: Invalues:- LGA1
Define the application's resources
.spec.containers.resources
The resources required for the application are specified in the Deployment manifest within the spec block.
spec:containers:- name: <container-name>image: koboldai/koboldai:<version>resources:limits:cpu: 8memory: 64Ginvidia.com/gpu: 1
Here, the container is defined by the YAML list within this block. First, the container name is specified (spec.containers.name). Then, the image that is to be used to create the container is given (spec.containers.name.image).
Kubernetes uses the Docker Hub public registry as its default container image registry. This means that unless the full URL of an alternative repository is explicitly set in the image field, Kubernetes will automatically search for the given name and tag pairing (in this example, that is koboldai/koboldai:3) in the public Docker Hub registry.
Because the image in this example is being sourced from Docker Hub, the given URL is not more specific in this example.
Learn more about how Kubernetes handles images in the official documentation.
Finally, the CoreWeave Cloud resources to be allocated to the container are defined in the resources block. In the given example, the resources defined for the Kobold AI container are given solely in terms of limits. This means that the container's maximum resource consumption limit is restricted to only those resources that are explicitly set by the manifest.
Learn more about limits and requests in the Kubernetes official documentation.
In this case, that means that the container may have up to 8 CPUs, up to 64Gi of memory, and up to one NVIDIA GPU. The specific type of NVIDIA GPU to use is set using affinities.
Associate the storage volume (if applicable)
.spec.volumes
The persistent storage volume created earlier is associated with the application in the Deployment manifest in the spec.volumes stanza, within the spec.volumes.persistentVolumeClaim.claimName field specifically.
The value of this field will need to exactly match the name of the storage volume created for the application, as demonstrated in this excerpted stanza from the example manifest above:
volumes:- name: kobold-ai-datapersistentVolumeClaim:claimName: "kobold-ai-data"
Additionally, as shown in the same example manifest, the volumeMounts block immediately preceding the volumes block defines where on the container the storage volume will be mounted:
volumeMounts:- name: kobold-ai-datamountPath: /kobold-ai-data
This dictates that the storage volume defined in .spec.volumes will be mounted to the mountPath of /kobold-ai-data on the Pods.
Define Kubernetes affinities
.spec.affinity
Kubernetes affinities are used to assign specific workloads to specific node types. On CoreWeave, they are used to determine on which node types workloads should run, as well in which data center region workloads should run.
Define the node types
On CoreWeave Cloud, affinities are used to select the CoreWeave node types where workloads will run.
In the example manifest given above, the spec.affinity stanza declares that workloads should run on an NVIDIA A40 GPU node. First, the matchExpressions list in this stanza contains the key-value set:
- key: gpu.nvidia.com/class
This specifies that an NVIDIA GPU will be used for these workloads.
Then, below this, values list includes one item: A40. This declares that the specific GPU node type to use will be an A40.
affinity:nodeAffinity:requiredDuringSchedulingIgnoredDuringExecution:nodeSelectorTerms:- matchExpressions:- key: gpu.nvidia.com/classoperator: Invalues:- A40
For more information on node types and their affinities for use with Deployment manifests, see Node Types.
Node type fallback options
Fallback options may be included by adding other node type values to the spec.affinity.nodeSelectorTerms.matchExpressions.values list. Node types will then be selected in order of this. For example, in this .values list, both A40 and A6000 are provided:
affinity:nodeAffinity:requiredDuringSchedulingIgnoredDuringExecution:nodeSelectorTerms:- matchExpressions:- key: gpu.nvidia.com/classoperator: Invalues:- A40- A6000
In this case, an A6000 will be selected as a fallback option should the A40 node type not be usable for some reason.
The resource section and the affinity section is unique to CoreWeave servers - other examples of affinities found outside of CoreWeave's documentation are likely differ.
Define the region
It is particularly important that if your application is using a storage volume, as has been true for our example, it is important to assign the workload's data center region to the same one to which the associated storage volume was deployed.
For this example, our storage volume was deployed to LGA1, so the application's manifest is given the affinity to only schedule workloads on nodes in the same region:
affinity:nodeAffinity:requiredDuringSchedulingIgnoredDuringExecution:nodeSelectorTerms:- matchExpressions:- key: topology.kubernetes.io/regionoperator: Invalues:- LGA1
Apply the Deployment
Once the Deployment is complete, deploy the manifest using kubectl:
$kubectl apply -f <filename>.yaml
For example, if we were to launch this application, the command would be...
$kubectl apply -f kobald-ai.yaml
...with the expected output:
deployment.apps/koboldai-test created
After deploying the manifest, view the running Pods that the Deployment has just created using kubectl get pods:
NAME READY STATUS RESTARTS AGEkoboldai-test-844567464d-6r6cb 1/1 Running 0 119s
🎉 Congratulations, your application is now deployed onto CoreWeave Cloud!
For additional and more advanced examples of containerized application Deployments, see the Examples section.