Organizations
Manage organization admins and members in the Cloud UI
Managing your CoreWeave organization is done from the organization management dashboard in the Cloud UI. To open the dashboard, click on the profile icon in the upper right-hand corner of the Cloud UI, then navigate to Organization.
About organizations
On CoreWeave Cloud, an organization is a group of associated users who share one or more namespaces.
Organization administrators
Within an organization, organization administrators are users who hold read and write access to manage the organization's users, including granting and retracting the access levels for other users.
Unless a CoreWeave administrator makes changes to your organization, only the first user (that is, the user who created the organization) is granted this level of access control by default. However, users may be granted the admin permission, thereby giving them the organization admin role and all of its permissions.
Users with the organization administrator role (admin) may:
- List, create, or remove API access tokens,
- create and manage namespaces within the organization,
- invite new users to join the organization,
- set user access levels,
- activate and deactivate users across namespaces.
Administrators are the only users who have these abilities, each discussed in more detail below.
To change the default organization admin user (the organization's first user), please contact support.
Administrator capabilities
Create API access tokens
Organization admins may generate new API access tokens by navigating to the API Access page on the Cloud UI. From this page, click the API & Kubeconfig tab at top right, then click the Create a New Token button to the right to open the token generation modal.
The Kubeconfig and Access Token are shown only once!
Be sure to save this file and the token in a secure location. If you lose your Access Token, it can be found inside your Kubeconfig file.
Token names are optional, but recommended. If the Automatically download Kubeconfig checkbox is checked, a Kubeconfig file with the new token embedded within it, named cw-kubeconfig, will download automatically upon token creation. To prevent this, uncheck this box.
.18f0326.1200.png)
Below the name input is the option to select the namespaces to which this token grants access. Select a namespace by clicking it, then click the right-pointing arrow to move it to the box on the right. Namespaces listed in the box on the right will be granted to the new token upon creation. To select multiple namespaces, check the boxes beside each desired namespace, then click the right-facing arrow to add them. Clicking the left-pointing arrow will remove namespaces to be added.
Once namespace selection is complete, click Create token.
.53dda6b.1200.png)
Edit access tokens
After an access token has been created, it may be edited from the API Access & Kubeconfig page. The following aspects of an API token may be changed after its initial creation:
- The name of the token, and
- the namespaces to which the token grants access.
To edit a token, locate it in the token menu, then click the pencil icon to the right of it to open the editing modal.
 (2).27ecfe9.1200.png)
Once the desired changes have been made in the modal, click Save to apply them.
 (2).9310646.1200.png)
Custom RBAC for tokens
For more fine-grained access control, organization admins may create a token with no namespaces selected. This creates a "blank" token, whose permissions are managed solely by custom Kubernetes RBAC policies bound to the token as the RBAC subject.
For more information, see Custom RBAC Access Tokens.
See Get Started with Kubernetes for more information on generating and using Kubeconfig.
Create a new namespace
From the left-hand navigation on the CoreWeave Cloud UI, select "Namespaces."
.d75f378.1200.png)
From this page, admins may create a new namespace by clicking the Create New Namespace button at top right. This will open the Create new namespace modal. Configure the name of the namespace and the users who will have access to it, then click Create namespace.
.4fcab64.1200.png)
Invite new users
Only organization administrators may invite new users. For security purposes, administrators may not edit their own privileges - any changes to an administrator's account privileges must be applied by another administrator user.
To invite a new user, navigate to the organization management page, then click Invite a User in the upper right-hand corner.
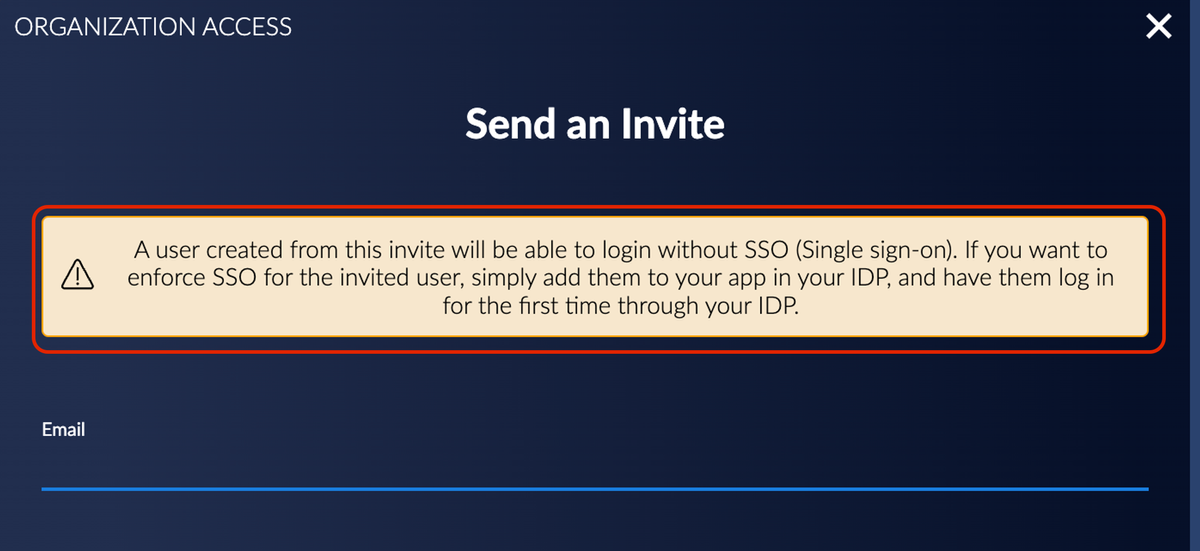
This will open a window prompting the administrator to create a new user invitation. A warning message will appear underneath the title, reminding them that users invited this way are able to login without SSO. If enforcing SSO is preferable, new users can be sent invites through the admin's Cloud app IDP.
Important: New users using SSO or social logins cannot obtain a usable password by resetting it conventionally.
Complete the subsequent form, providing the email of the person to invite, the namespaces to assign permissions for the user, and additional permissions for user management and billing access privileges. The namespaces to which the new user will have access is also selected here, by moving namespaces from the Available Namespaces to the Selected Namespaces column.
These permissions remain in place until the invited user accepts the invitation and creates their account. Then, once their account exists, their permissions may be adjusted by organization administrators from the main organization management page under the Users section.
Finally, click Send Invite.
 (1).558d98a.1200.png)
The organization management page also allows admins to perform the following actions on invited users, prior to the completion of account creation:
- copy the invite link that was emailed to the invited user,
- resend the invitation email to the invited user, or
- revoke the invitation from the invited user
.e4a6342.1200.png)
Set user access levels
Once an invitation is accepted and a new user has completed registration, their account may be managed from the Organization Management page.
The following access levels may be granted to and revoked from each user:
admin
When inviting a new user, checking the Admin checkbox on the invite form grants the invited user the admin role, thereby granting that user all of the privileges of an organization administrator.
.ed79e17.1200.png)
Once the user's account is created, access levels may be changed, revoked, or added to a user account by navigating to the Organization Management page, then checking the admin checkbox under the user's name.
Click the Save Changes button to save adjustments to access configuration.
.727a615.1200.png)
billing
Checking the View Billing checkbox on the user invitation form will grant the invited user billing permissions, which allows that user to view billing details on the organization's Billing Portal. Users with this access level may not make changes to billing details, but they may view the organization's billing information.
.caeed6a.1200.png)
Billing permissions may be revoked or added to the user account by checking or unchecking the billing checkbox under the user's name on the Organization Management page.
Click the Save Changes button to save adjustments to access configuration.
.b6b8895.1200.png)
Clicking the Add All button will grant the given user all available permissions, including access to all listed namespaces. Clicking the Remove All button removes all listed permissions from the selected user.
Namespace access levels
On CoreWeave, Kubernetes RBAC policies are used to map user access controls to namespaces, which allows organization admins the ability to specify which users do or do not have control access within a given namespace. Following the principle of least privilege, new users are not given privileges within any namespaces, other than those to which they have been explicitly granted access.
When creating an invitation to a new user, the namespaces to which they may have access can be selected by checking the box beside the desired namespace, and then clicking the > button on the right-hand side of it to move it to the Selected Namespaces box. At least one namespace must already exist in order to provision user access.
User-specific namespace permissions for already existing accounts are adjusted by navigating to the Users section of the Organization Management page, expanding a given user's details, then checking or unchecking the boxes beside the corresponding namespaces.
.5f232e2.1200.png)
Click the Save Changes button to save adjustments to access configuration.
At this time, organization admins can grant users all permissions in a given namespace with the exception of w:pods (write to Pods) and w:full (full write access).
Should users other than the organization admins require those permissions, please contact support.
Deactivate a user account
Under the Actions column, users may be deactivated and re-activated. Deactivating users will prevent them from accessing their account, but user accounts may be reactivated at any time. To manage the activation status of a user's account, click the button located on the left side of the user row.
.401b407.1200.png)
Changes to per-user-namespace access do not apply to access tokens. API Access Tokens are owned by organizations, and are controlled by a different set of access control policies. Only organization admins have access to add, list, and remove Access Tokens.
When removing a user, API Tokens must be removed manually from the API Access page by an organization admin.
To remove a user from your organization completely, immediately deactivate the user's account and any Access Tokens associated to that user, then contact CoreWeave support.